AWS S3
Overview
This source supports ingestion of multiple log sources through AWS S3.
Supported Sources:
- Cisco Umbrella
- AWS GuardDuty
- DNS Filter
- AWS CloudTrail
Setup Instructions
Configuring a cloud source in Scope is a two-step process.
-
Generating AWS S3 credentials and gathering the required information in the AWS Management Console. Please refer to Section 1 – AWS S3 Setup
-
Setting up the AWS S3 cloud source in the Scope application. Please refer to Section 2 - Scope Setup
AWS S3 Setup
To get started, you’ll need to generate and gather the following information from the AWS Management Console –
- Access Key
- Secret Access Key
- Regions
- Bucket Name
- Prefix (for individual data provider)
Step 1: Create a Custom IAM Policy
-
Sign in to the AWS Management Console.
-
Navigate to Identity and Access Management (type
IAMin the search bar and select IAM from the dropdown).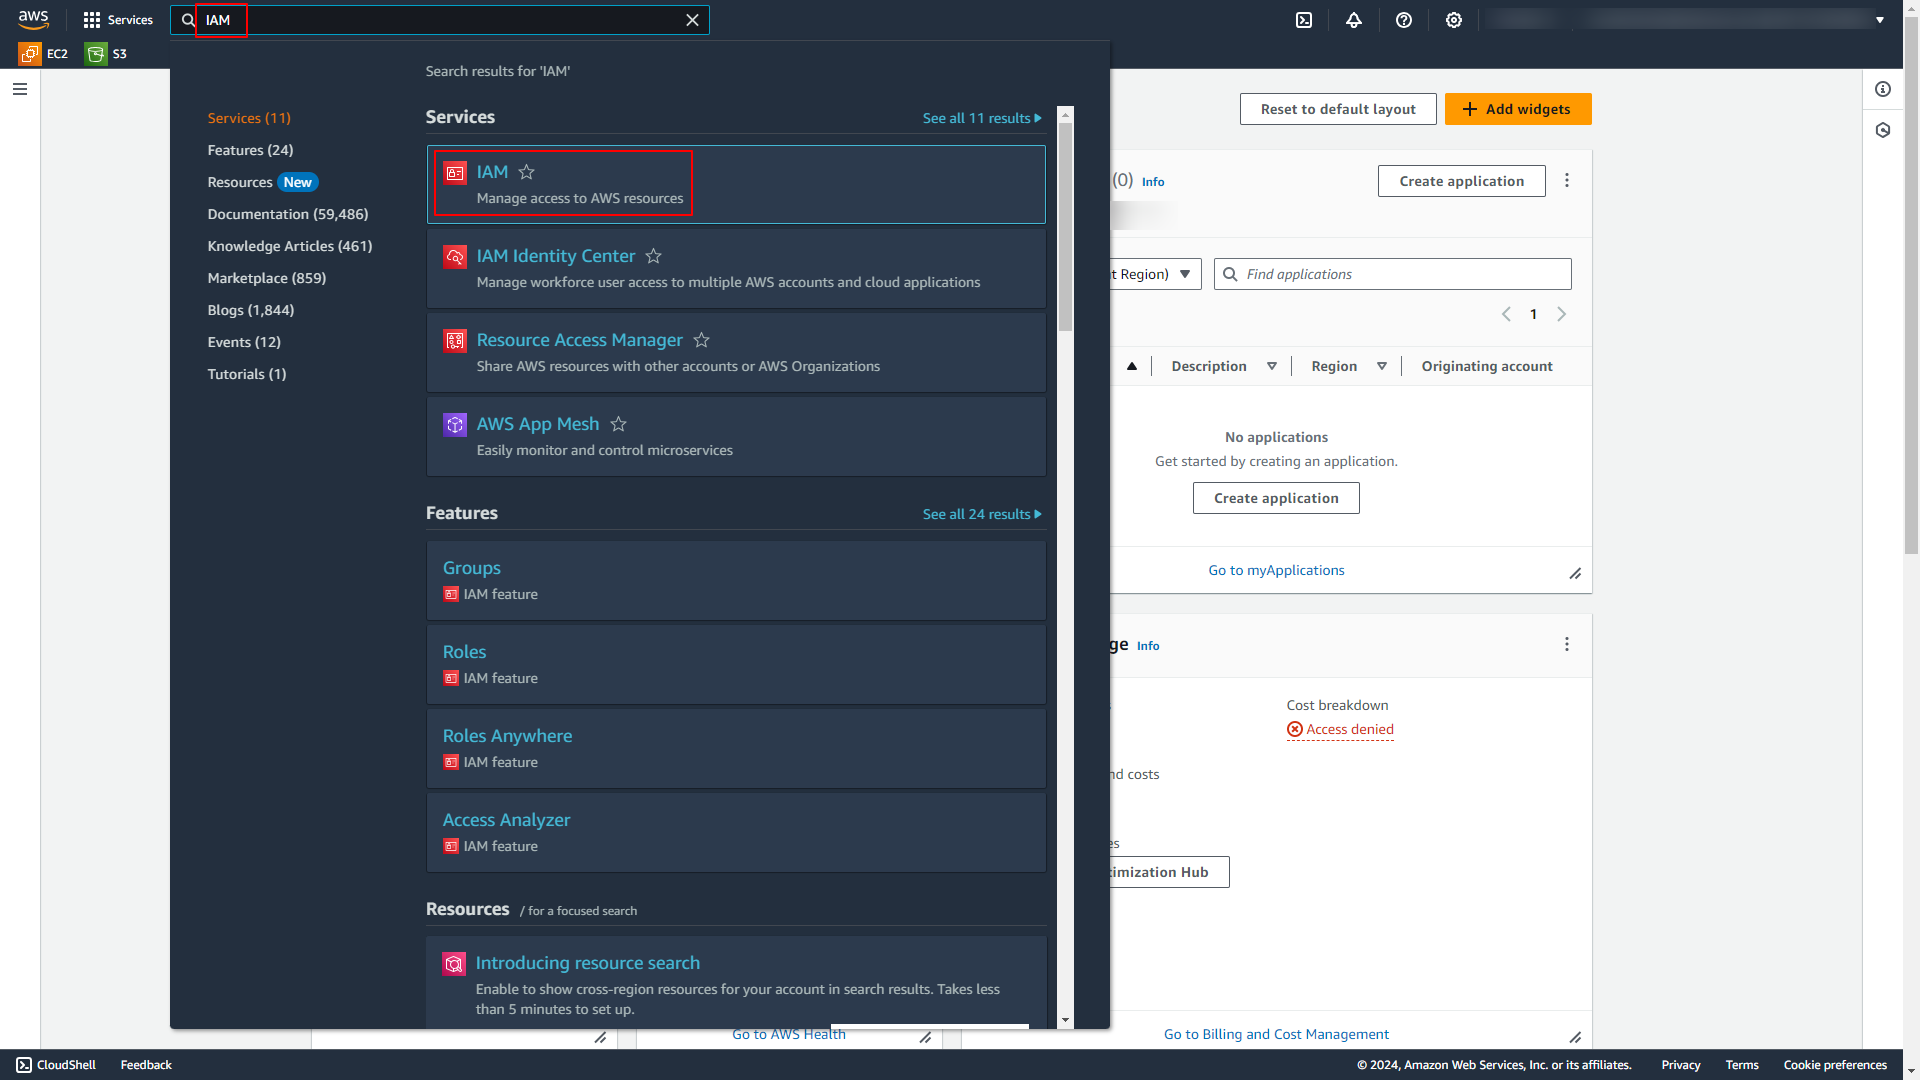
-
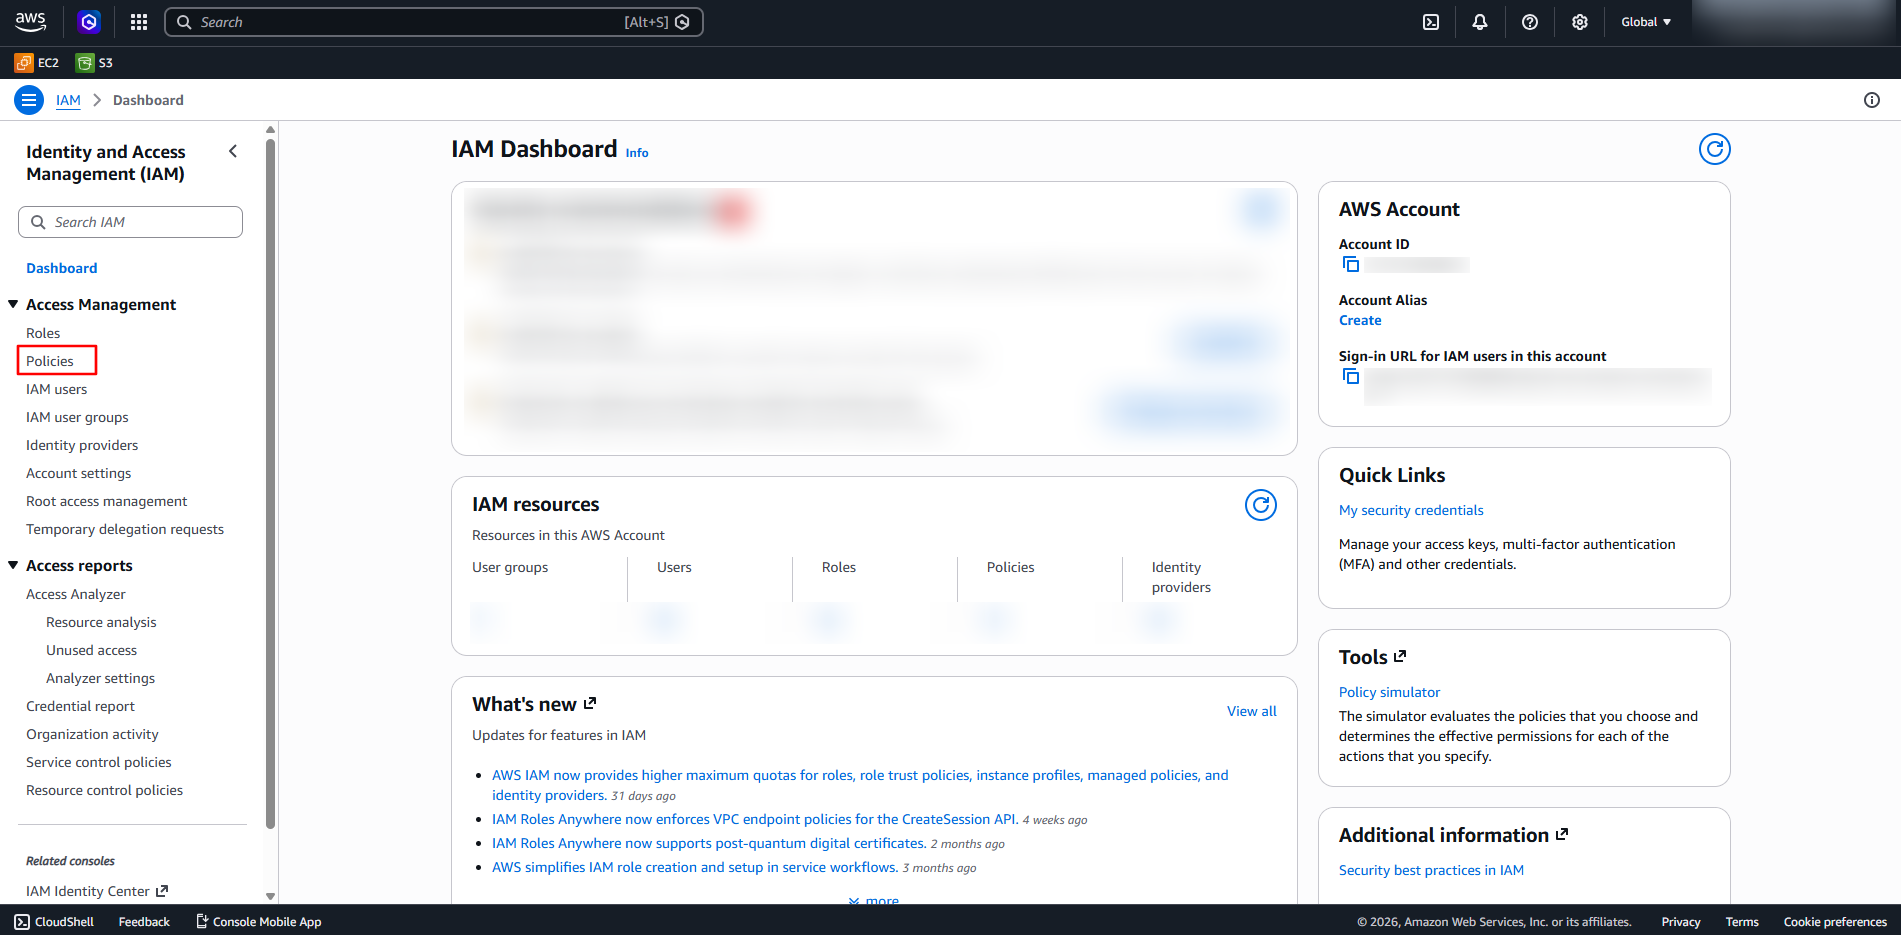
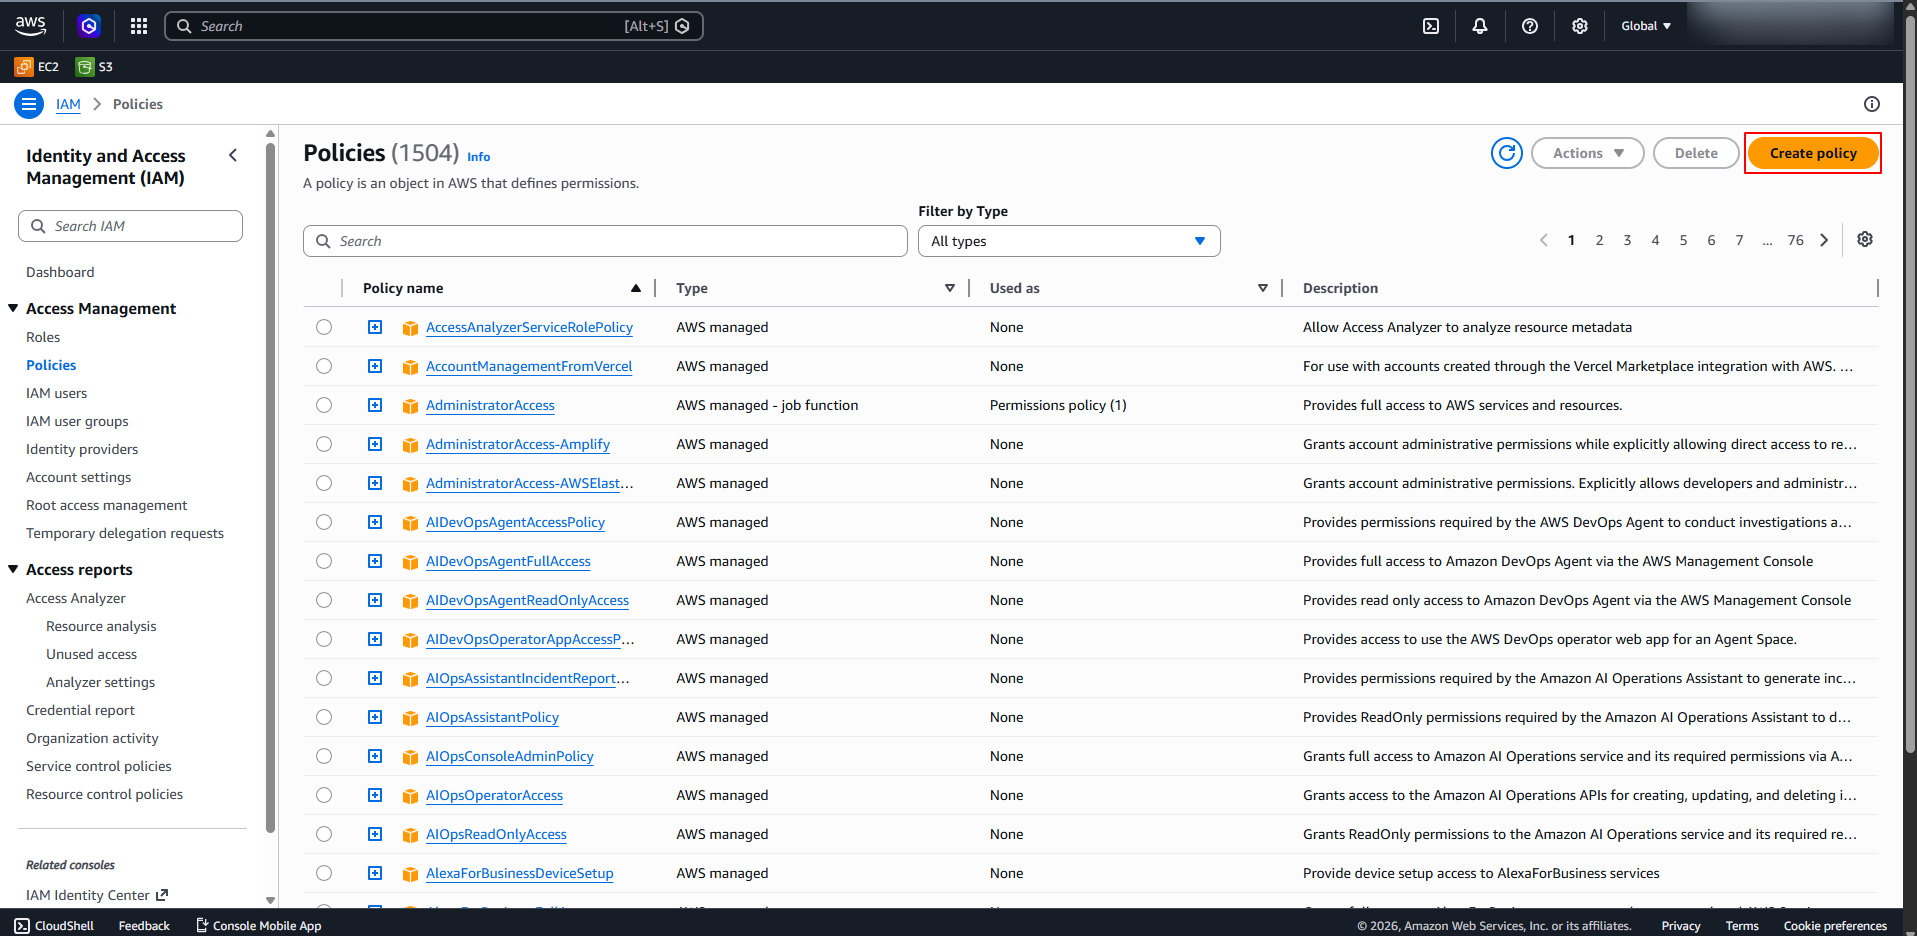
Click on Policies in the left navigation pane.
-
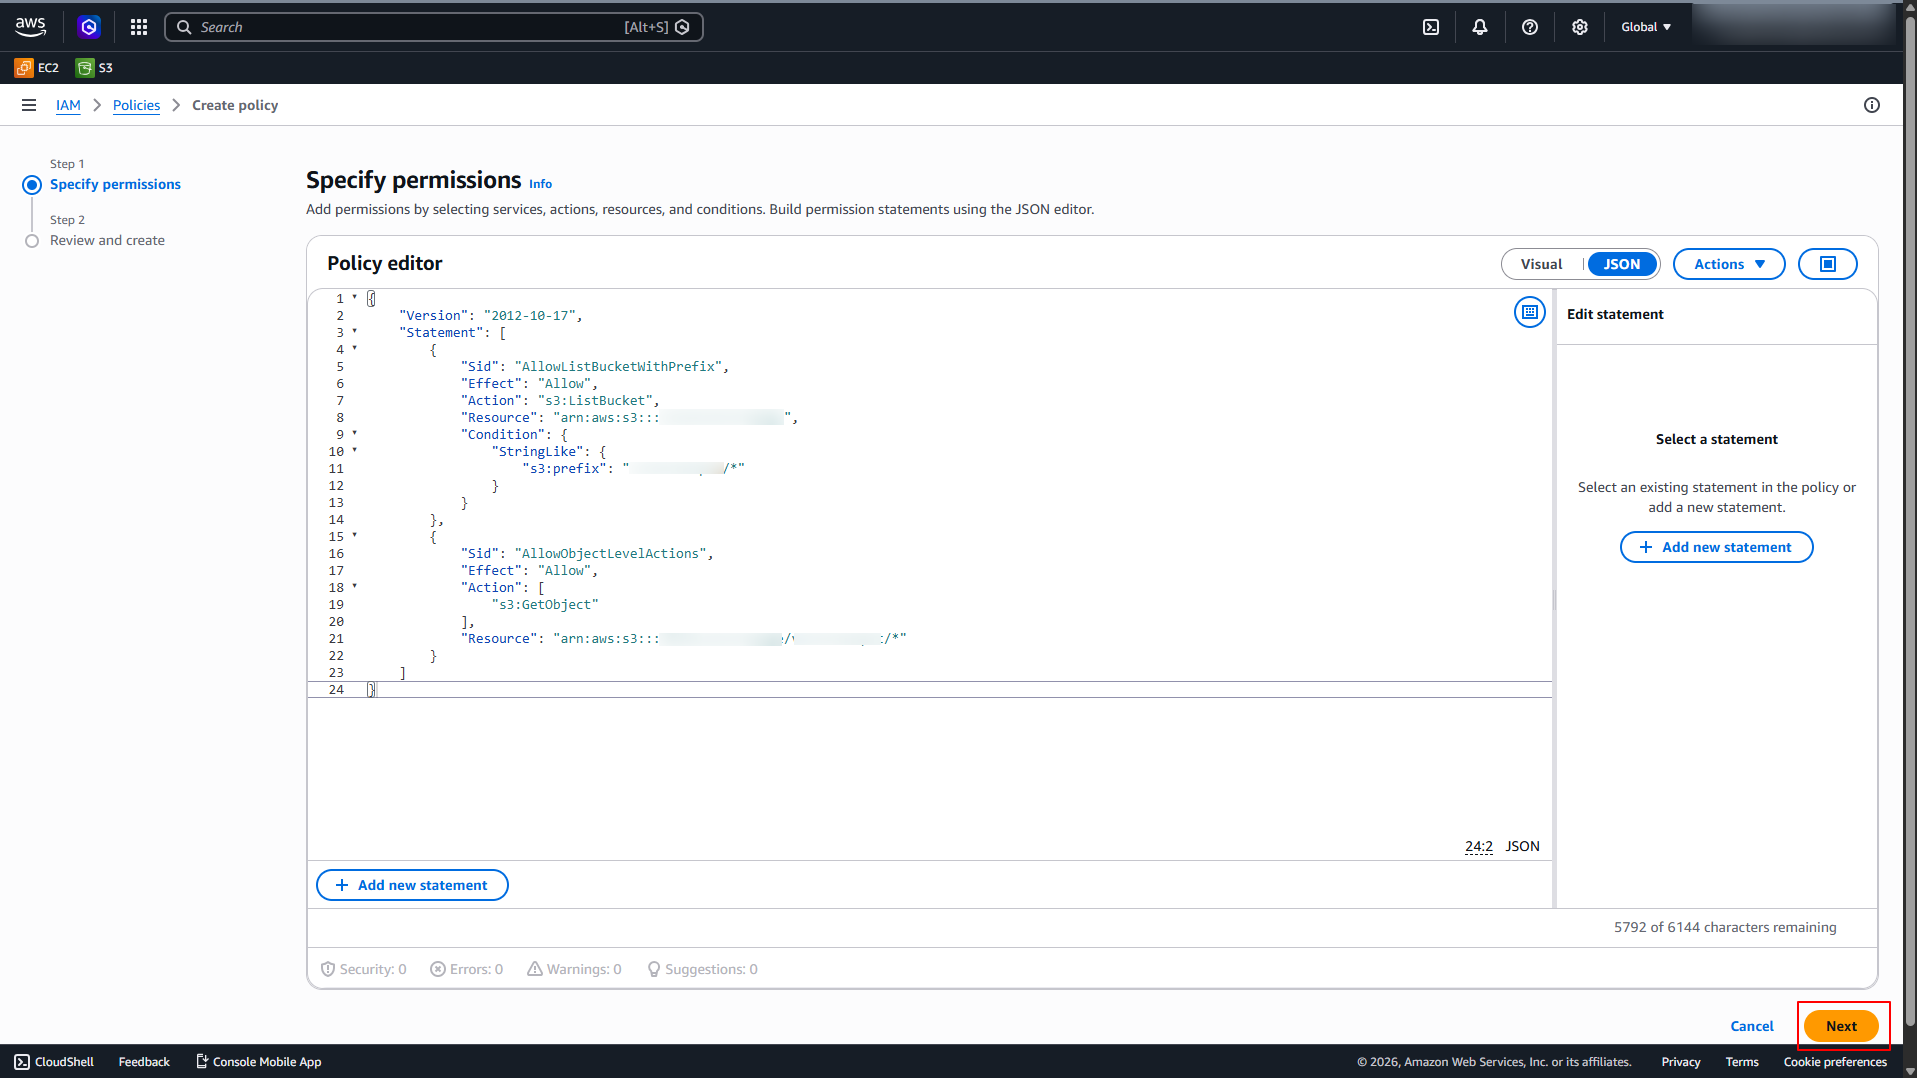
Click on Create Policy.
-
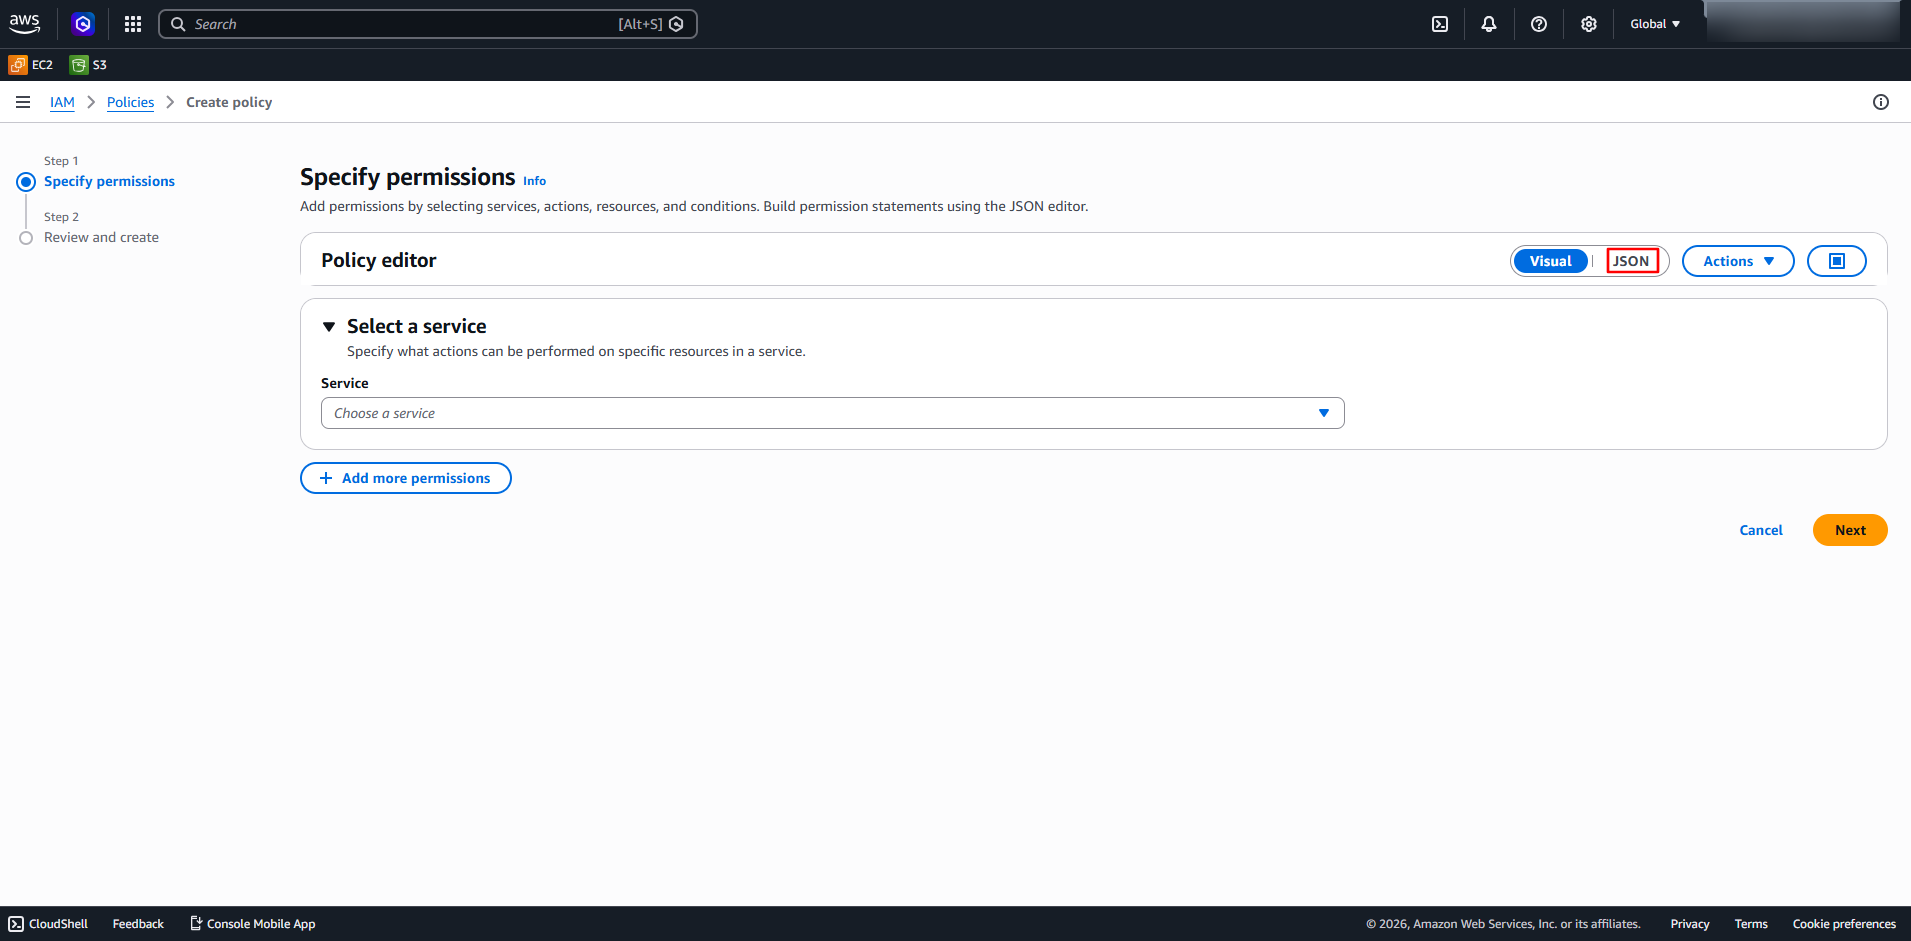
In Policy Editor, select JSON.
-
In Specify Permissions, create a policy allowing only the following permissions:
ListBucketGetObject
The following sample JSON can be used for creating the policy:
{
    "Version": "2012-10-17",
    "Statement": [
        {
            "Sid": "AllowListBucketWithPrefix",
            "Effect": "Allow",
            "Action": "s3:ListBucket",
            "Resource": "arn:aws:s3:::my-bucket",
            "Condition": {
                "StringLike": {
                    "s3:prefix": "my-prefix/*"
                }
            }
        },
        {
            "Sid": "AllowObjectLevelActions",
            "Effect": "Allow",
            "Action": [
                "s3:GetObject"
            ],
            "Resource": "arn:aws:s3:::my-bucket/my-prefix/*"
        }
    ]
}
Where:
my-bucket– Provide the name of the S3 bucket for which access should be granted.my-prefix– Provide the prefix (folder path) within the bucket for which access should be granted.
For example, if the bucket name is
log-stream-bucketand the prefix isaudit-logs/, the policy JSON should be constructed as follows:{ "Version": "2012-10-17", "Statement": [ { "Sid": "AllowListBucketWithPrefix", "Effect": "Allow", "Action": "s3:ListBucket", "Resource": "arn:aws:s3:::log-stream-bucket", "Condition": { "StringLike": { "s3:prefix": "audit-logs/*" } } }, { "Sid": "AllowObjectLevelActions", "Effect": "Allow", "Action": [ "s3:GetObject" ], "Resource": "arn:aws:s3:::log-stream-bucket/audit-logs/*" } ] } -
Once the JSON is added in the Policy Editor, click Next.
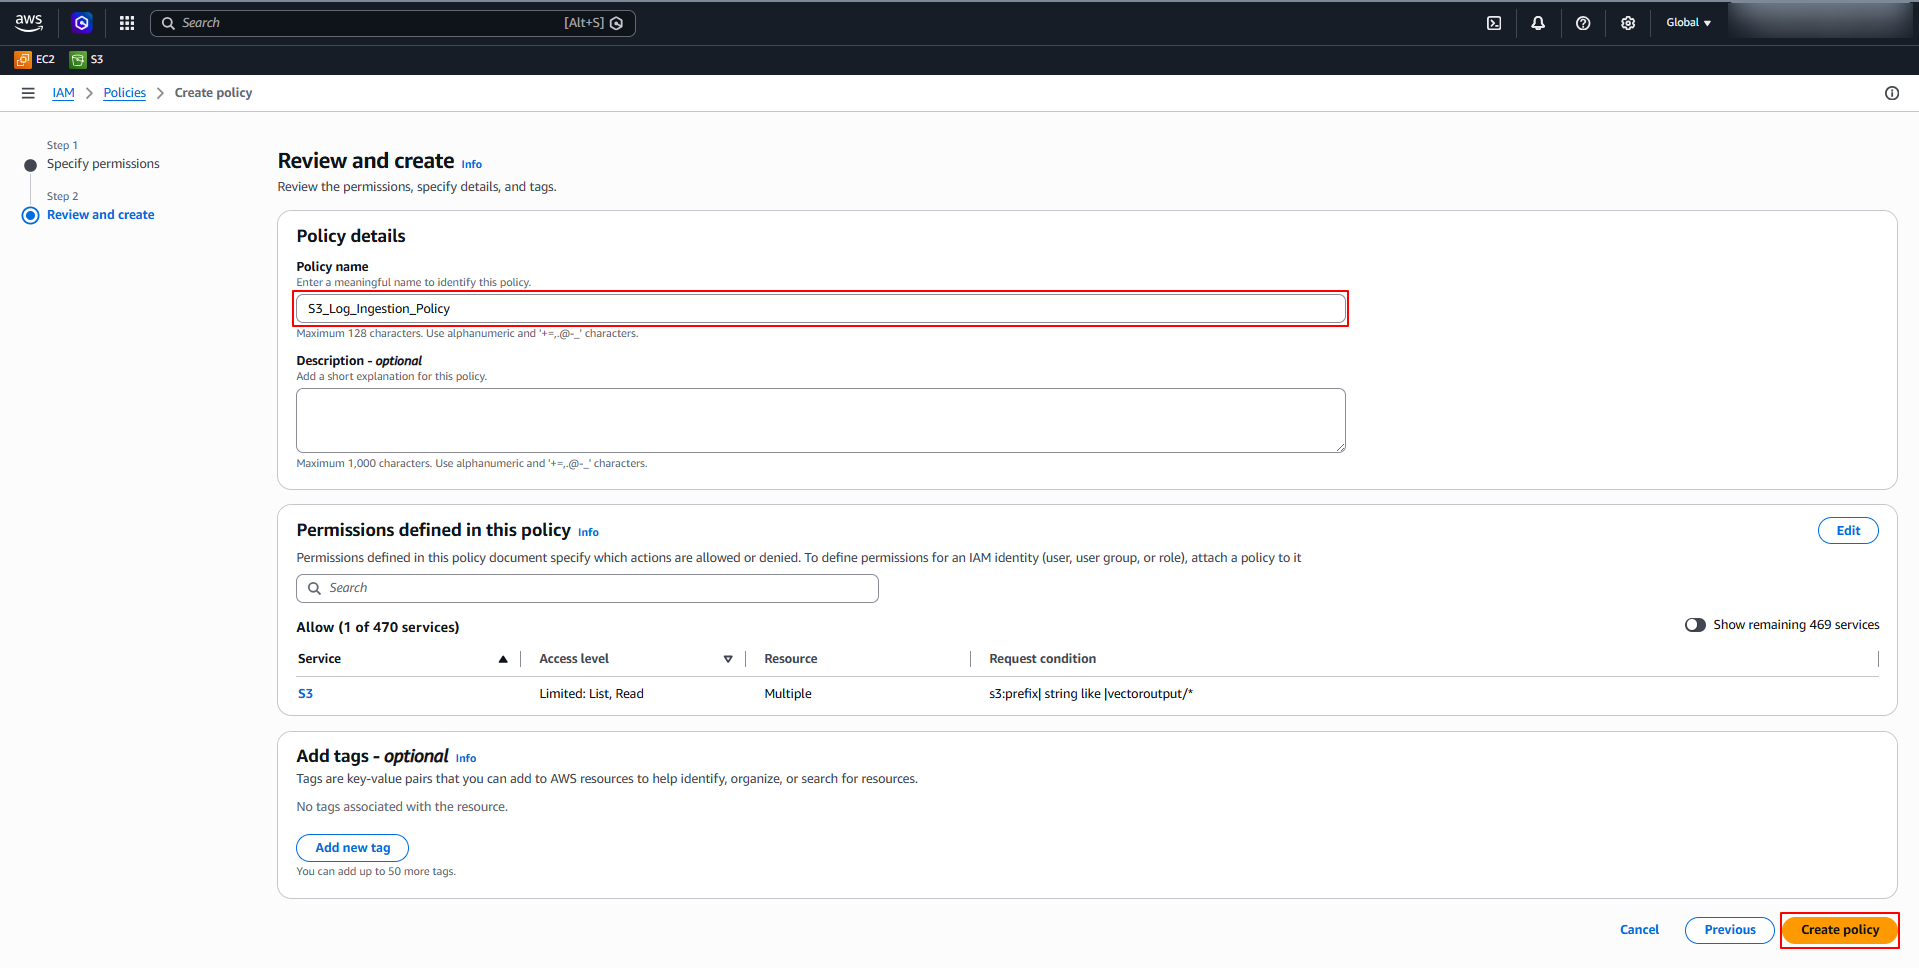
-
In the Review and Create section, provide a name for the policy in the Policy Name field, and click Create Policy.
-
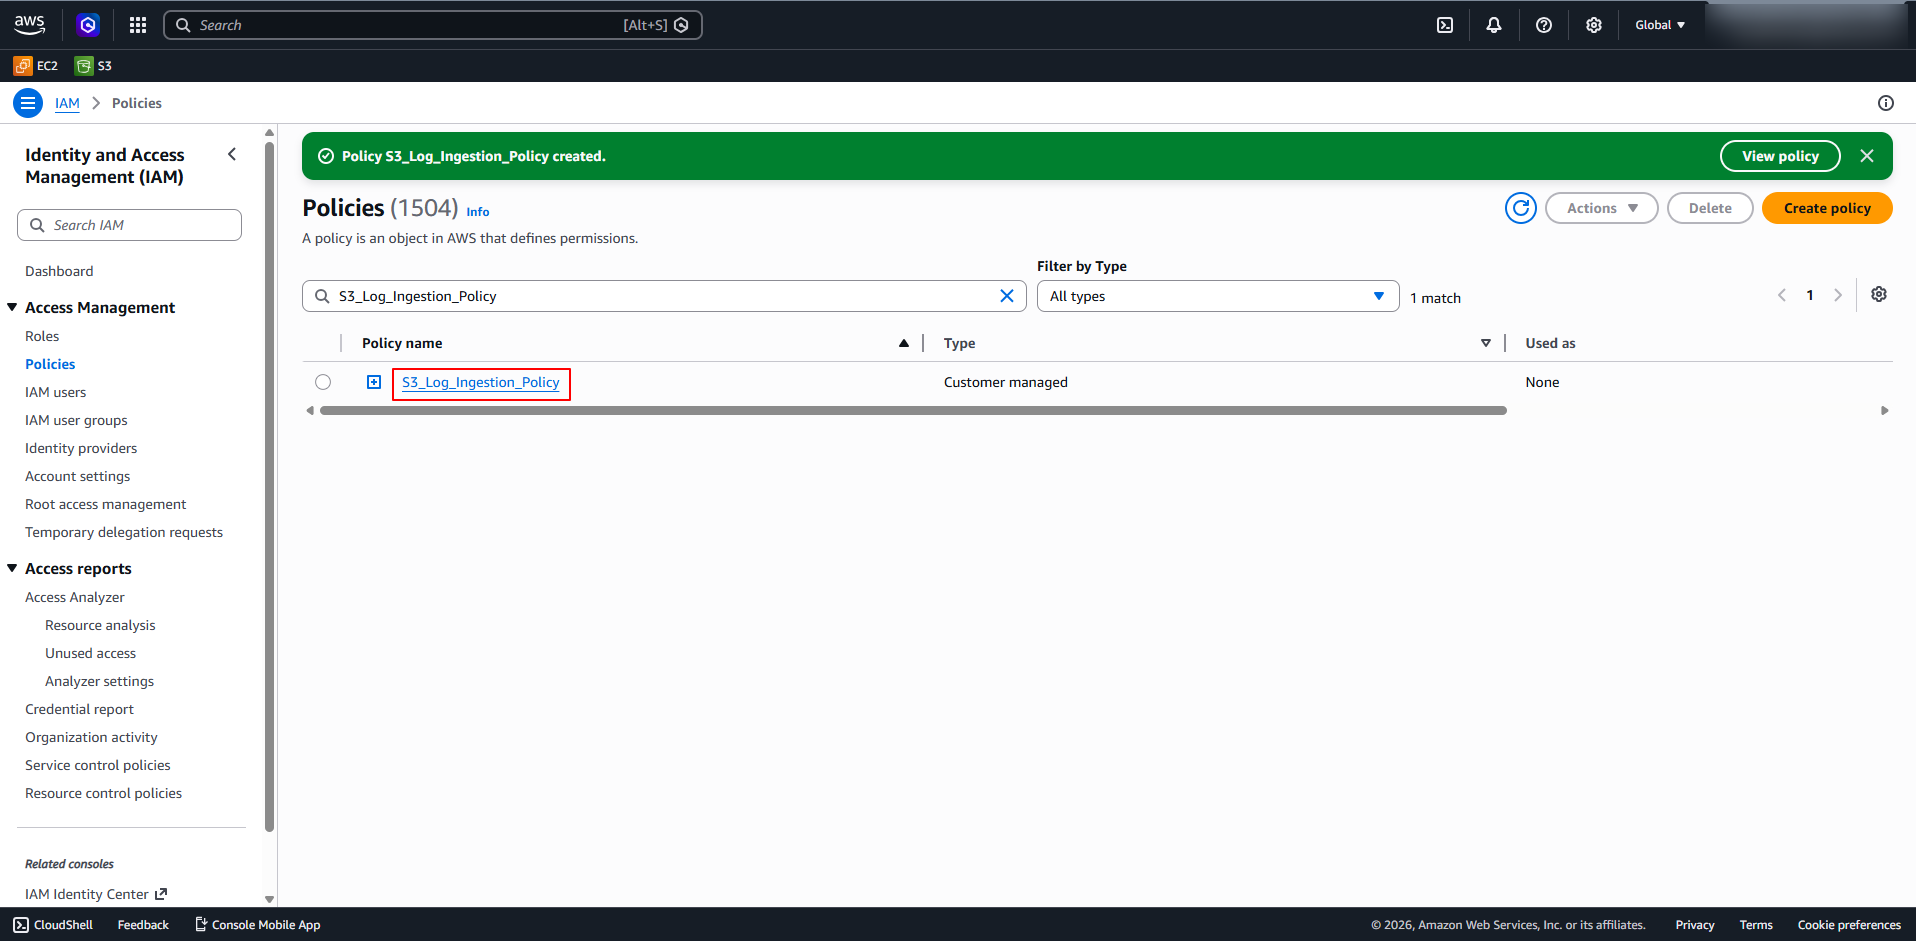
The custom policy is created.
Step 2: Create an IAM User
-
Sign in to the AWS Management Console and navigate to Identity and Access Management (for IAM navigation reference, see Step 1).
-
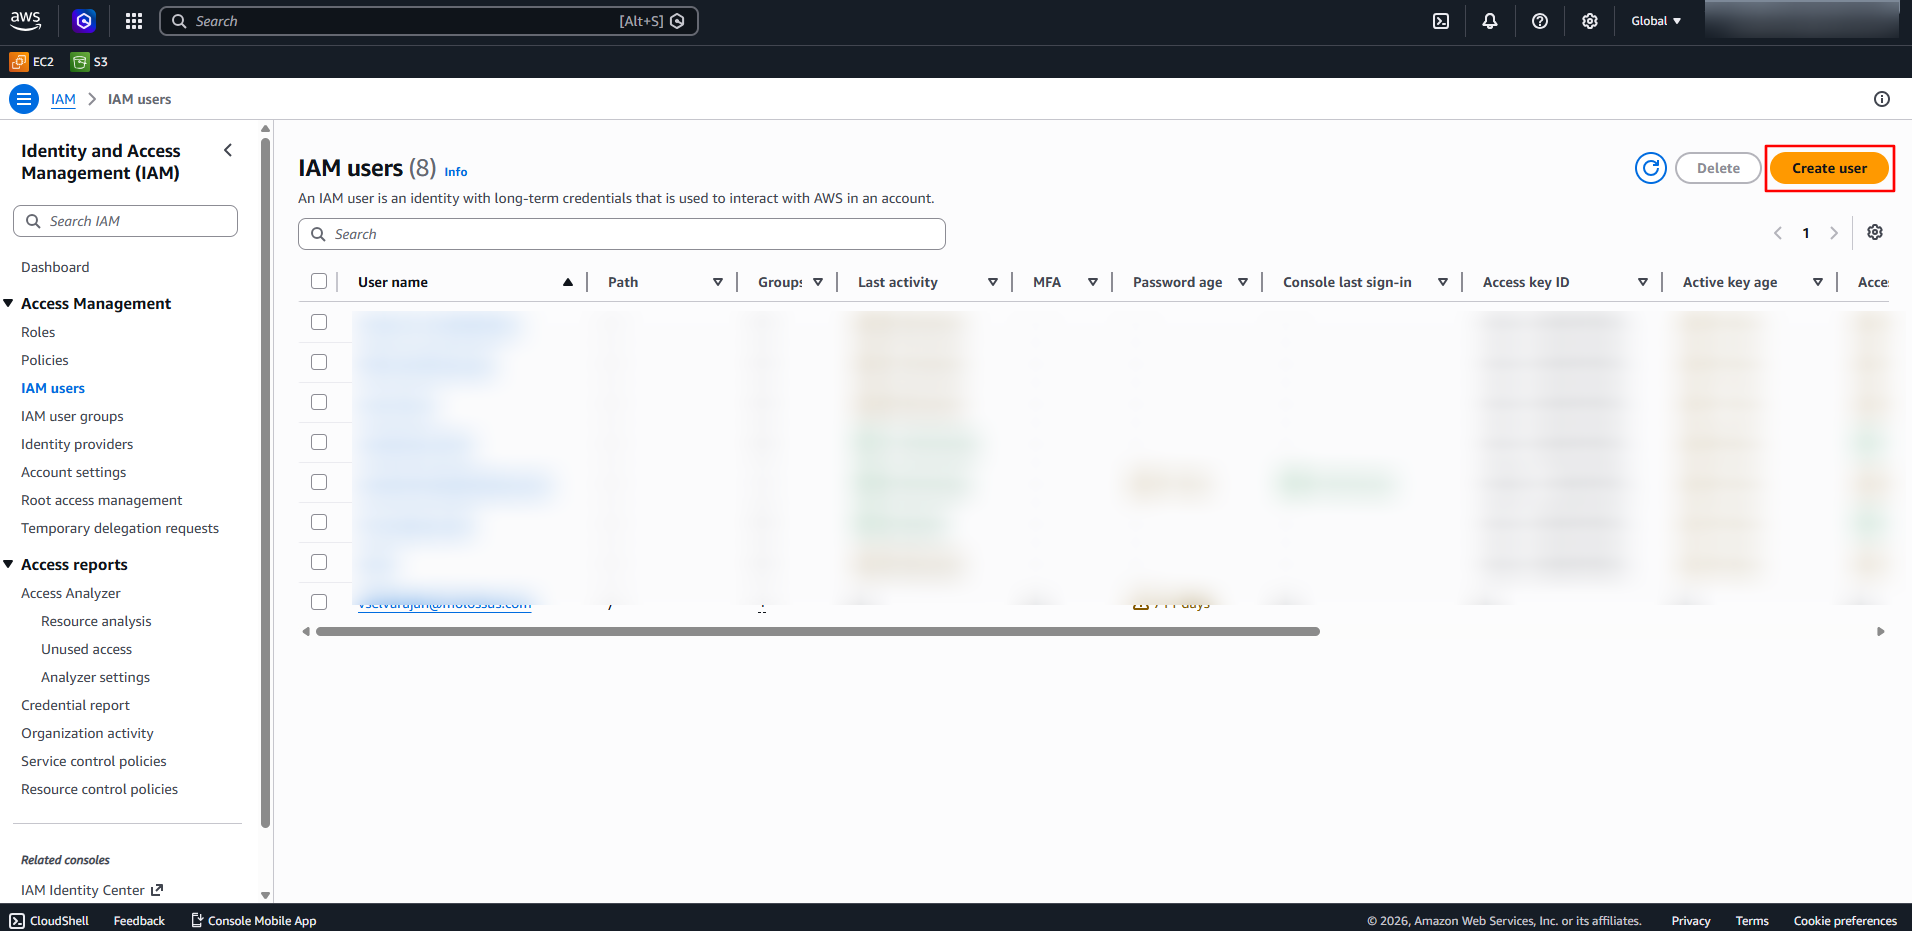
Click on Users in the left navigation pane.

-
Click on Create user.
-
In the Specify user details section, enter a name in the User name field and click Next.
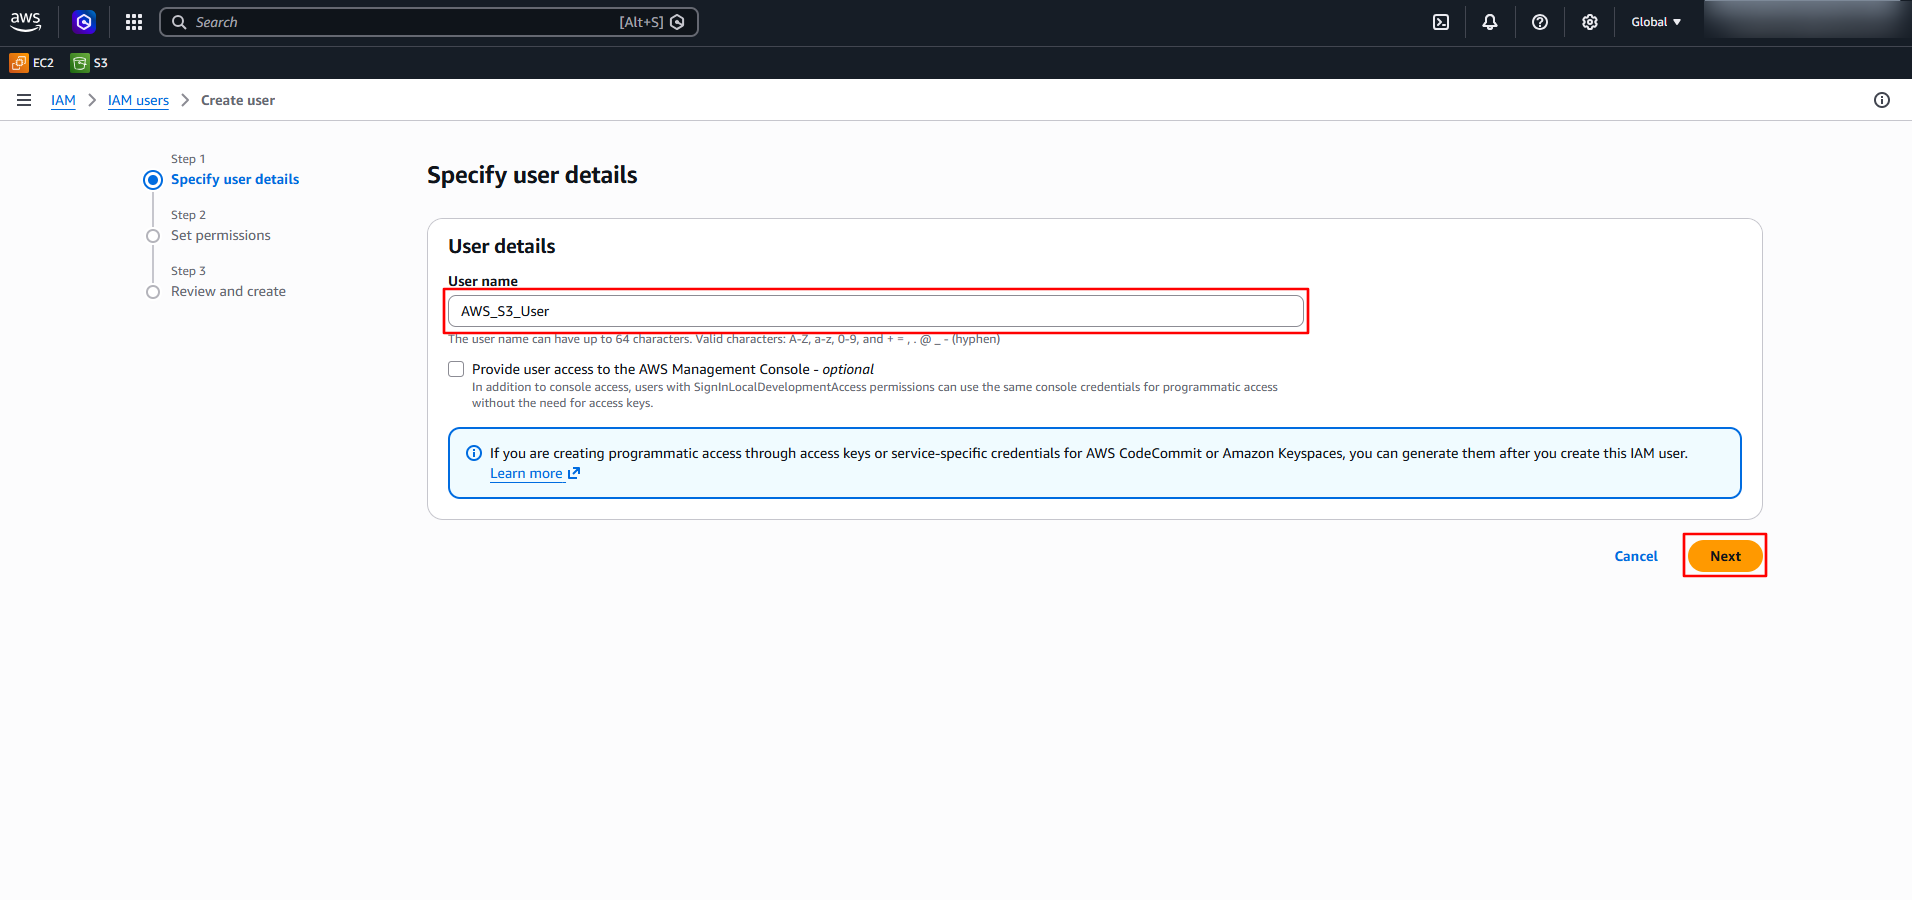
-
In the Set Permissions section, select Attach policies directly. In Permissions policies, select the policy created in Step 1 (in this case
S3_Log_Ingestion_Policy) and click Next.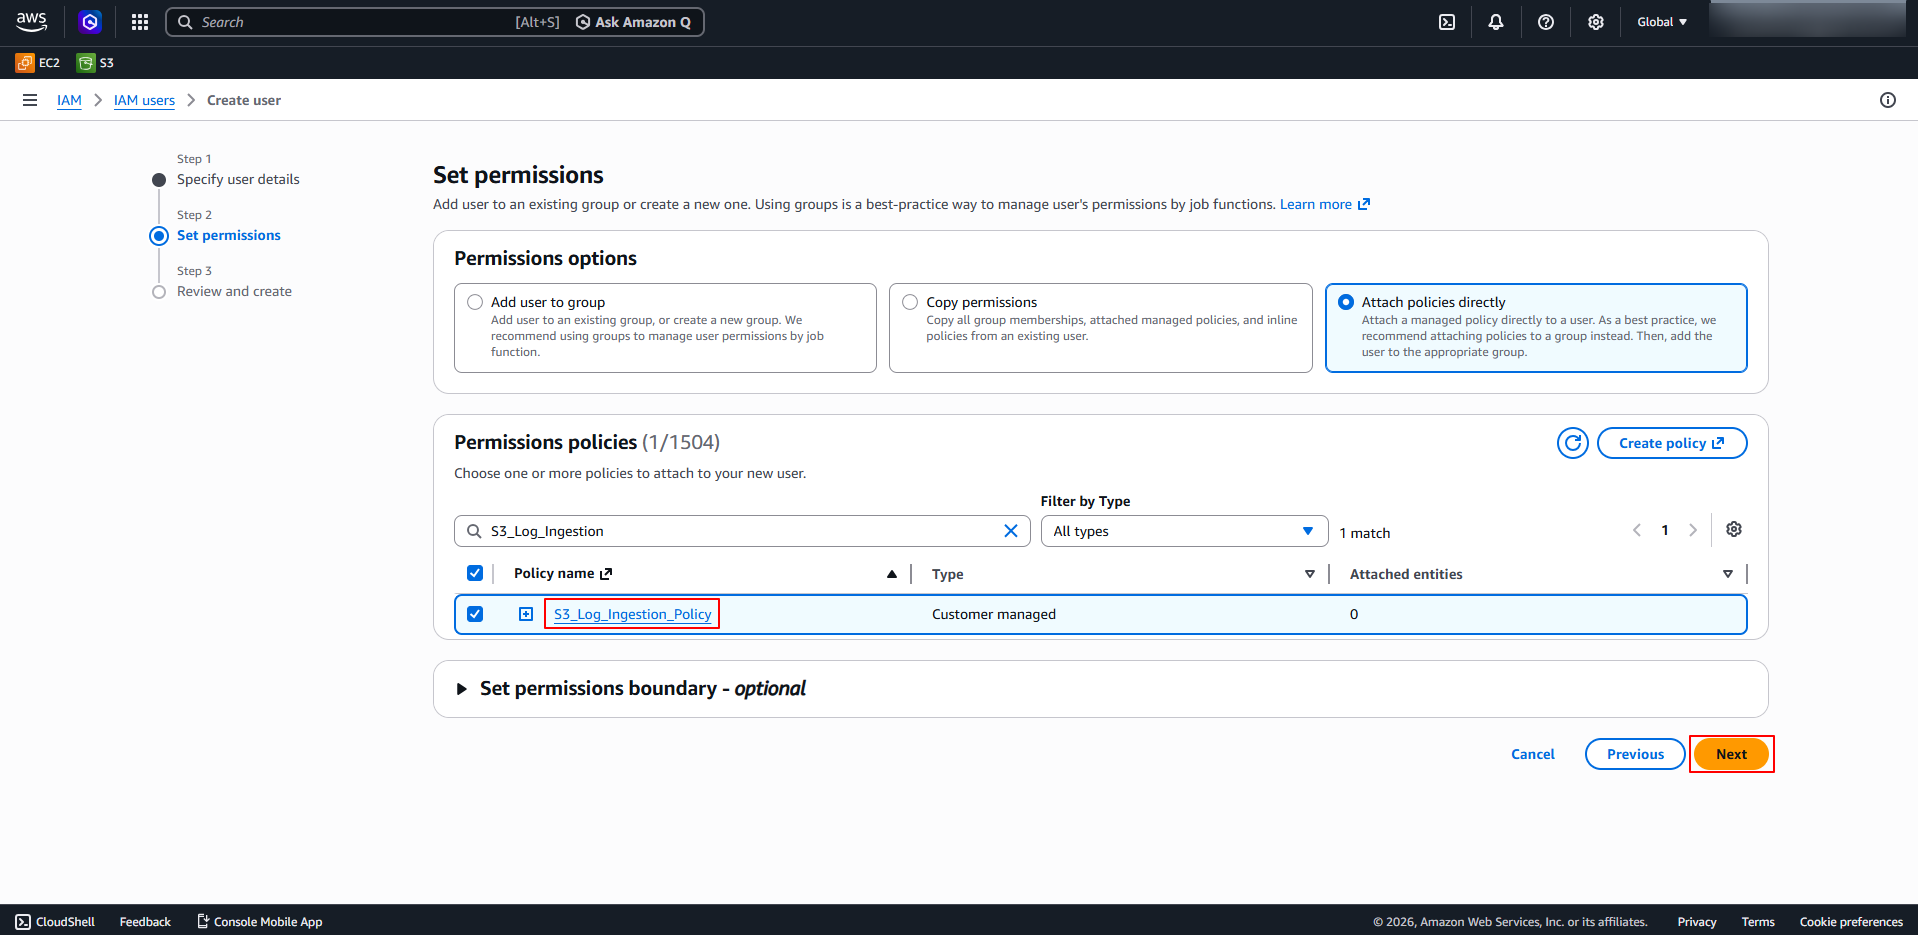
-
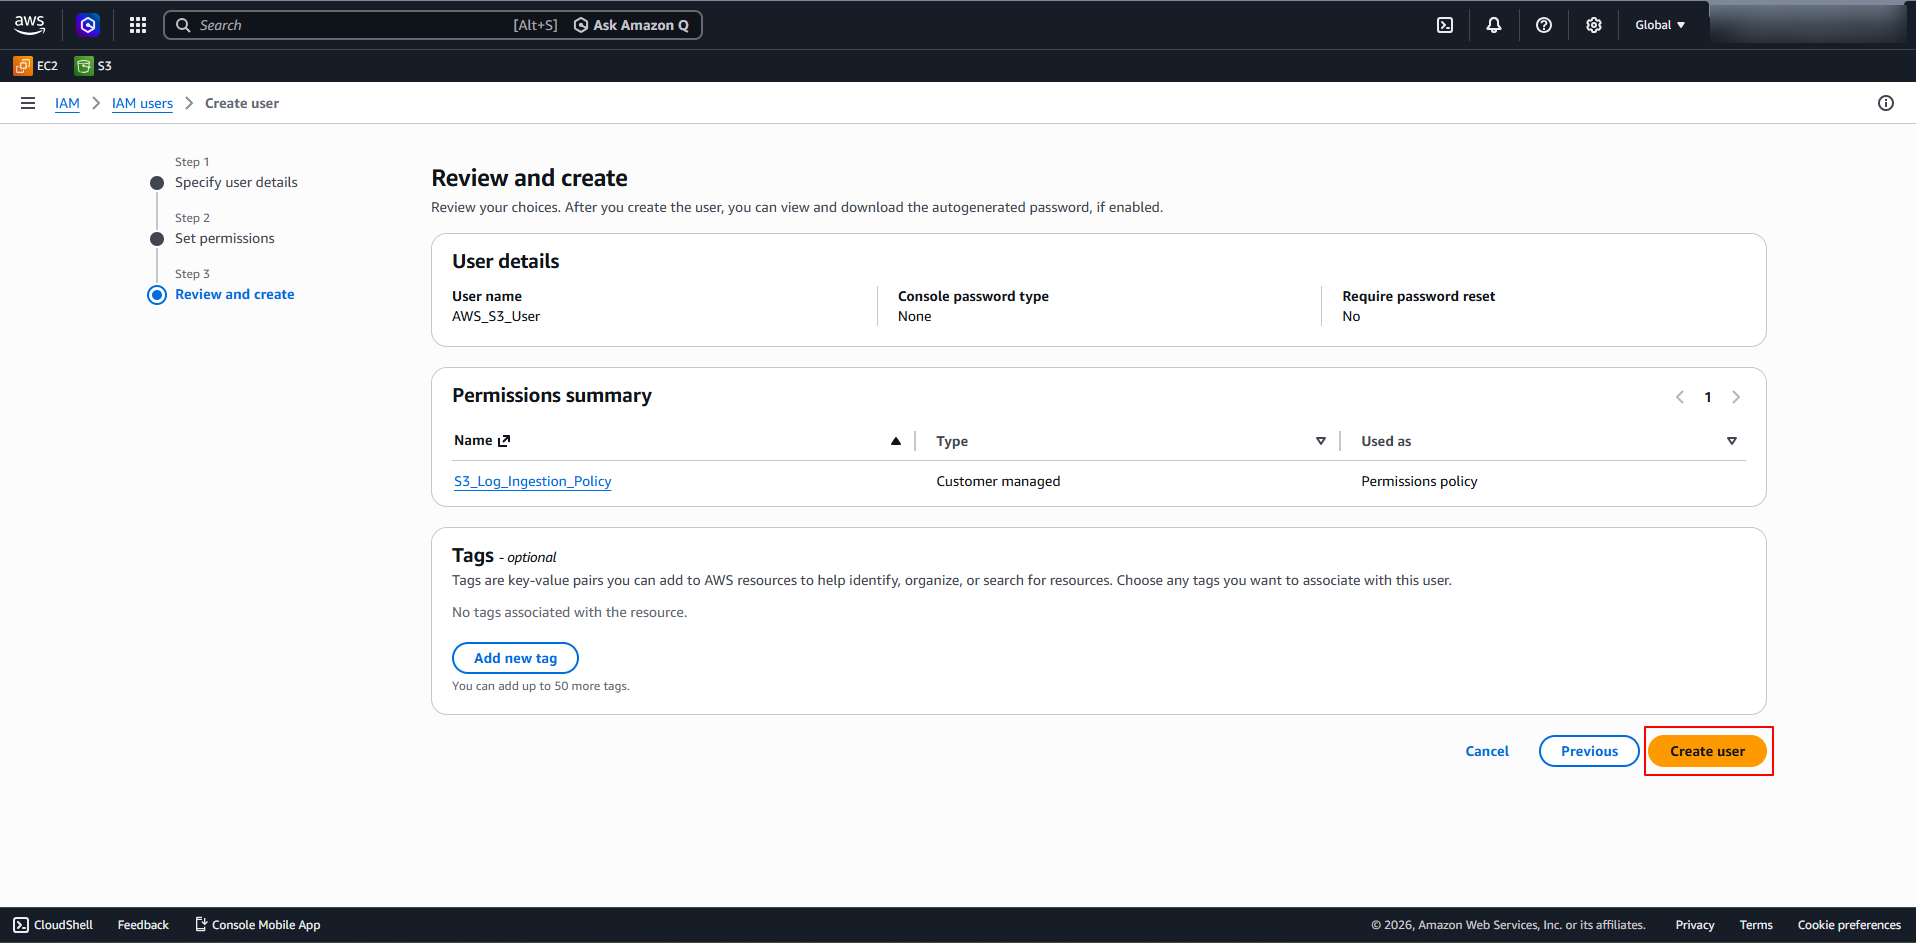
In the Review and Create section, review the User details and Permissions summary, then click Create User.
-
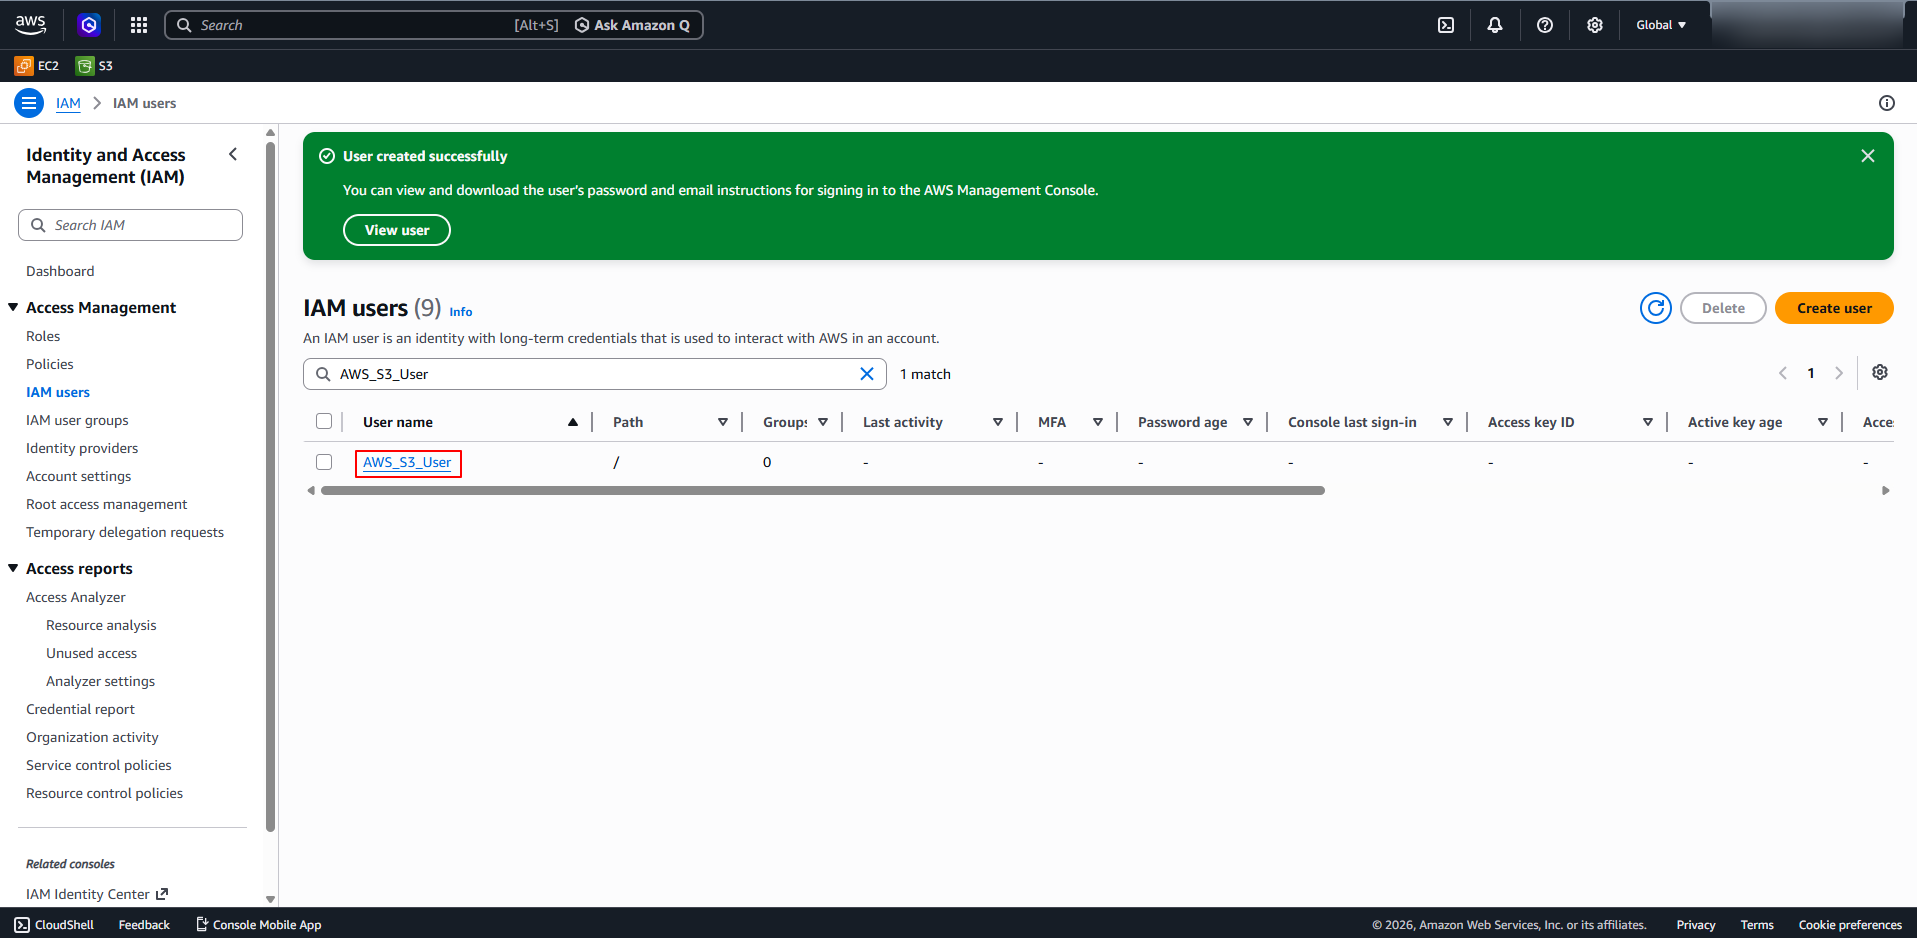
The IAM user will be created.
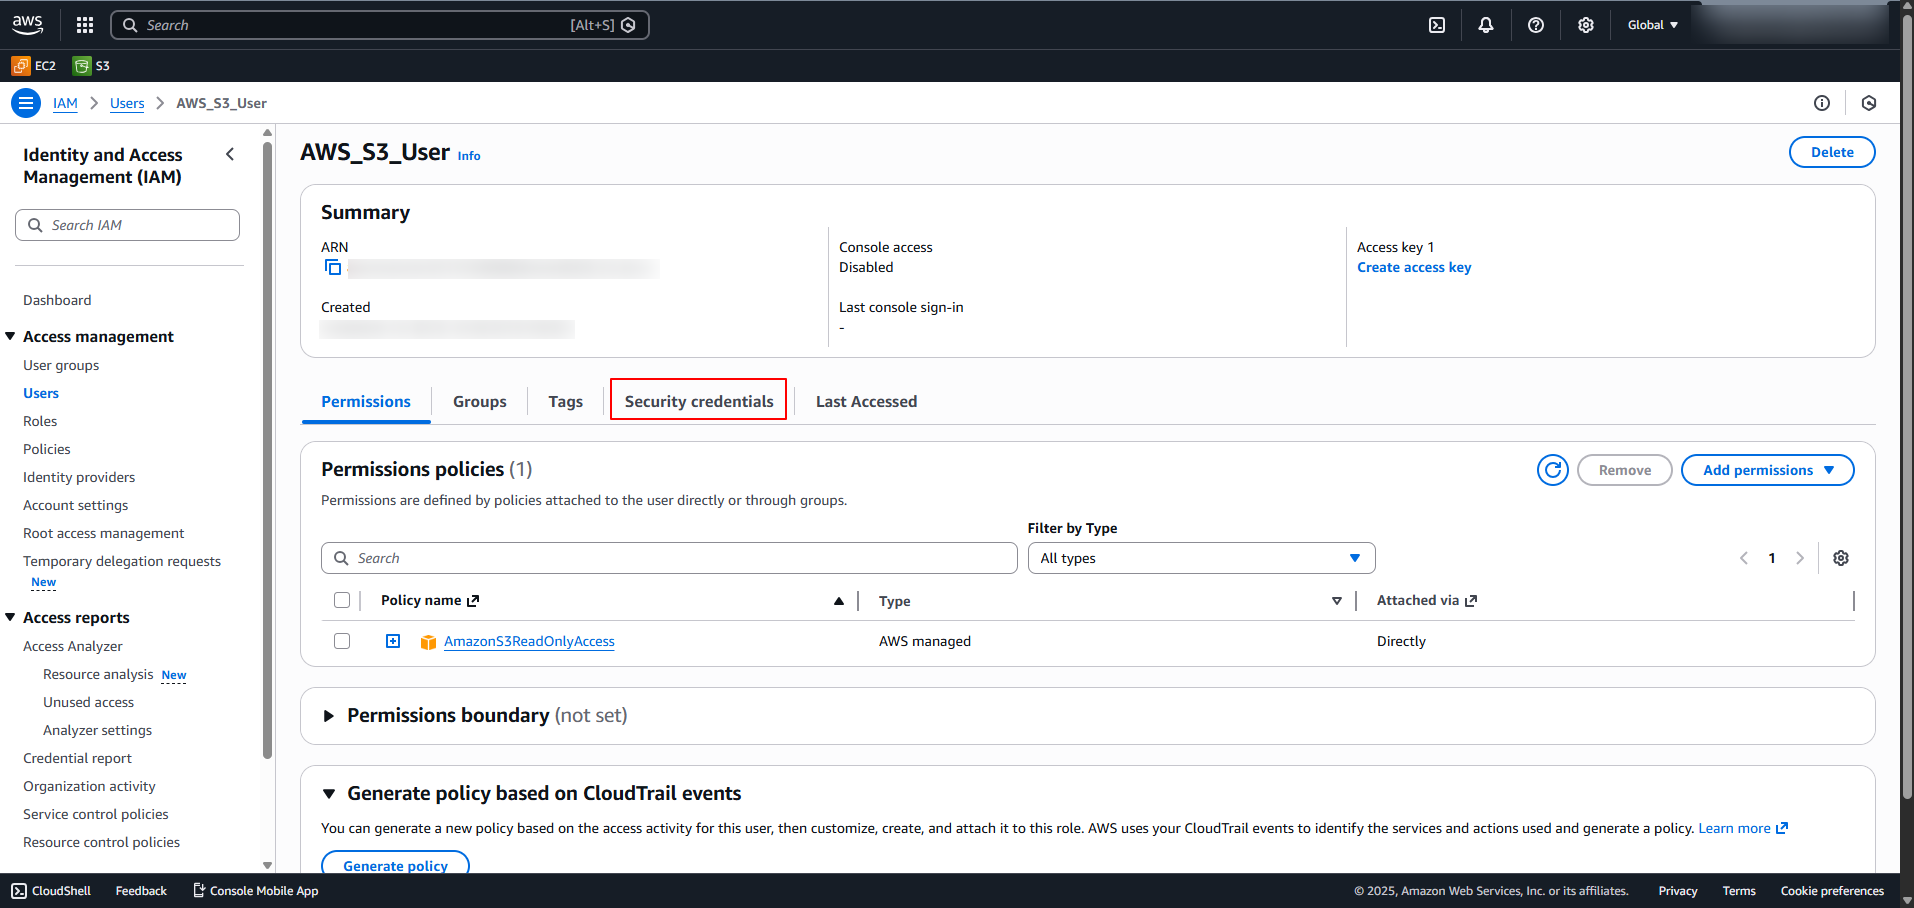
Step 3: Generate Access Key & Secret Access Key
-
In the AWS Management Console, navigate to IAM -> Users (for IAM navigation reference, see Step 1).
-
Click on the created/required IAM user.

-
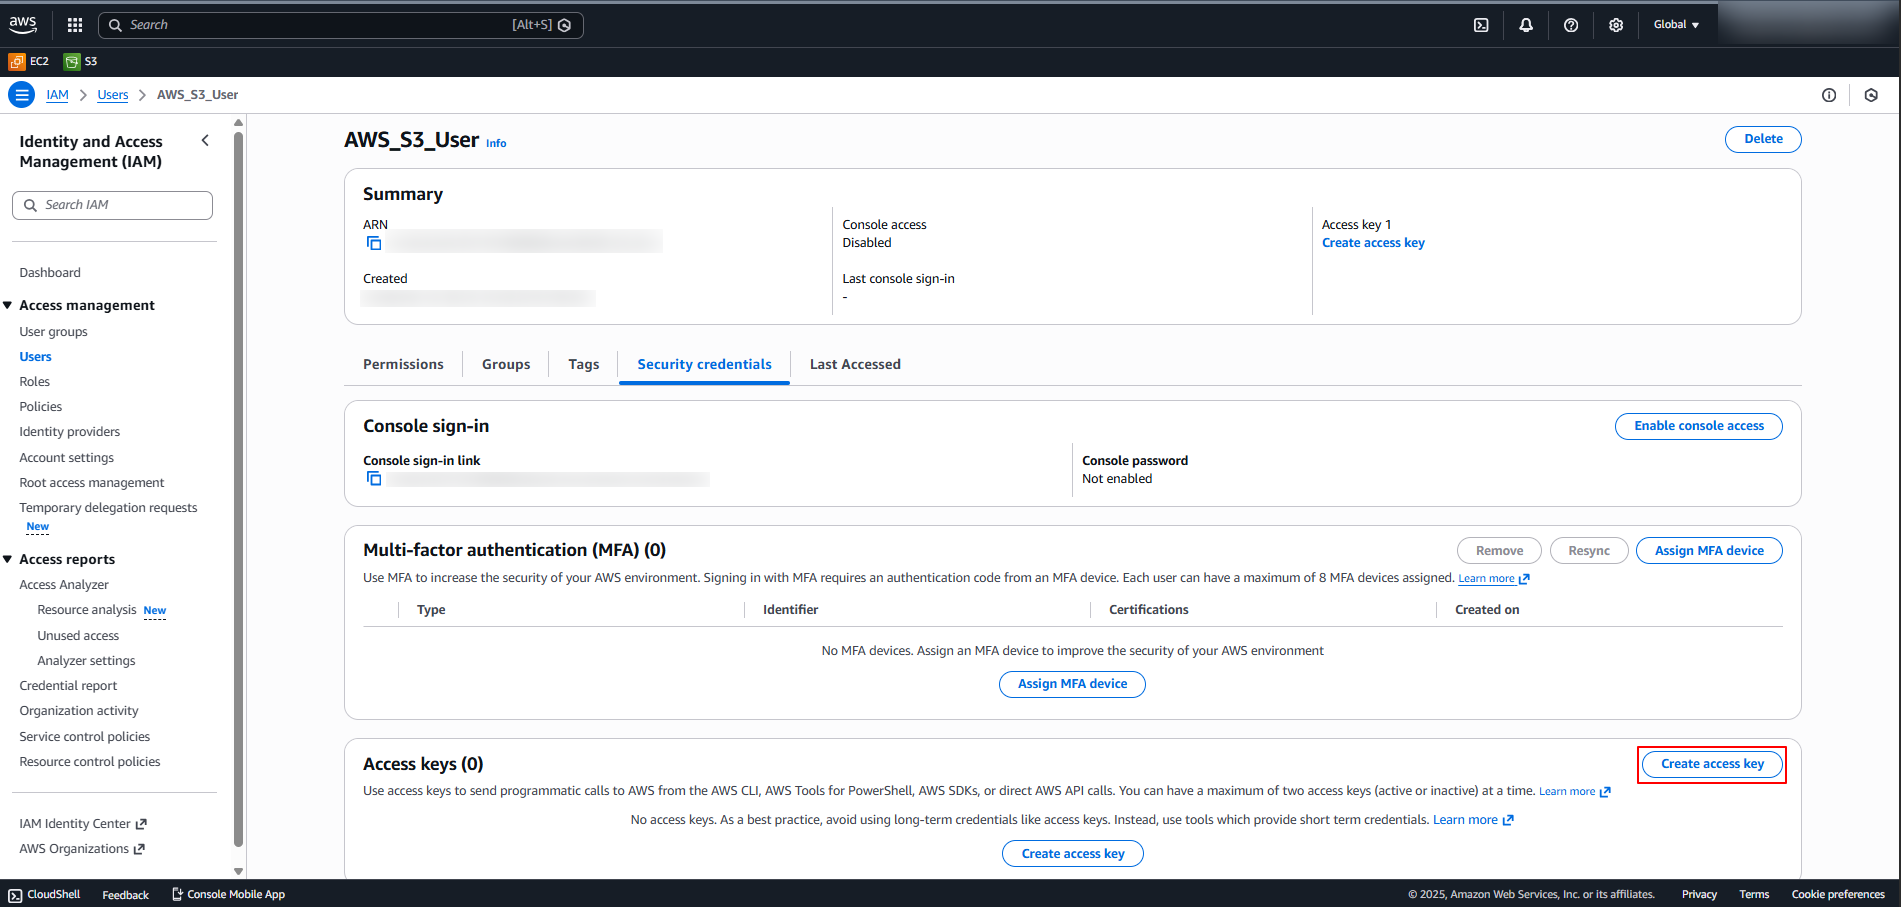
Select the Security Credentials tab.
-
Click on Create Access Key.
-
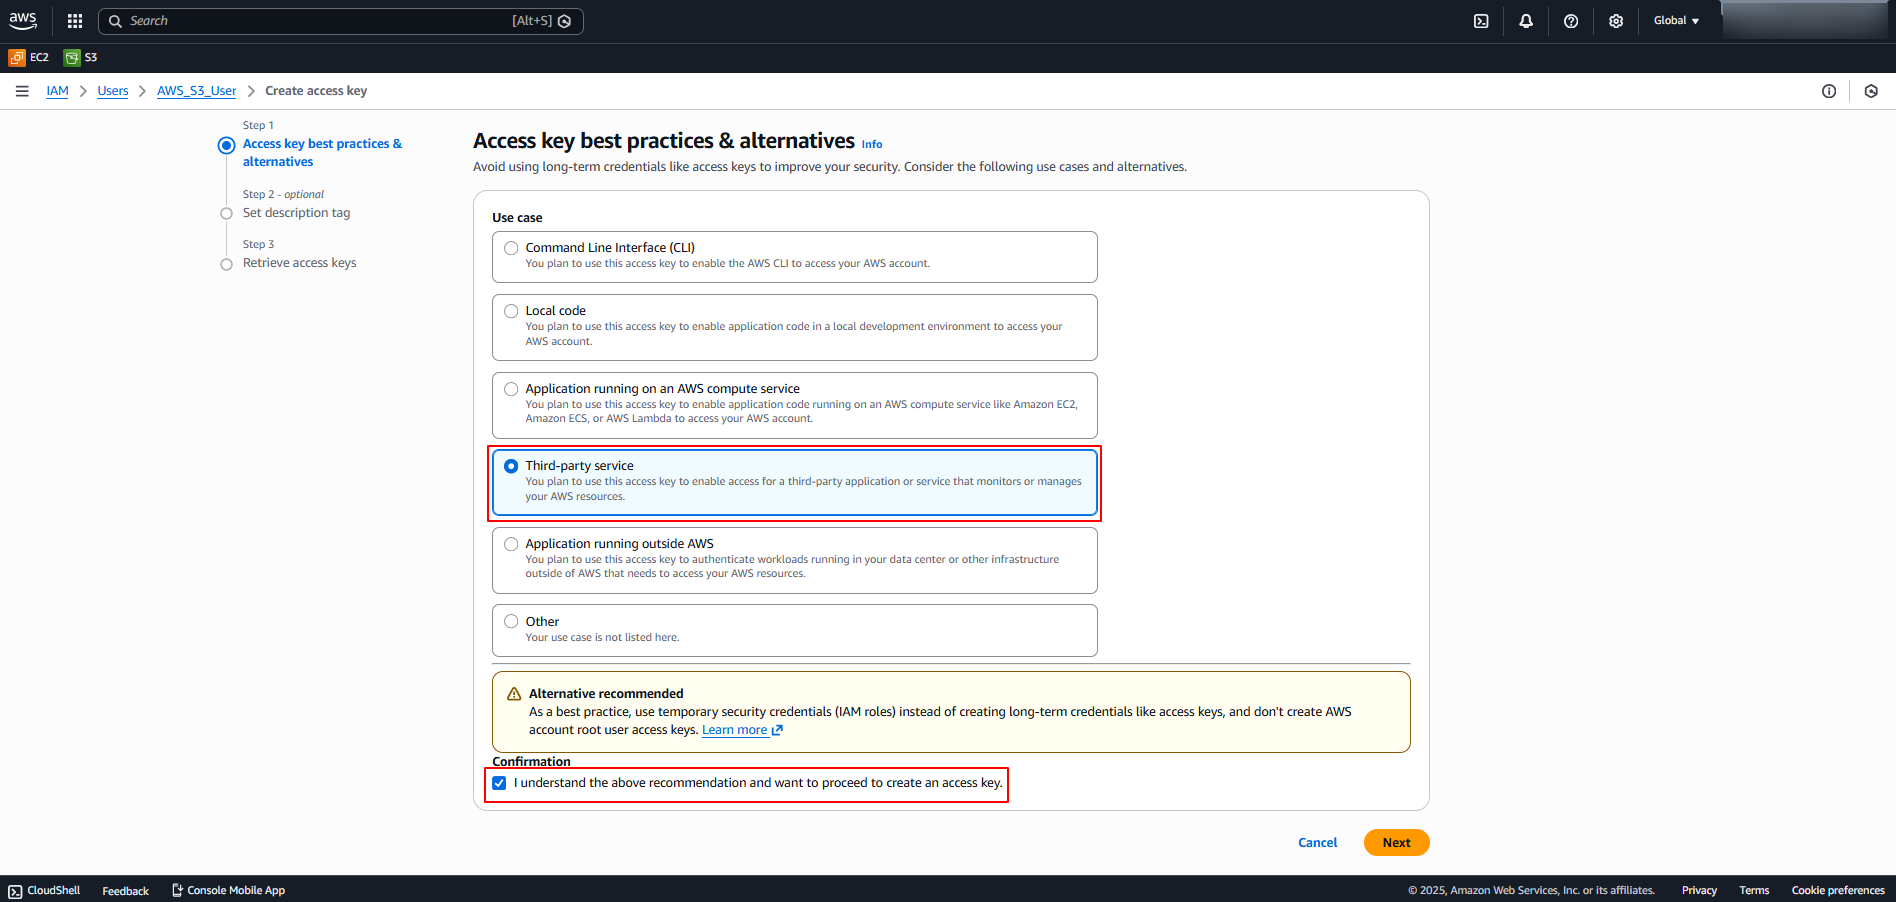
In the Access key best practices & alternatives section, select Third-party service, select the Confirmation checkbox, and click Next.
-
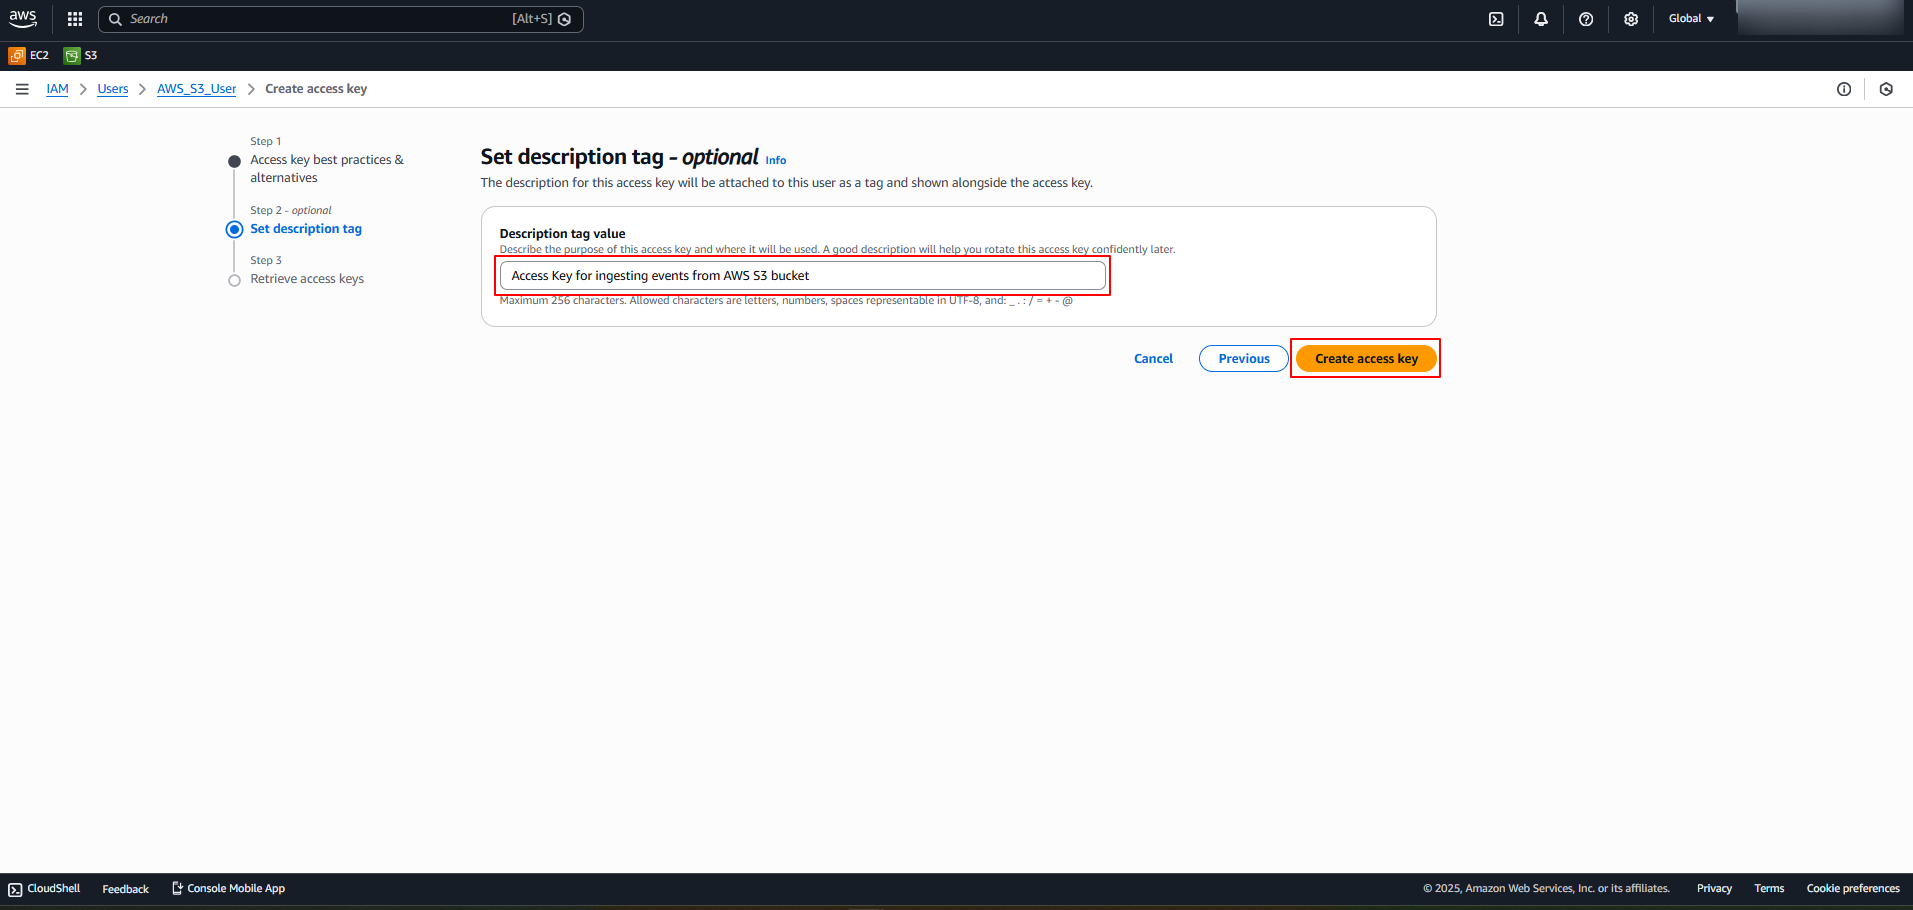
(Optional) In the Set description tag section, provide a description.
-
Click on Create access key.
-
In the Retrieve access keys section, the Access Key and Secret Access Key are generated. Copy them or click Download .csv file to download the keys. Store the keys in a safe location.
Note: The access keys can only be viewed or downloaded at this point. They cannot be recovered later. If the keys are lost or forgotten, generate new access keys by repeating this step and disable the old key.
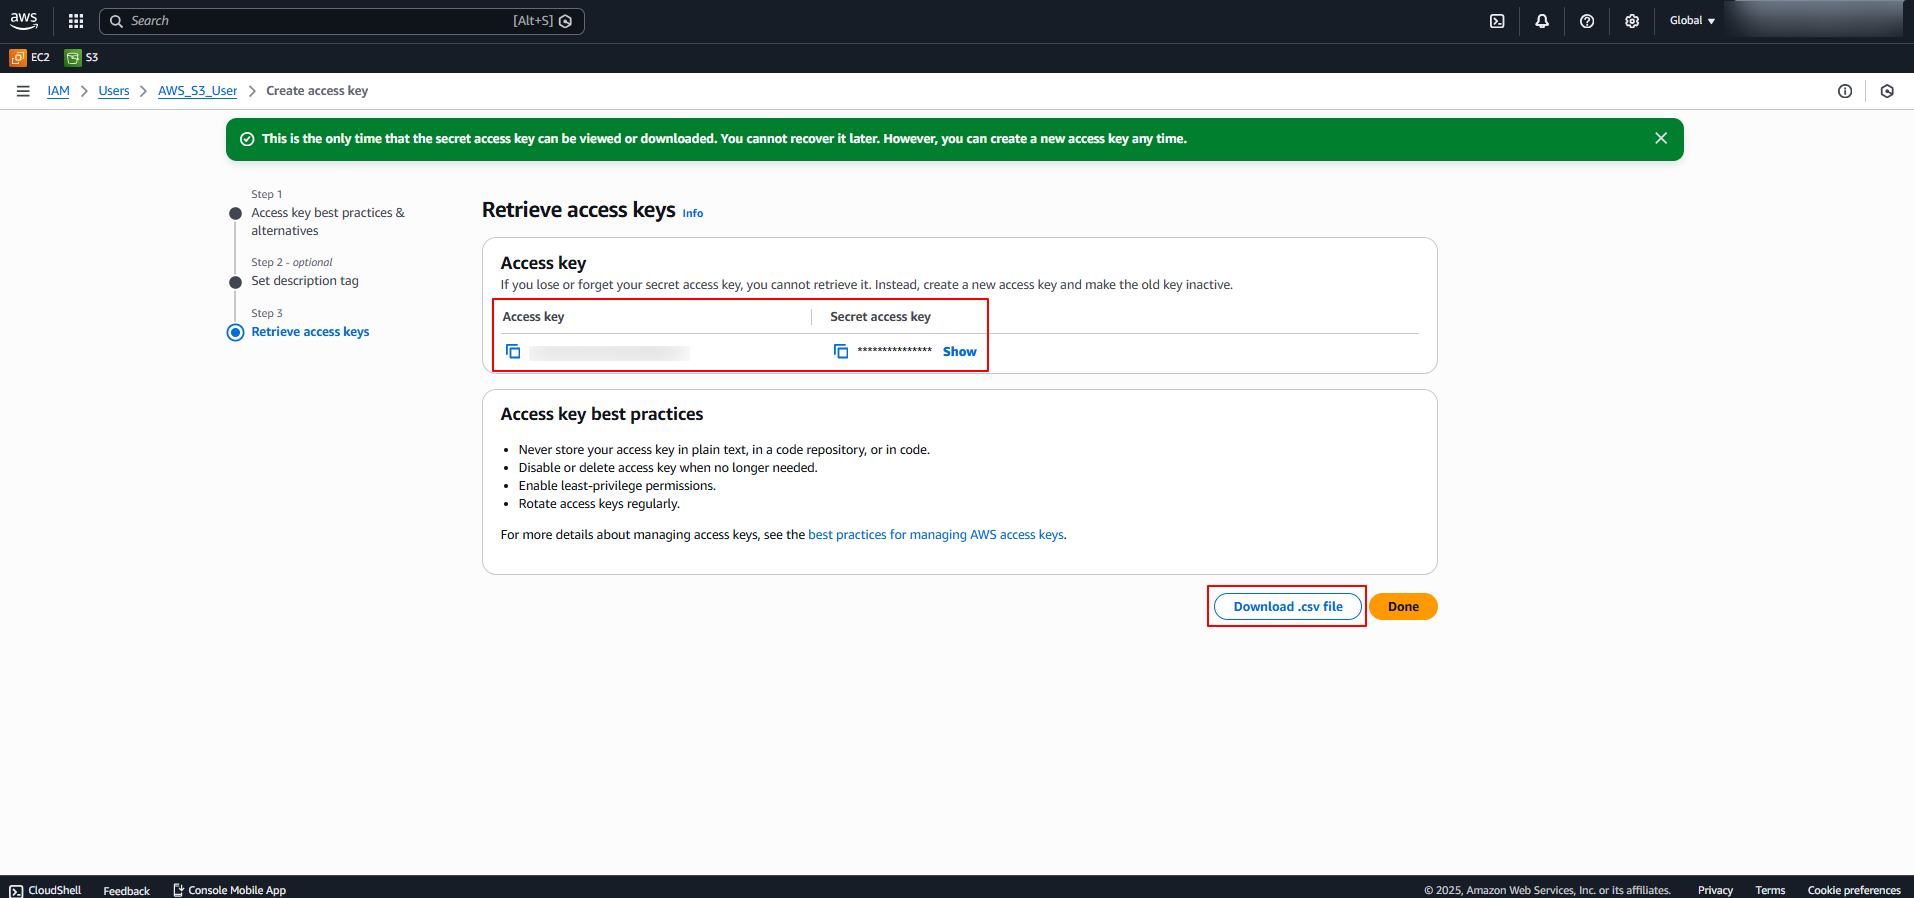
The generated Access Key and Secret Access Key are to be configured in Scope Setup: Step 1 for initiating the AWS S3 log ingestion.
Step 4: Determine AWS Region
-
Sign in to the AWS Management Console.
-
Click on Profile Name and navigate to Account.
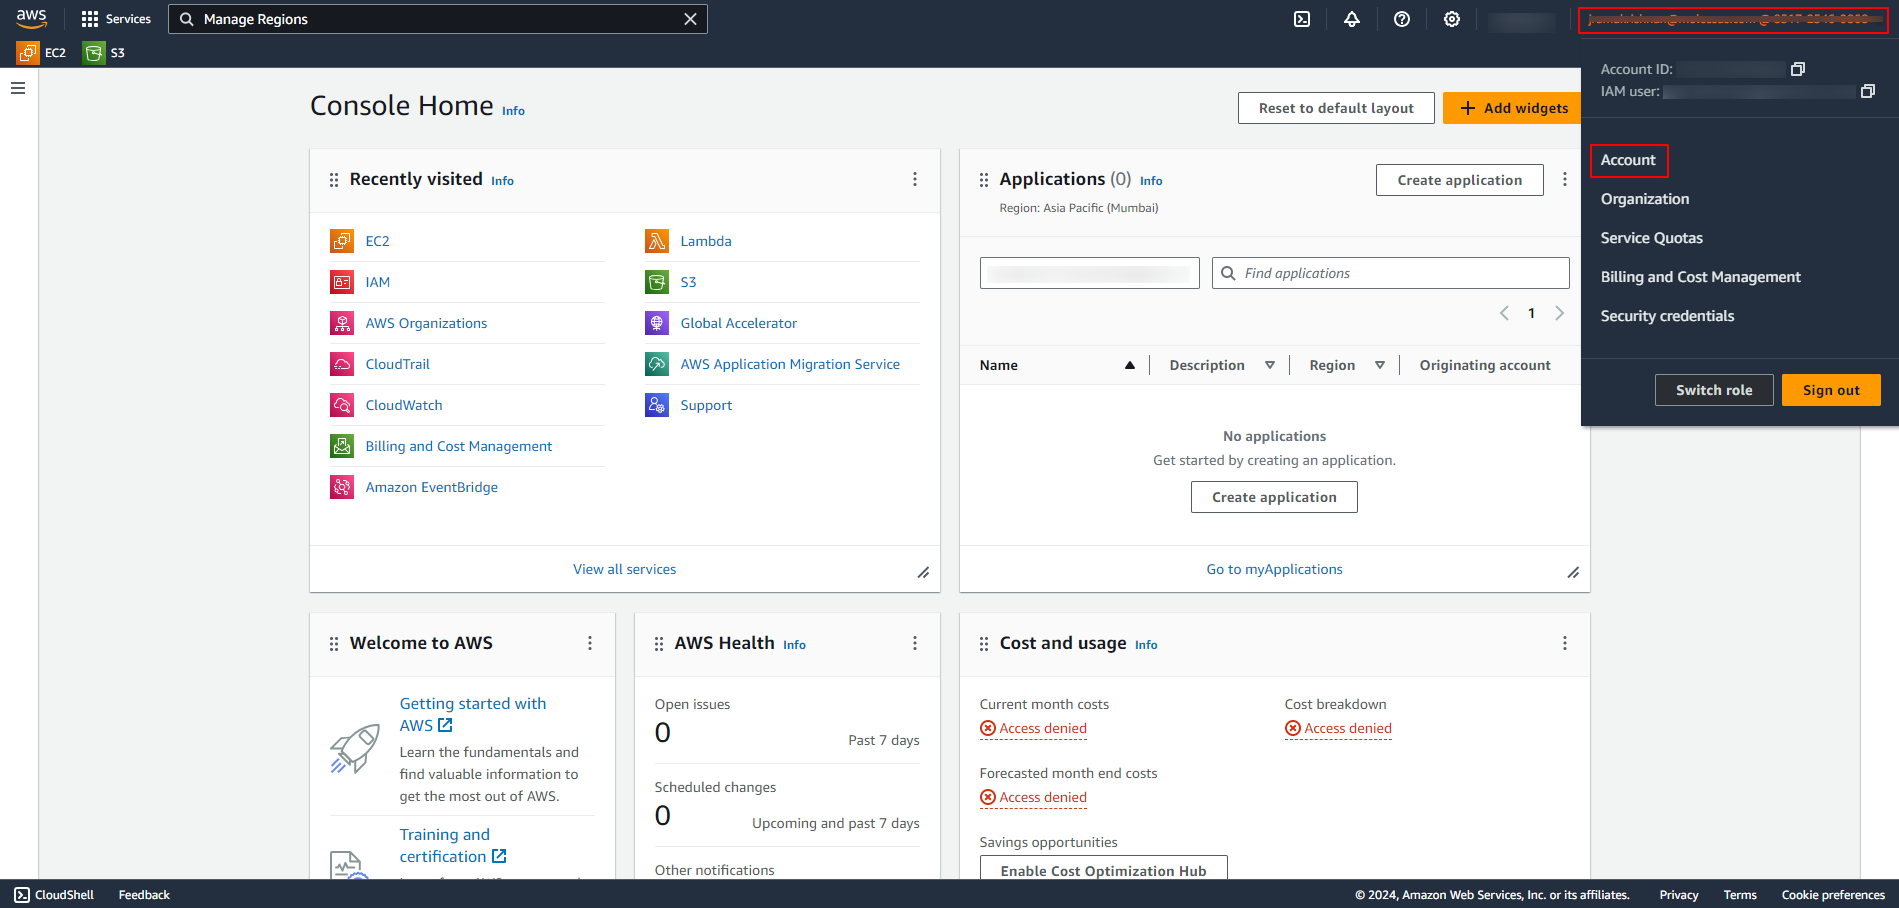
-
In the AWS Regions section, identify either the enabled AWS Regions or the preferred AWS Regions from which AWS S3 data provider logs are to be ingested.
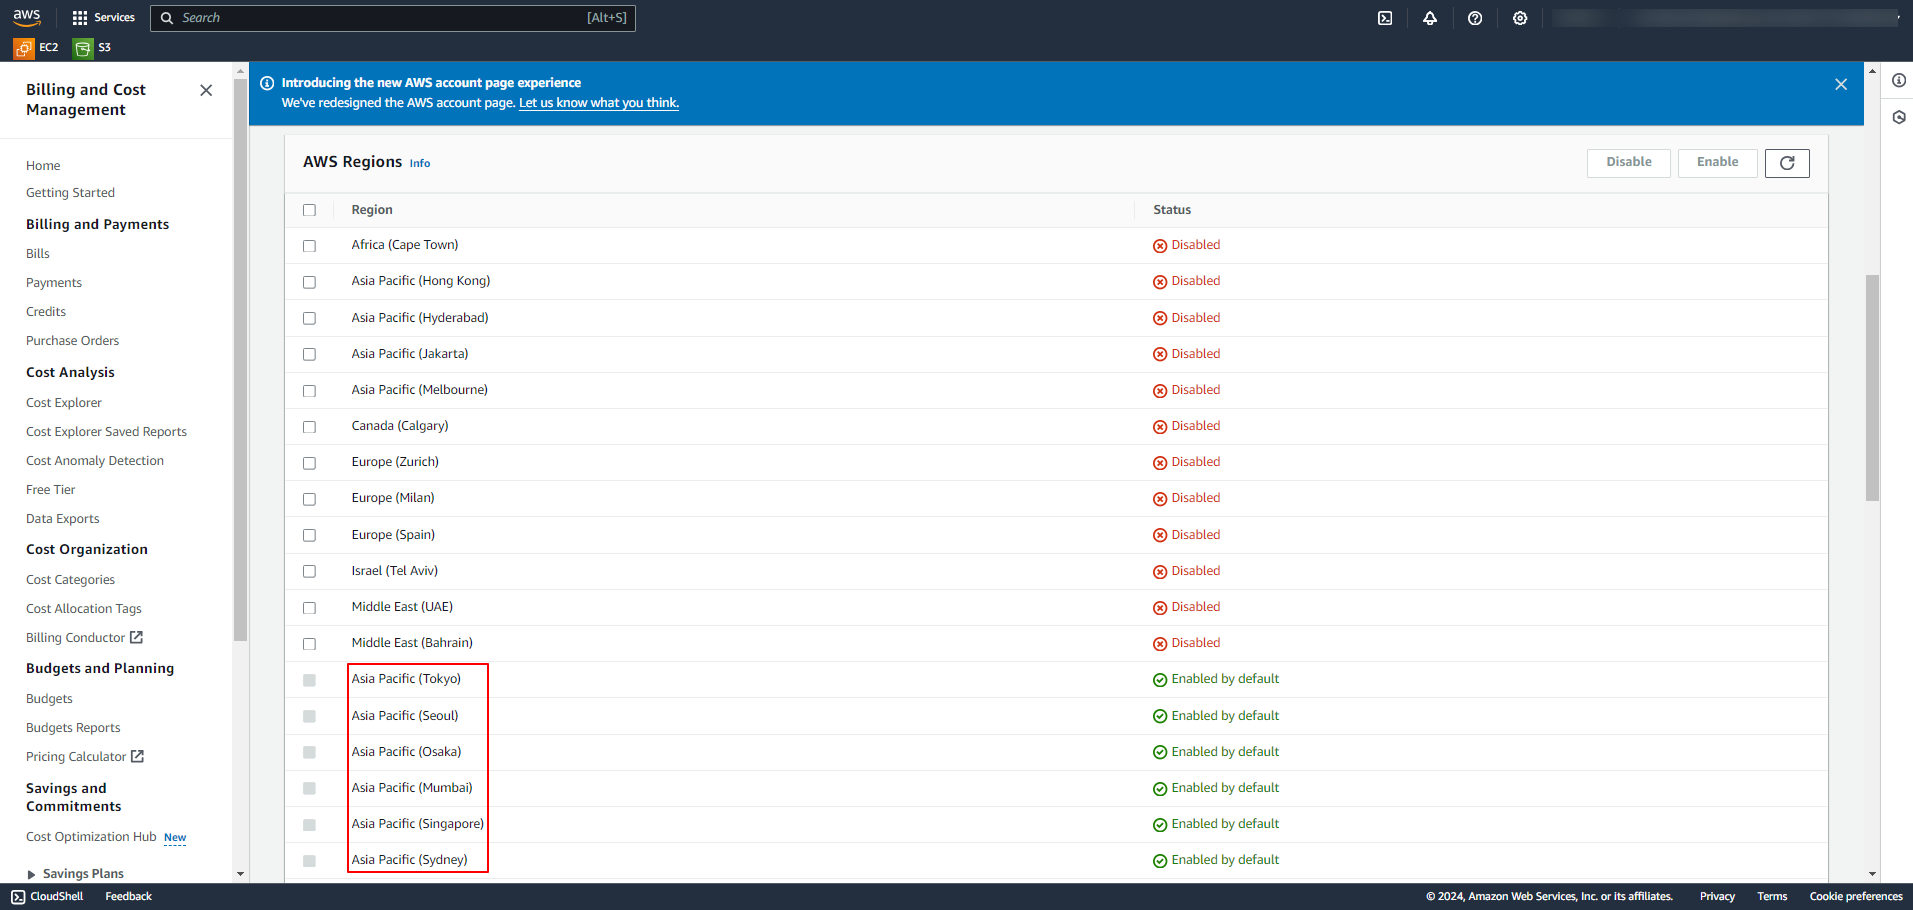
The identified AWS Region(s) are to be configured in Scope Setup: Step 1 for initiating the AWS S3 log ingestion.
Step 5: Determine the Required AWS S3 Bucket
-
Sign in to the AWS Management Console.
-
In the Home Page search box, search for S3 and click on S3 from the search results.
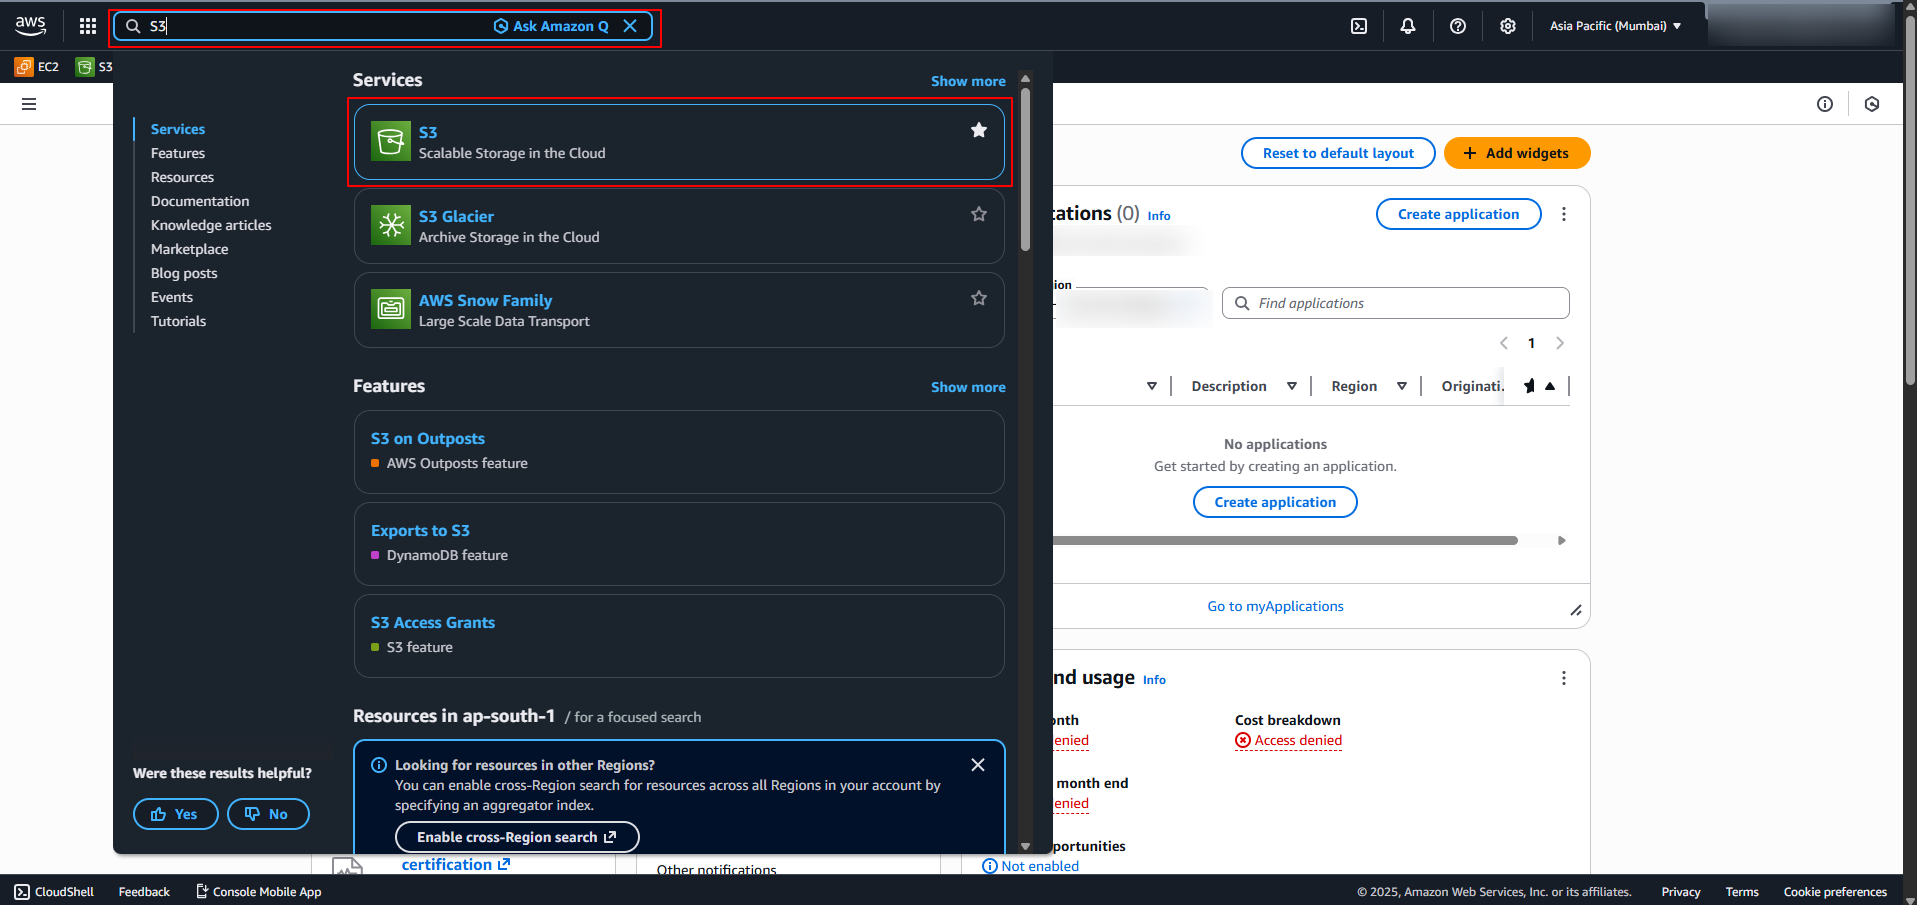
-
In the S3 General Purpose Buckets section, identify the required bucket from which events are to be ingested.
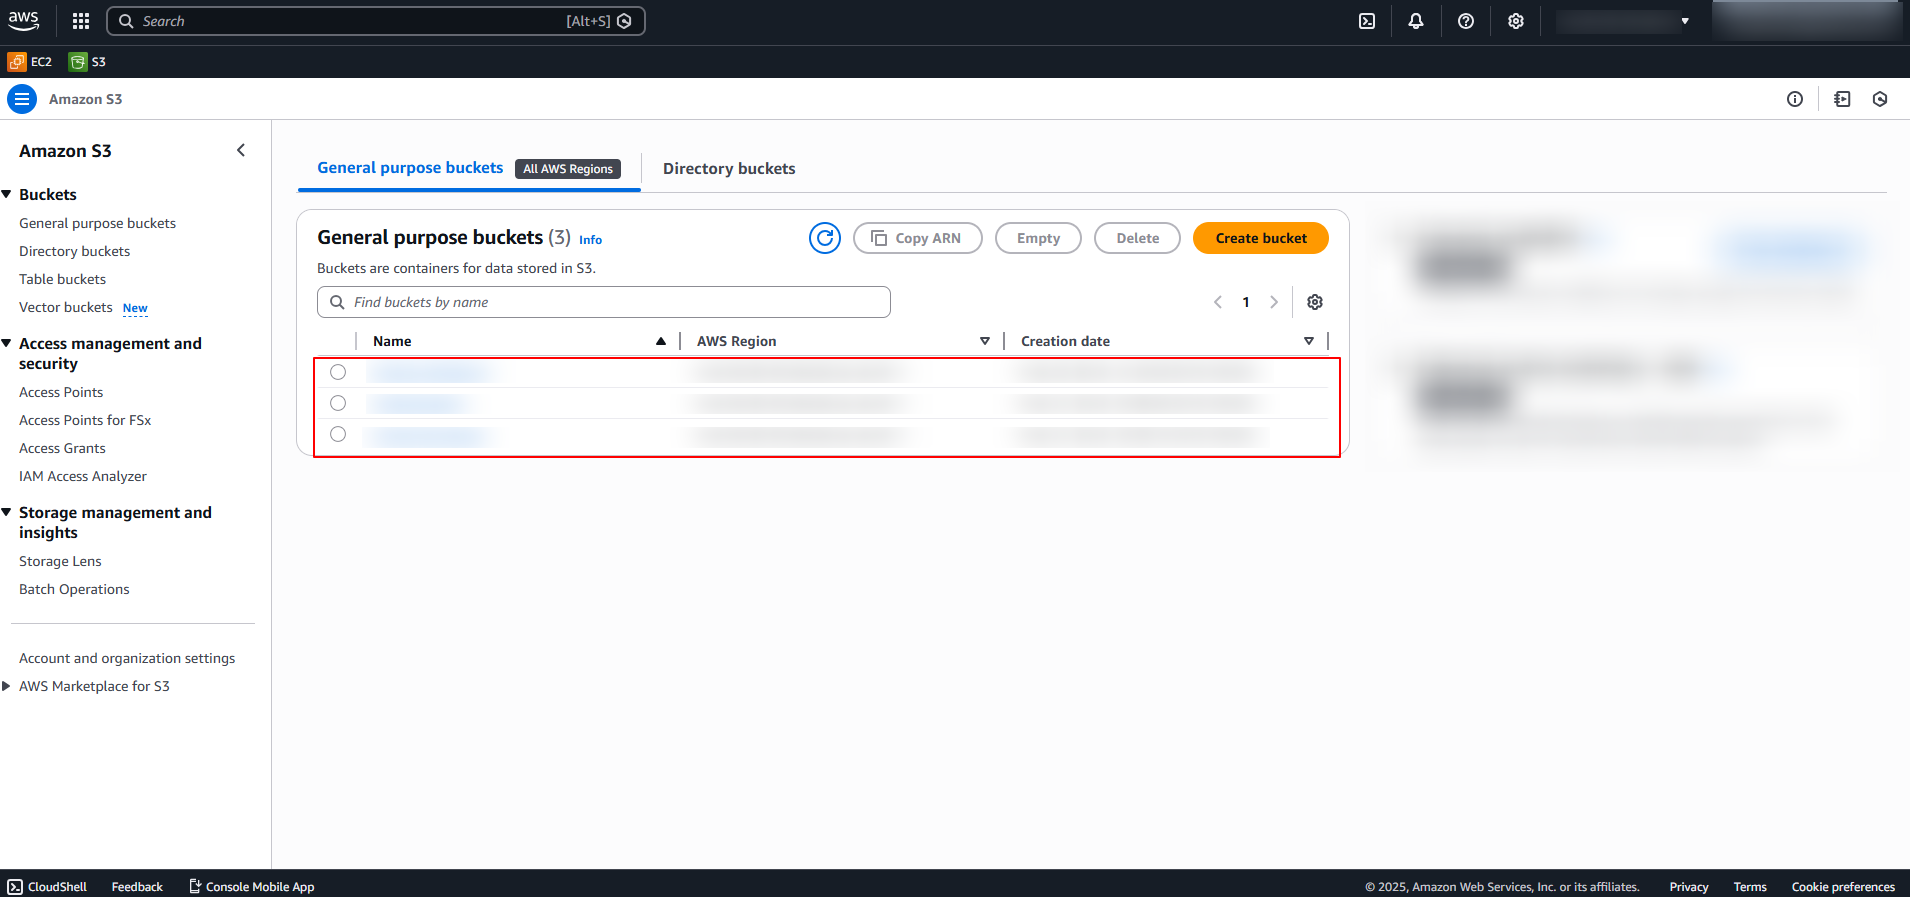
The Bucket Name is to be configured in Scope Setup: Step 1 for initiating the AWS S3 log ingestion.
Step 6: Configure Supported Data Providers to Export Logs to AWS S3
Refer to the source-specific documentation below for detailed configuration steps for each supported data provider.
- Export Cisco Umbrella Logs
- Export AWS GuardDuty Logs
- Export DNS Filter Logs
- Export AWS CloudTrail Logs
Scope Setup
Step 1: AWS S3 Cloud Source Registration in the Scope Application
Once the credentials and required information are gathered, they must be configured in the Scope application to establish the connection and enable data ingestion from the AWS S3 environment.
In the Scope application, to register an AWS S3 cloud source, navigate to the cloud source registration page
-
Log into the Scope application

-
Select the required Organization from the Organization dropdown

-
Navigate to the side menu -> Administration

-
Navigate to the Cloud sources tab

-
Click on the +Add Source button

-
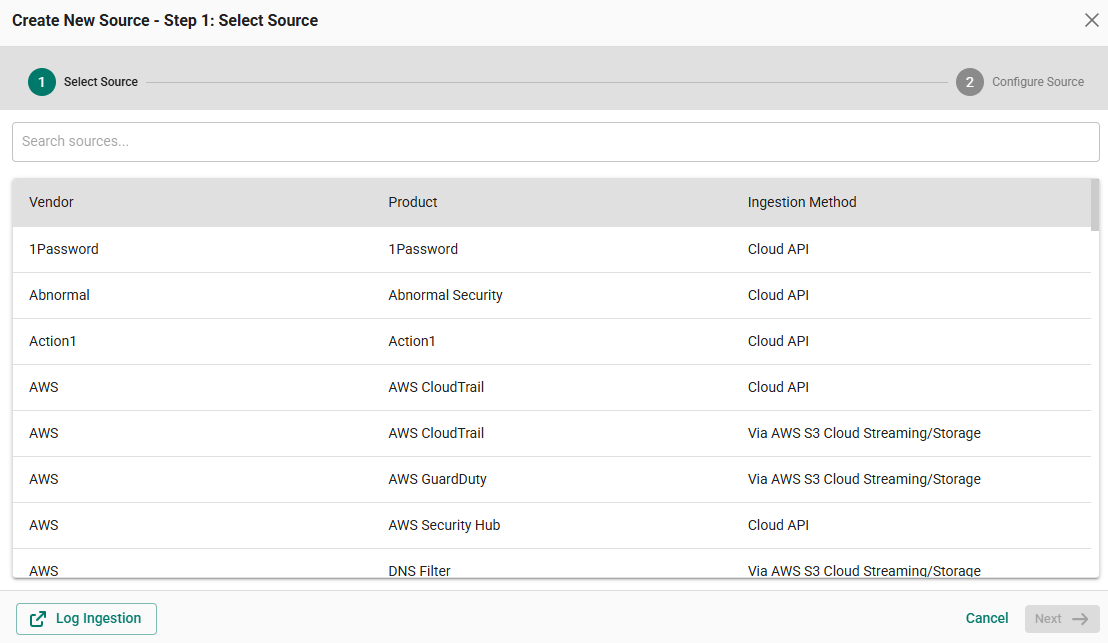
In the Step 1 of the Add Source wizard, search for AWS S3 or any of the data providers, select the desired data provider and click Next.
-
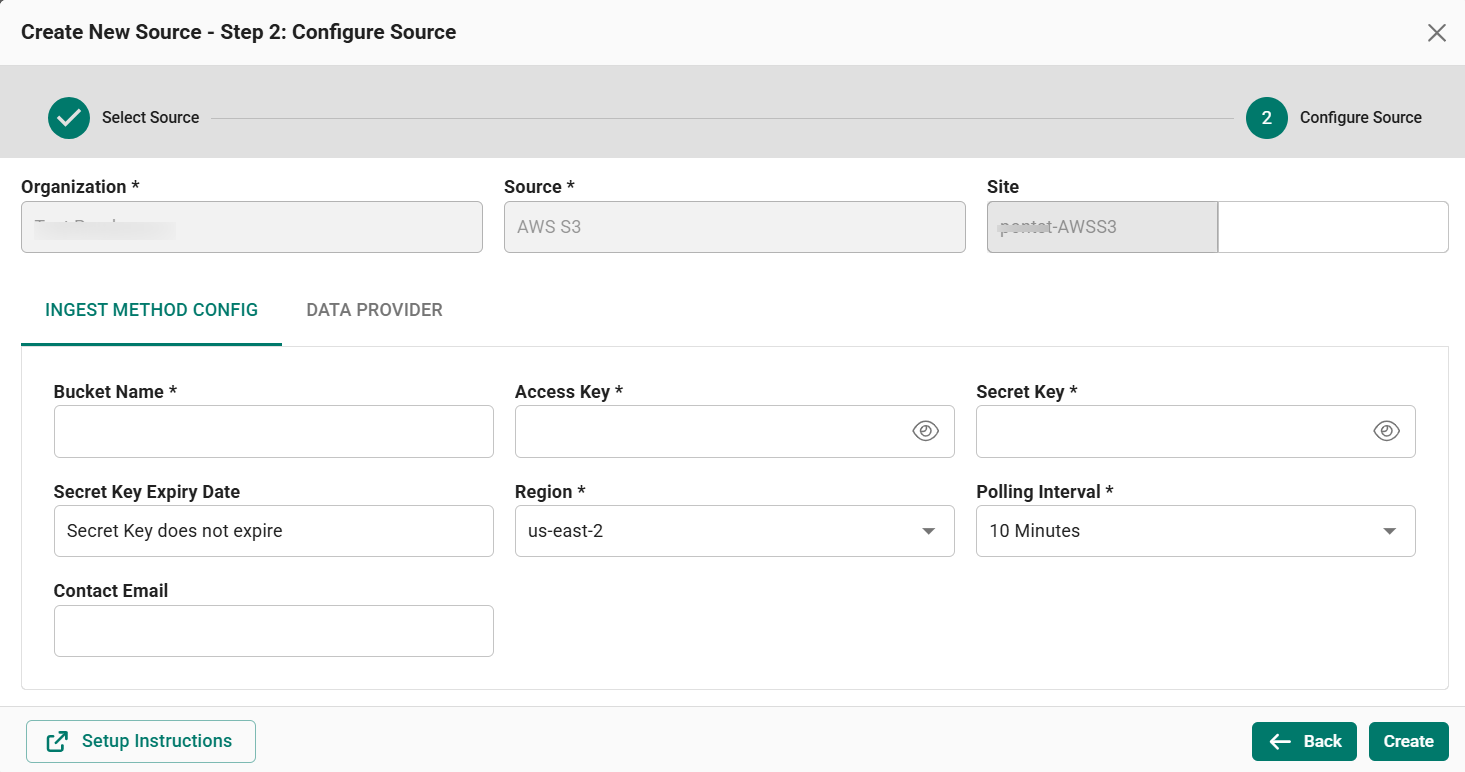
In the Step 2 of the Add Source wizard, configure the other parameters across the two tabs as described below.
Input Method Config Tab
Provide the following parameters in the Input Method Config tab –
-
Site: The user defined name for the AWS S3 cloud source.
-
Bucket Name: The bucket name determined in Step 5.
-
Access Key: The Access Key generated in Step 3.
-
Secret Access Key: The Secret Access Key generated in Step 3.
-
Region: Select the Region(s) from which AWS S3 events are ingested (determined in Step 4).
-
Polling Interval: The polling interval for making periodic API calls to the AWS S3 SDK. The user can select the time interval from the dropdown.
-
Contact Email: The email address of the person who registers the AWS S3 cloud source in Scope.
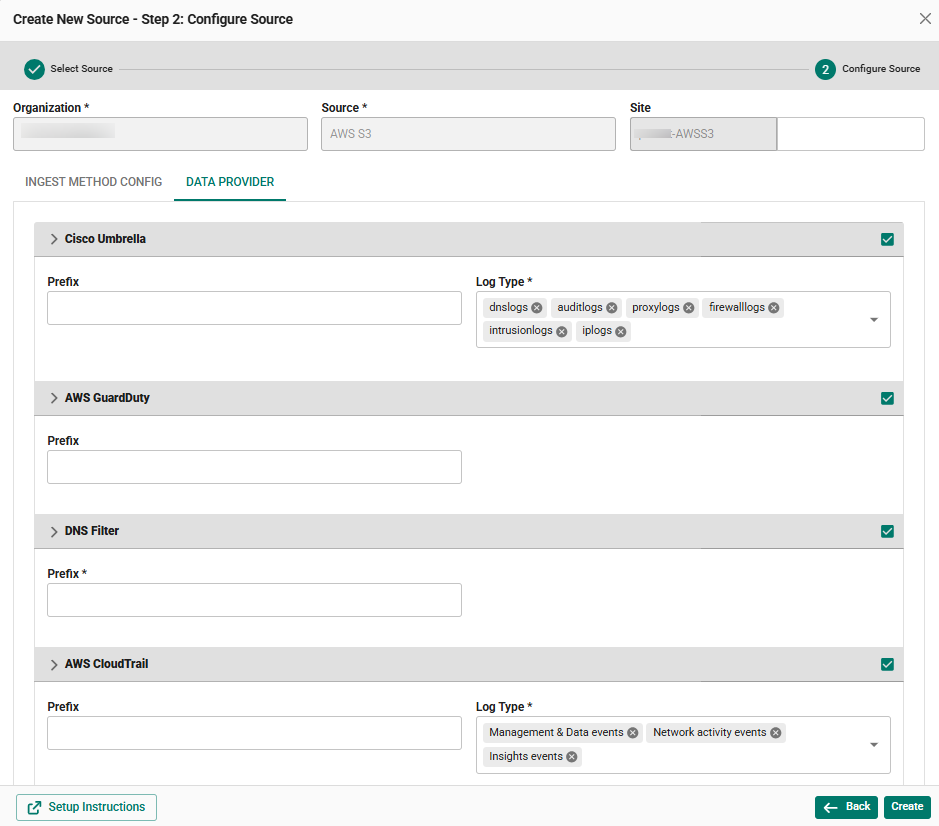
Data Provider Tab
Configure the required data providers in the Data Provider tab. Each data provider has its own accordion section –
Cisco Umbrella
-
Select the Cisco Umbrella checkbox.
-
Prefix: Provide the required prefix.
-
Ingest From: The start date from which the logs should be ingested from the AWS S3 account.
Note: This option is available only at the time of registering the data provider. The user will not be able to edit it later.
-
Log Type: Select the log types from the dropdown. By default, all supported log types are selected.
AWS GuardDuty
-
Select the AWS GuardDuty checkbox.
-
Prefix: Provide the required prefix.
-
Ingest From: The start date from which the logs should be ingested from the AWS S3 account.
Note: This option is available only at the time of registering the data provider. The user will not be able to edit it later.
DNS Filter
-
Select the DNS Filter checkbox.
-
Prefix: Provide the required prefix.
-
Ingest From: The start date from which the logs should be ingested from the AWS S3 account.
Note: This option is available only at the time of registering the data provider. The user will not be able to edit it later.
AWS CloudTrail
-
Select the AWS CloudTrail checkbox.
-
Prefix: Provide the required prefix.
-
Ingest From: The start date from which the logs should be ingested from the AWS S3 account.
Note: This option is available only at the time of registering the data provider. The user will not be able to edit it later.
-
Log Type: Select the log types from the dropdown. By default, all supported log types are selected.
Once the required connection parameters are entered, the AWS S3 registration is complete in Scope and is ready for ingestion of AWS S3 logs.