Okta
Overview
Configuring a cloud source in Scope is a two-step process.
-
Generating Okta API credentials in the Okta Admin Console. Please refer to Section 1 – Okta Setup
-
Setting up the Okta cloud source in the Scope application. Please refer to Section 2 – Scope Setup
Okta Setup
To get started, you’ll need to generate the following credentials in the Okta Admin Console –
- Client ID
- Private Key (RSA key file)
- Okta Domain (Base URL)
Step 1: Create an API Services Application in Okta
-
Log into the Okta Admin Console as a user with administrative privileges (super admin role).
-
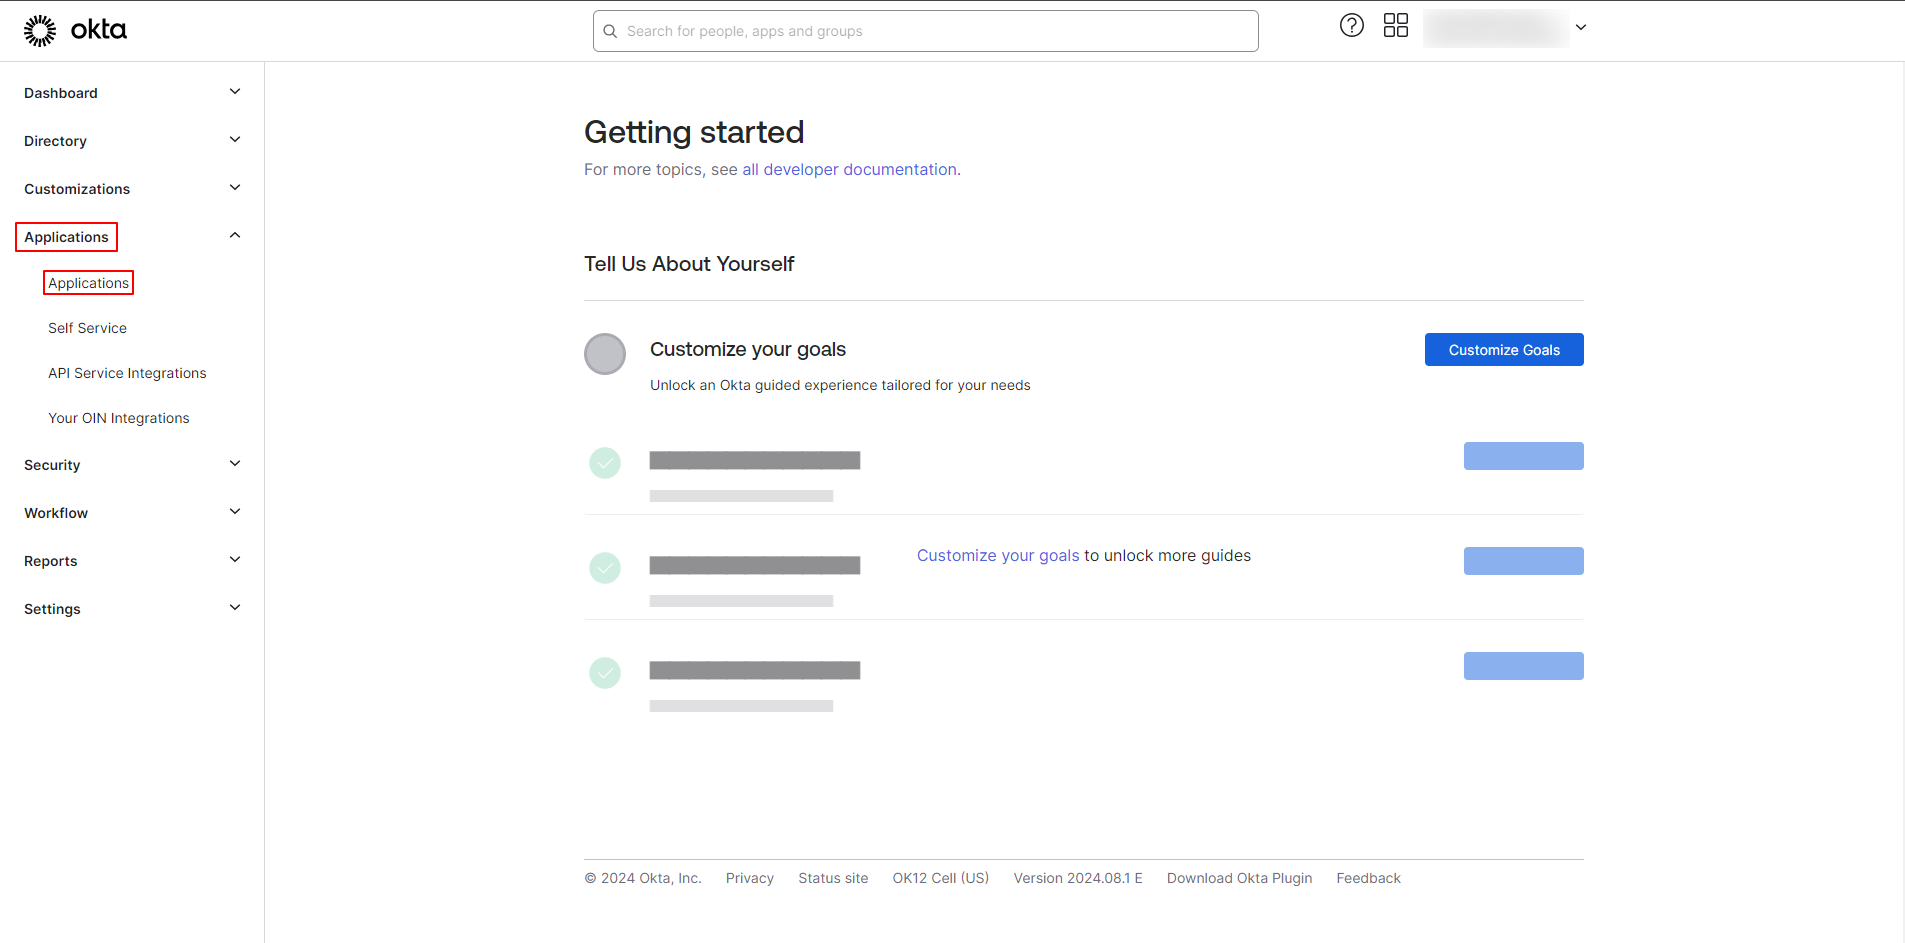
In the Side menu, Navigate to Applications -> Applications.
-
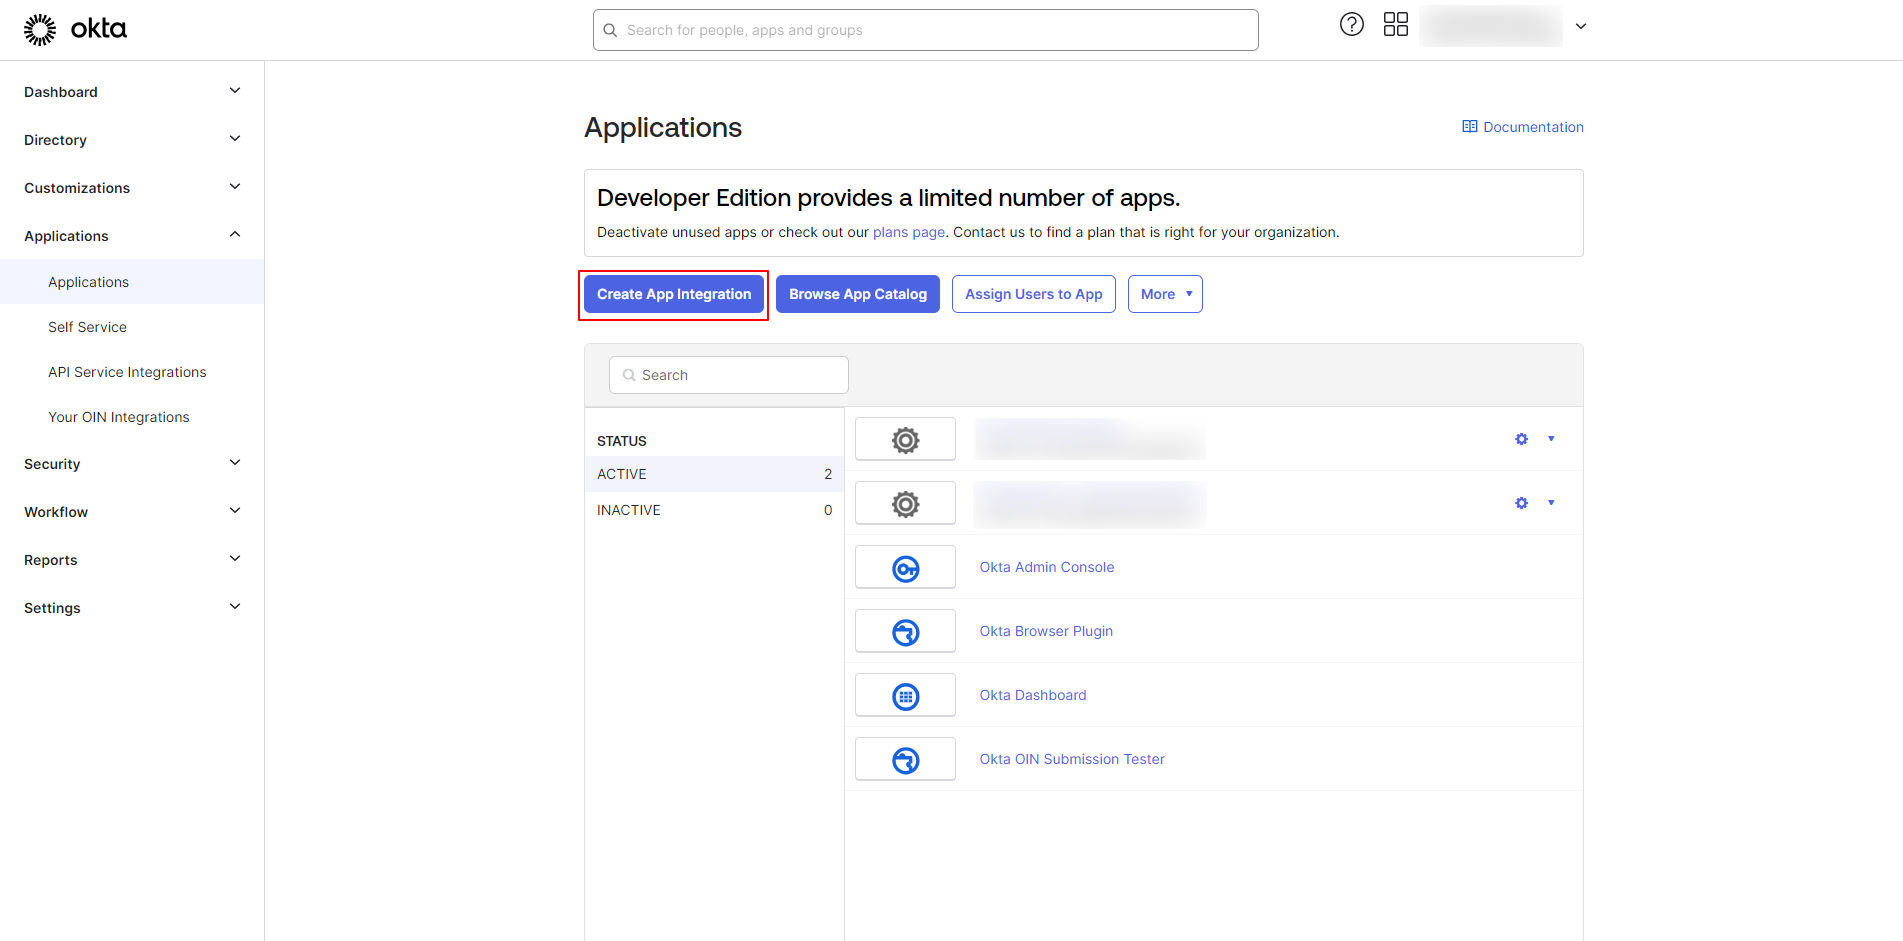
Click Create App Integration.
-
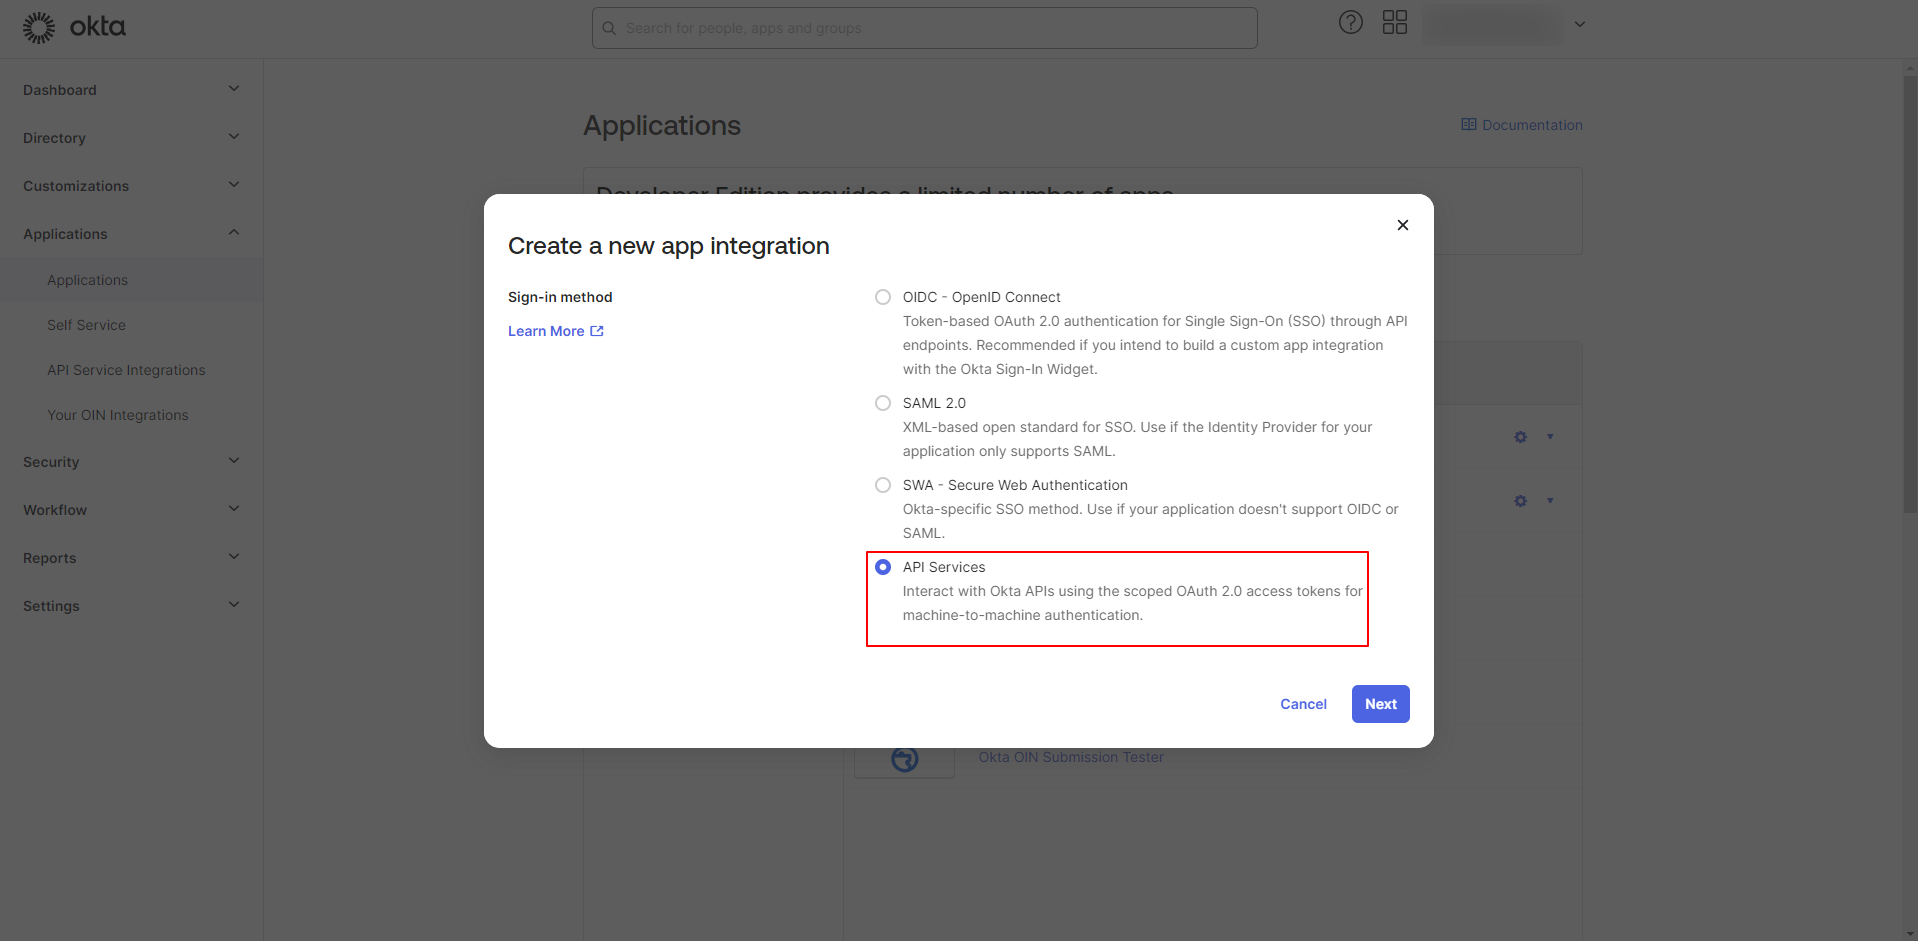
Select API Services as the sign-in method and click Next.
-
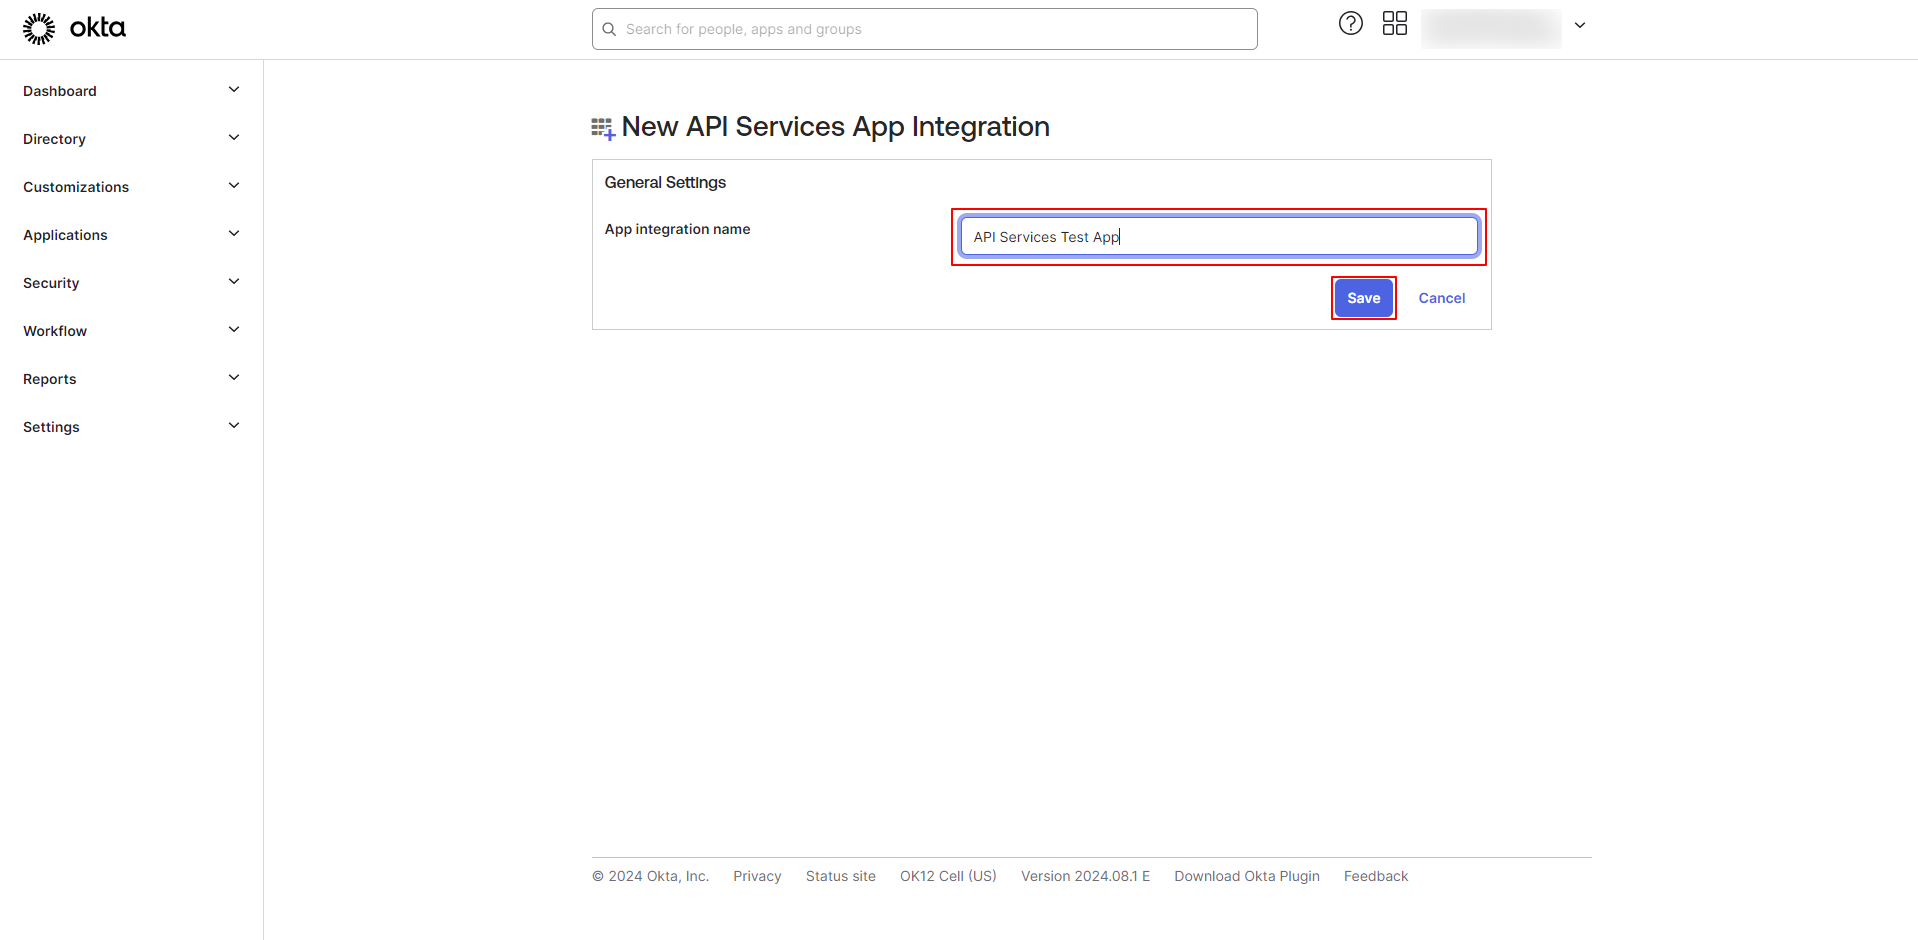
Provide an App integration name (user defined) and click Save.
Step 2: Assign Required Role & Scopes
-
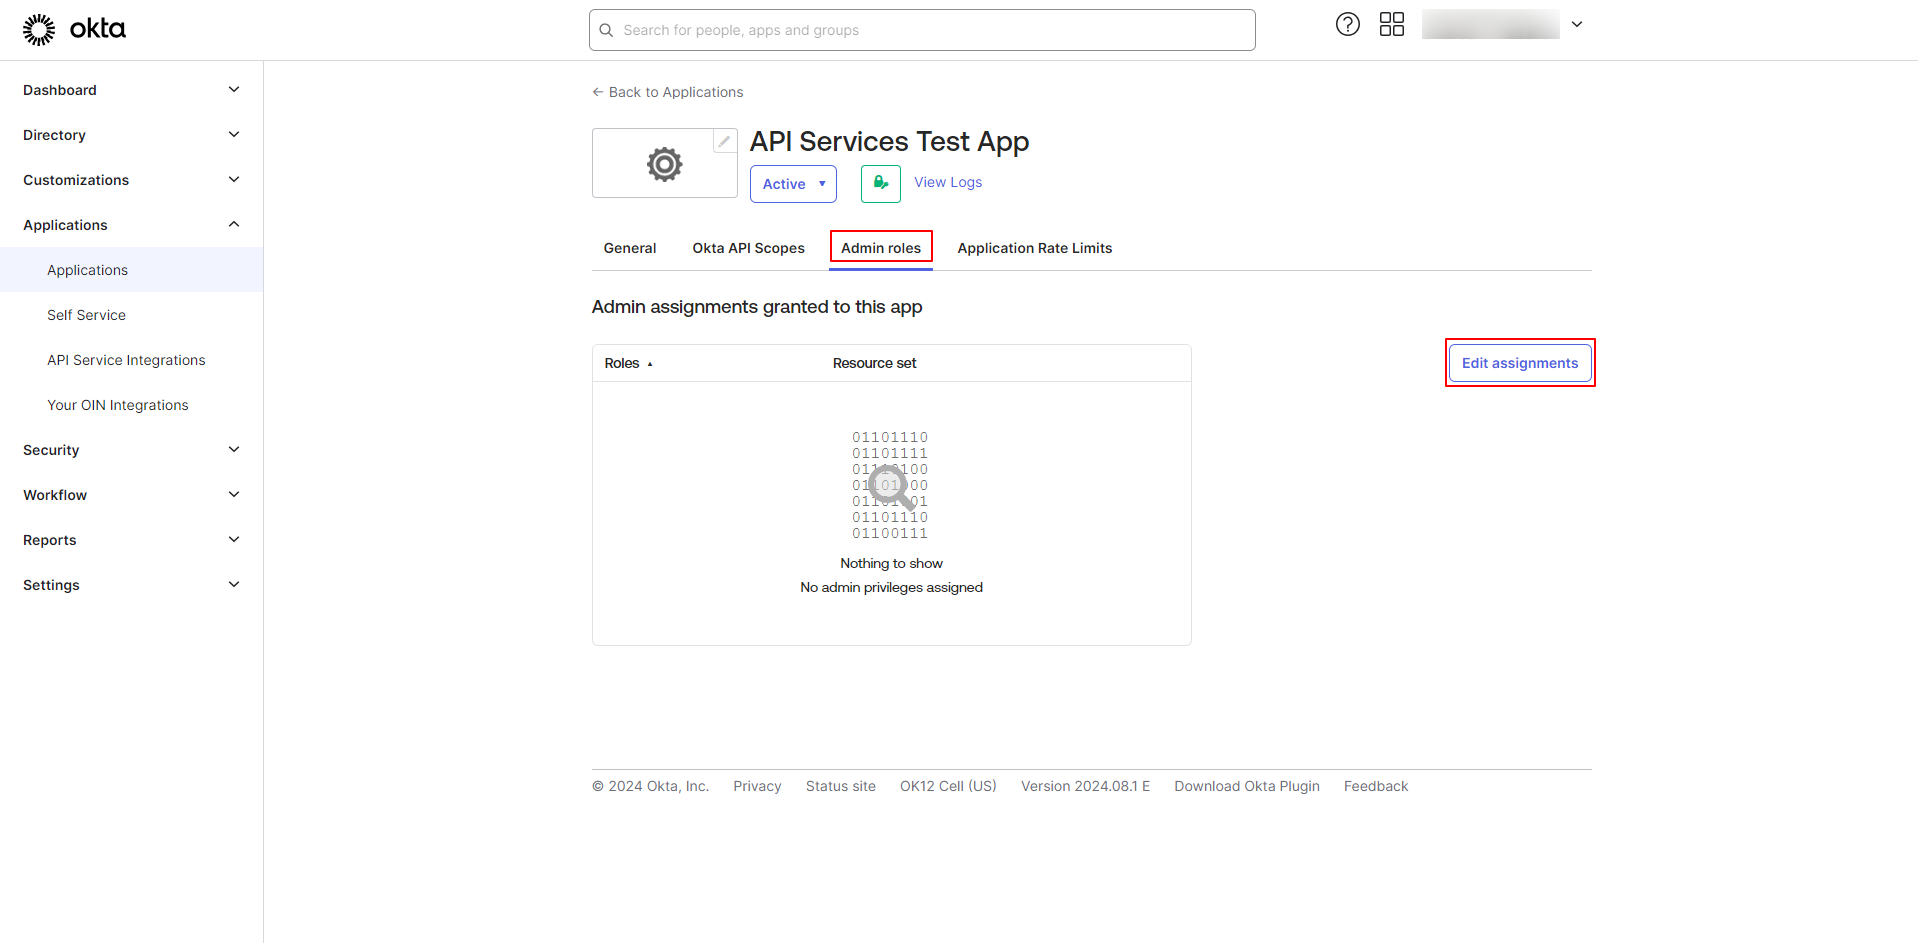
In the created application, Click on Admin roles tab and Click Edit Assignments
-
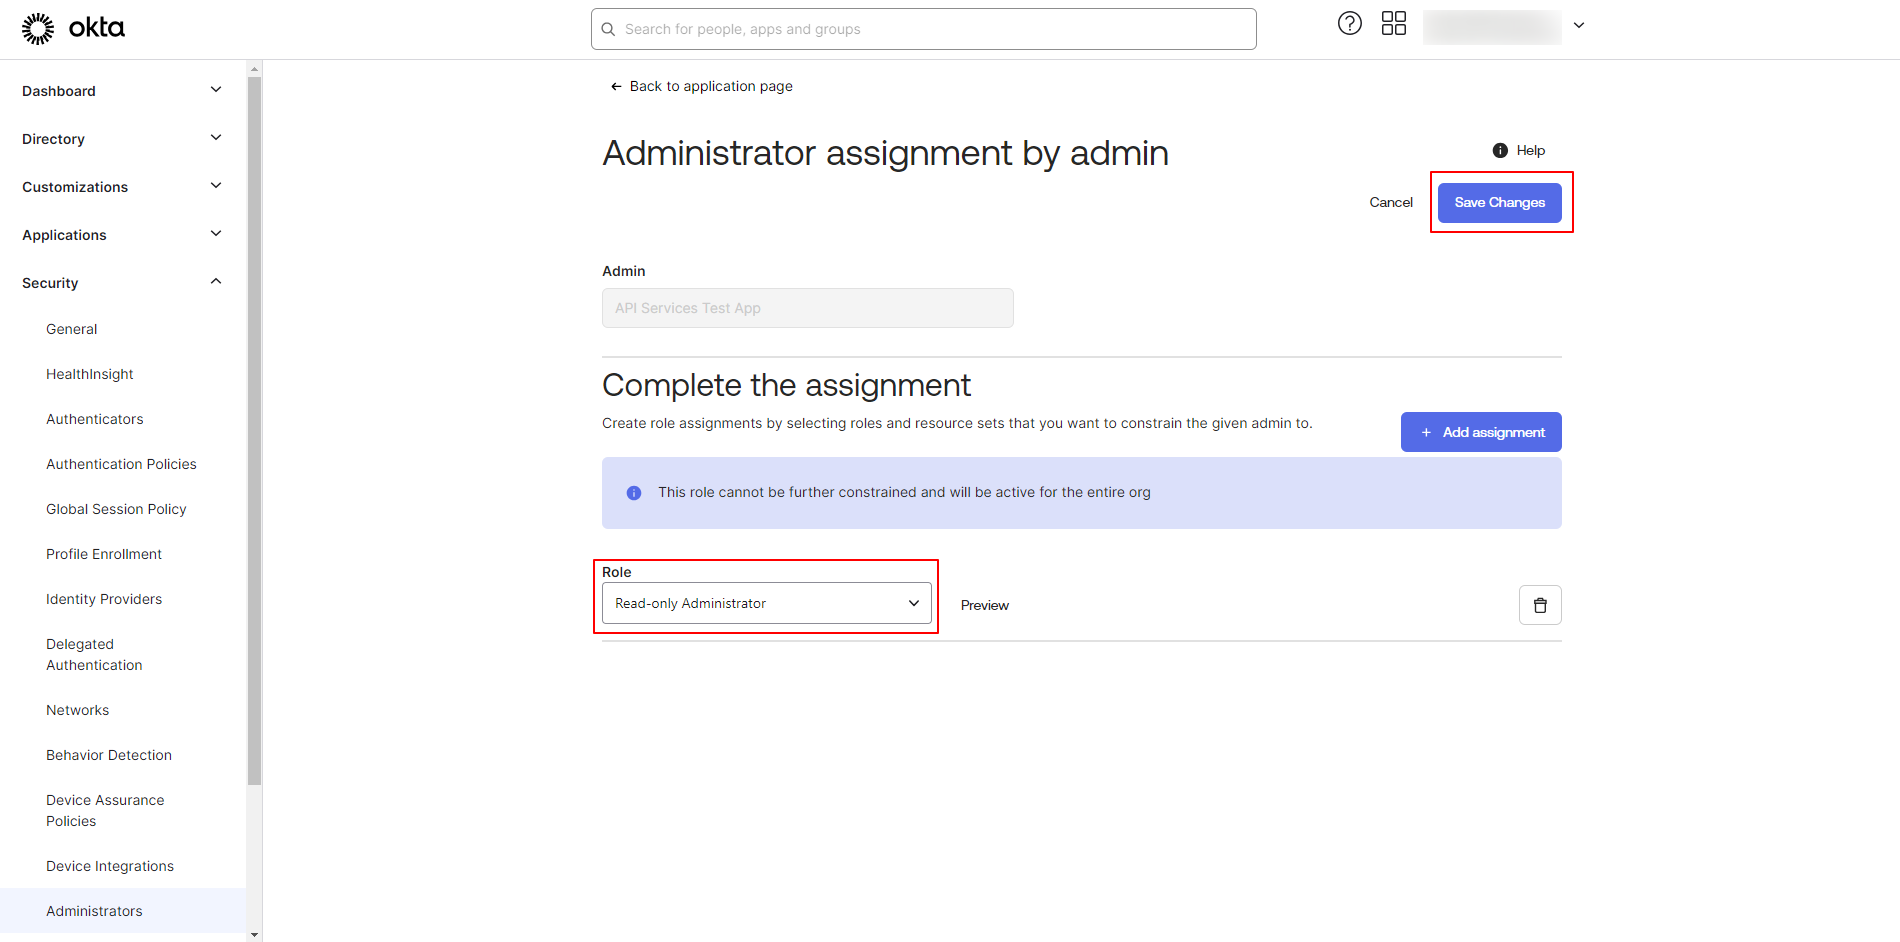
Assign the role with Read-only Administrator permissions to the resource sets that you require and Click on the Save Changes button.
-
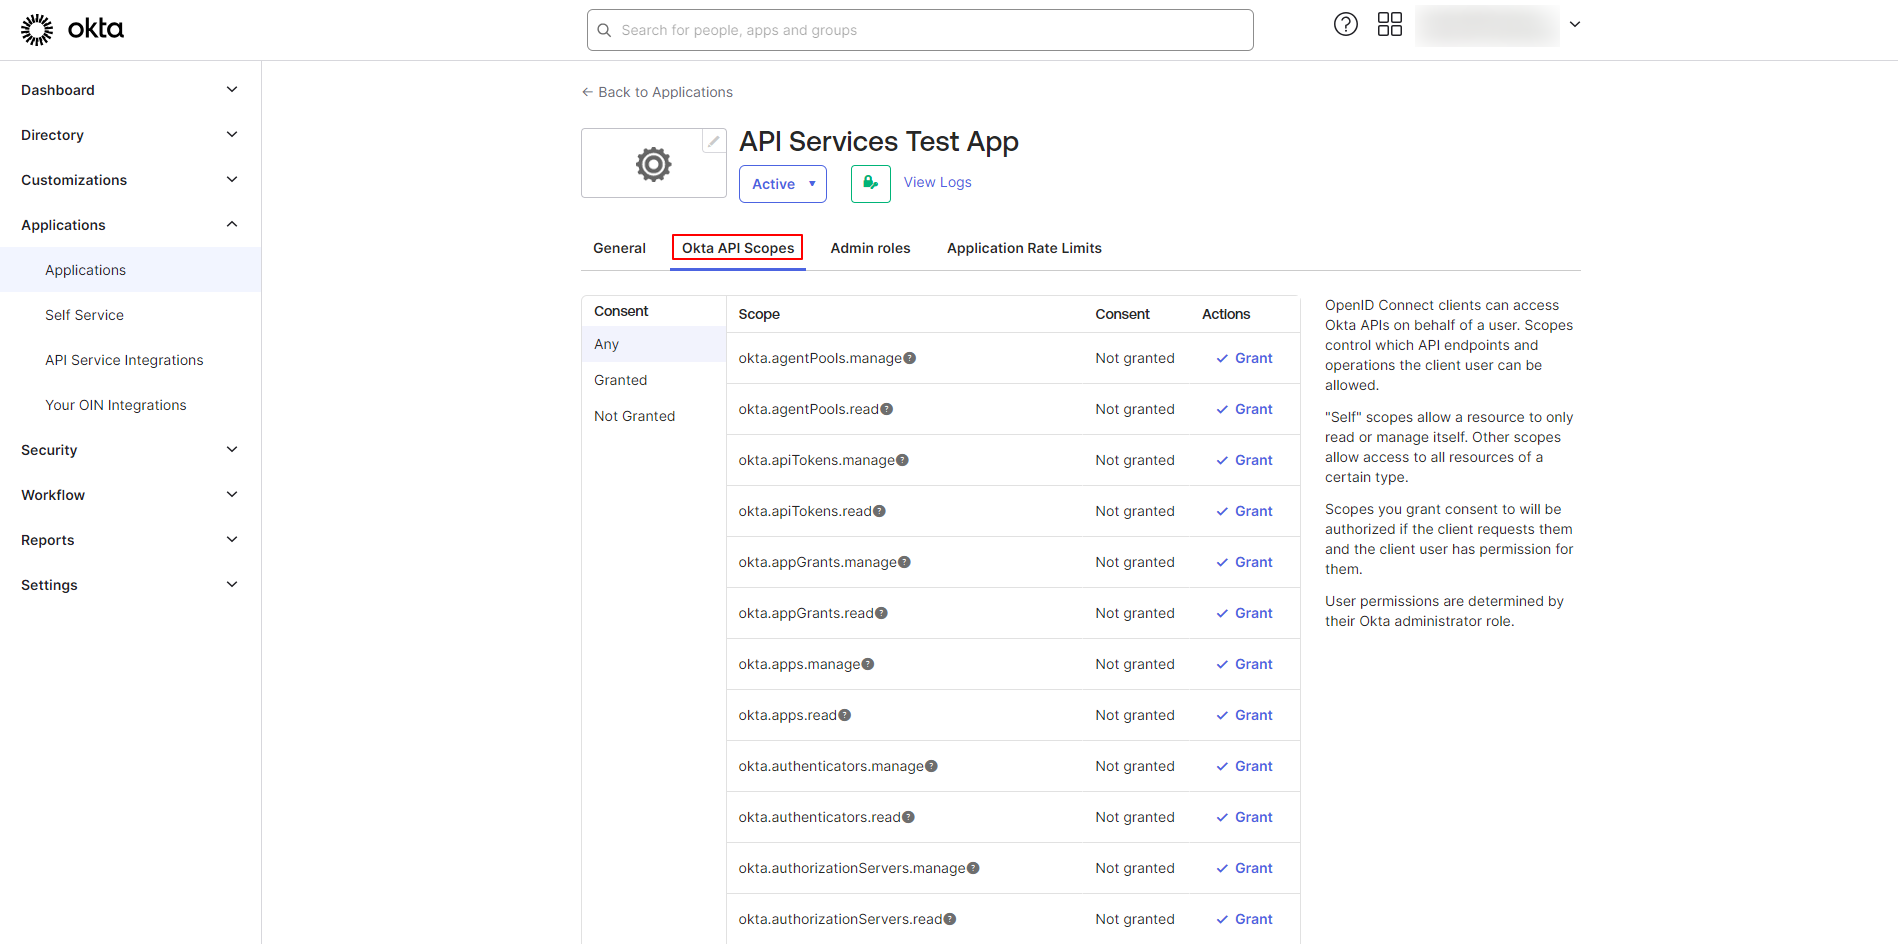
Navigate to the Okta API Scopes tab of the application.
-
Grant the
okta.logs.readscope to allow the application to read Okta System Log events.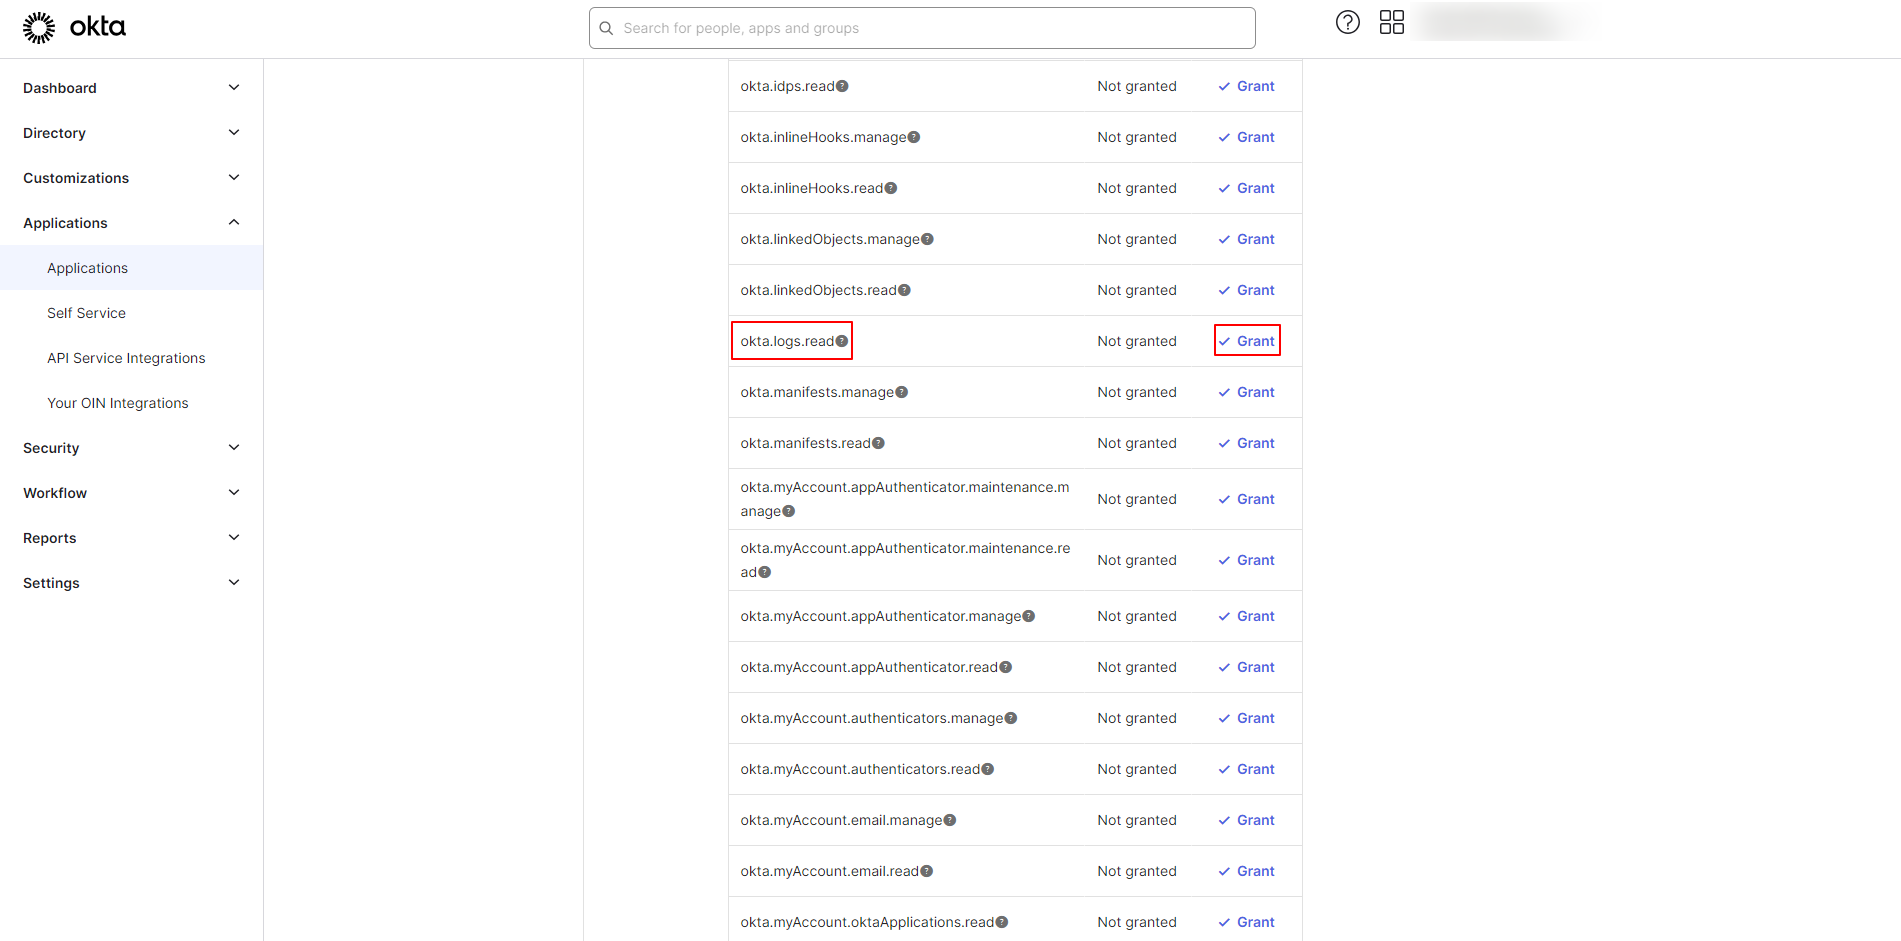
-
Click Grant to confirm.
Step 3: Disable DPoP and Generate a Public/Private Key Pair
-
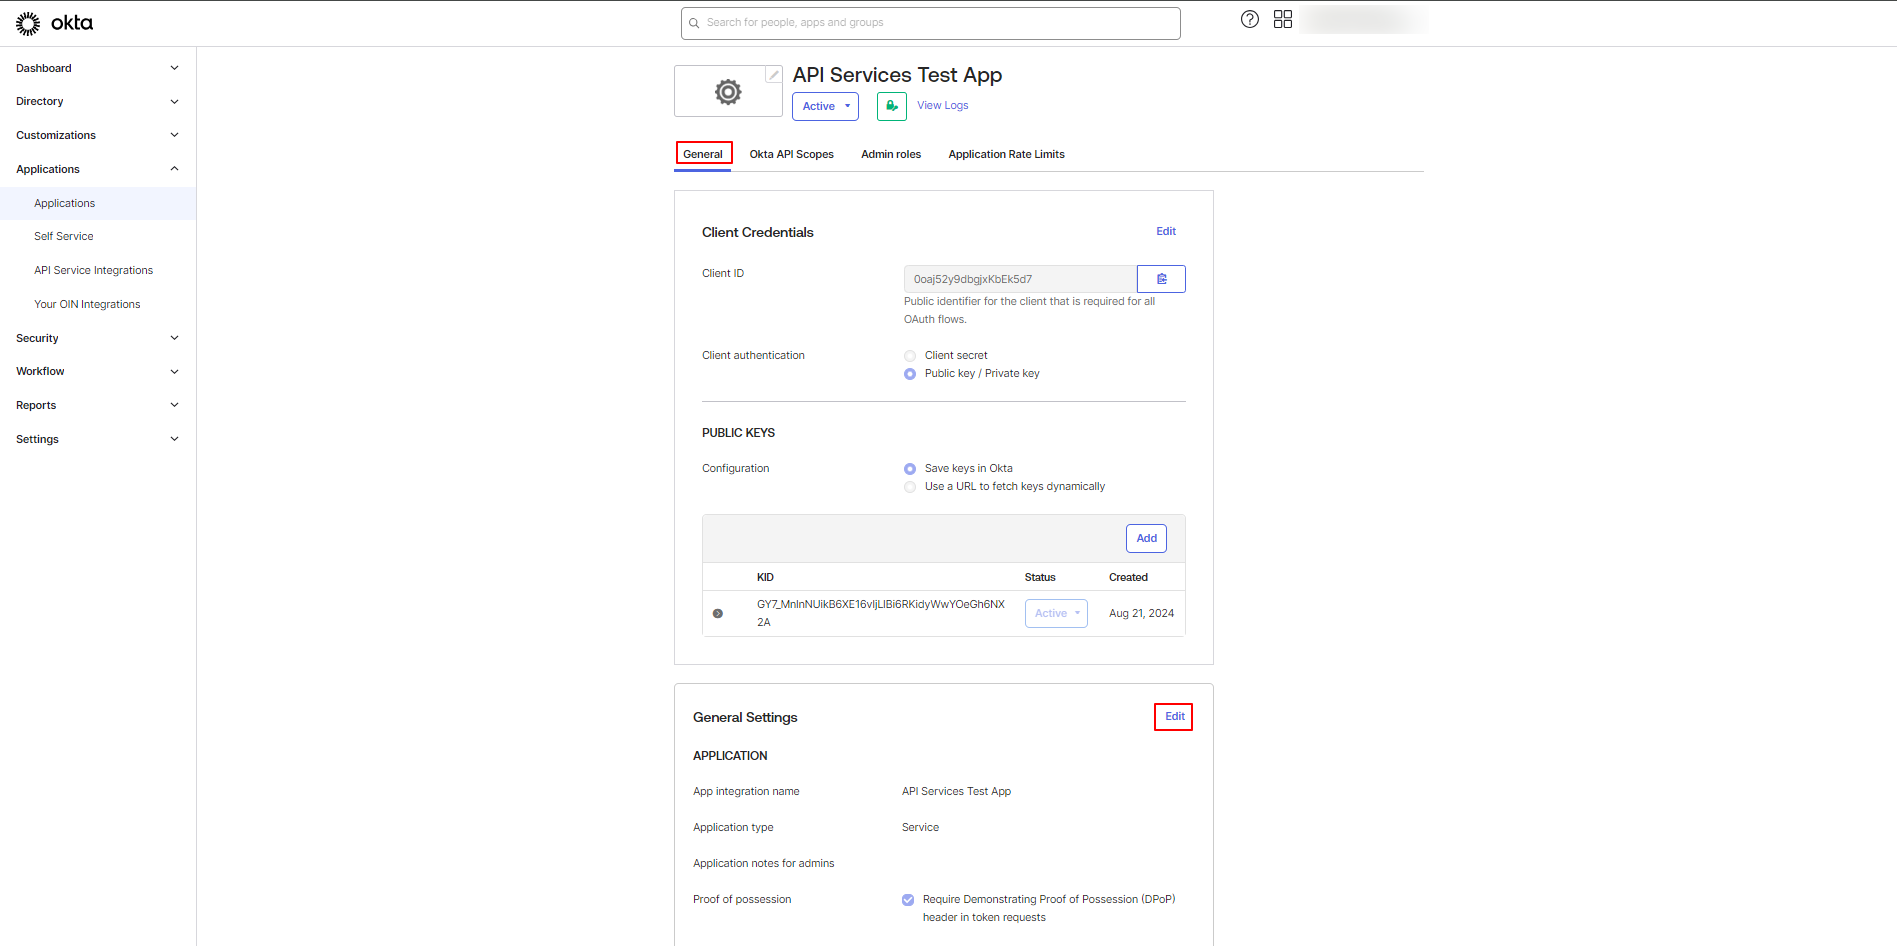
Navigate to the General tab of the newly created application.
-
In the General Settings section, click on Edit.
-
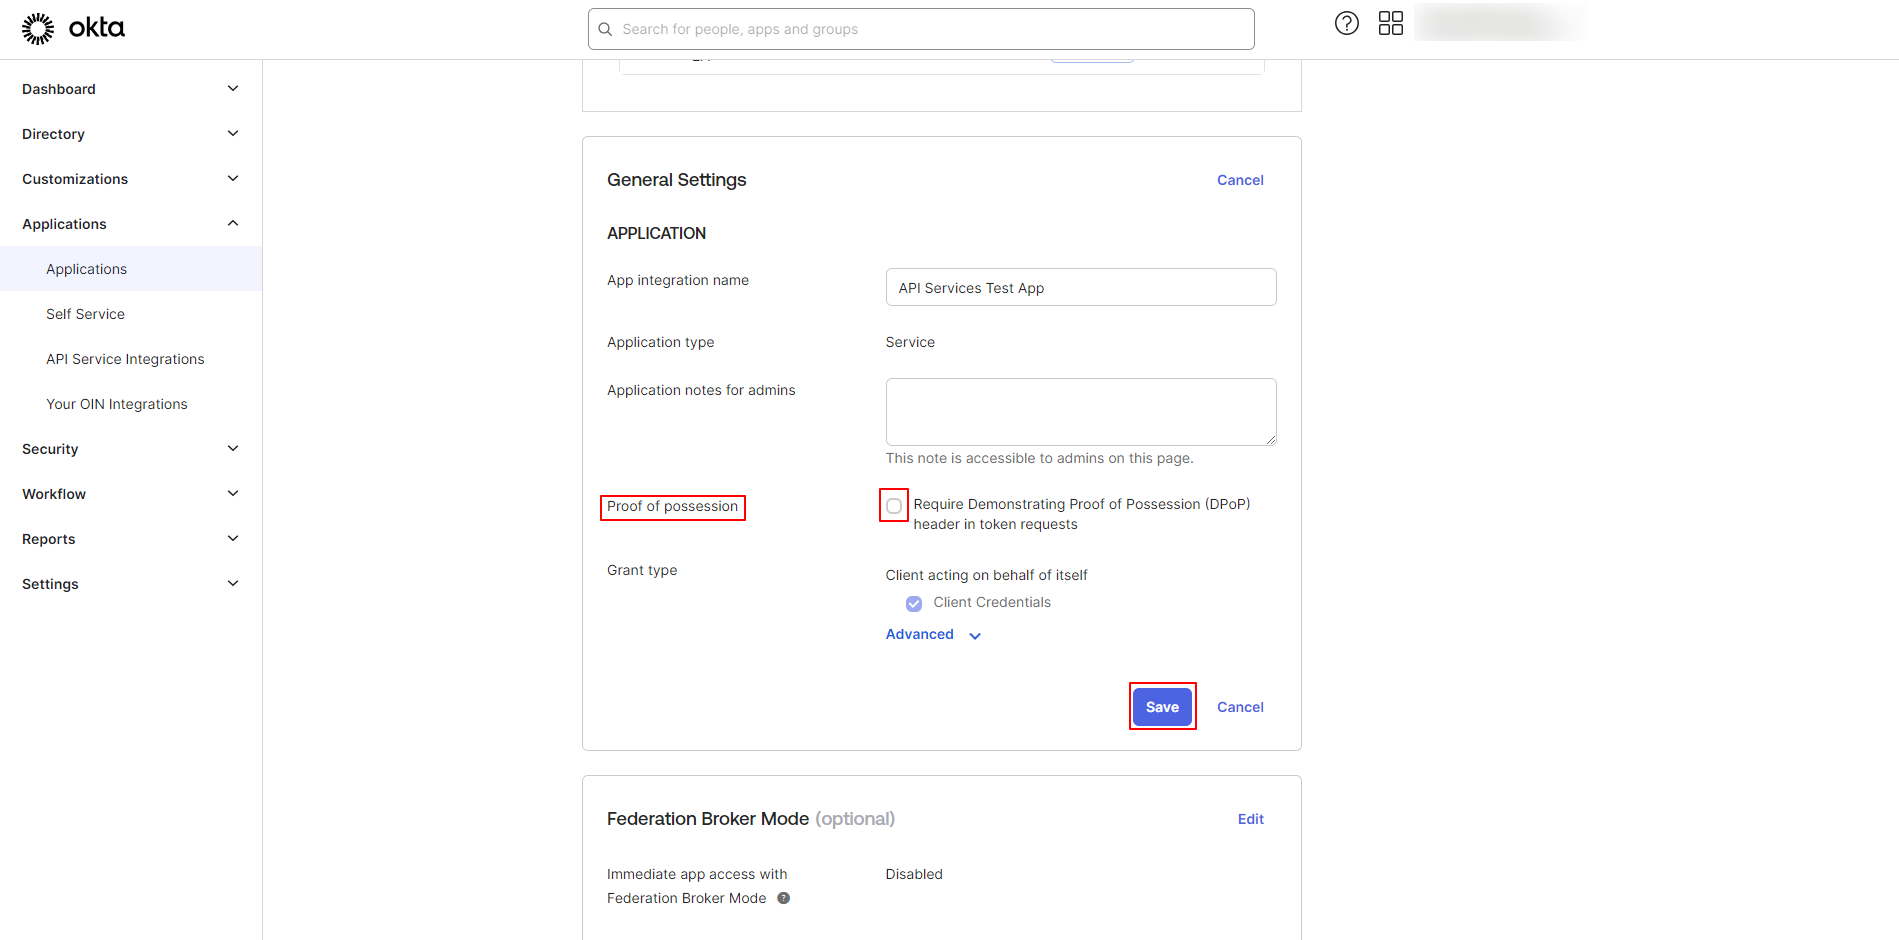
Uncheck the checkbox for Proof of Possession (DPoP) and then Click Save.
-
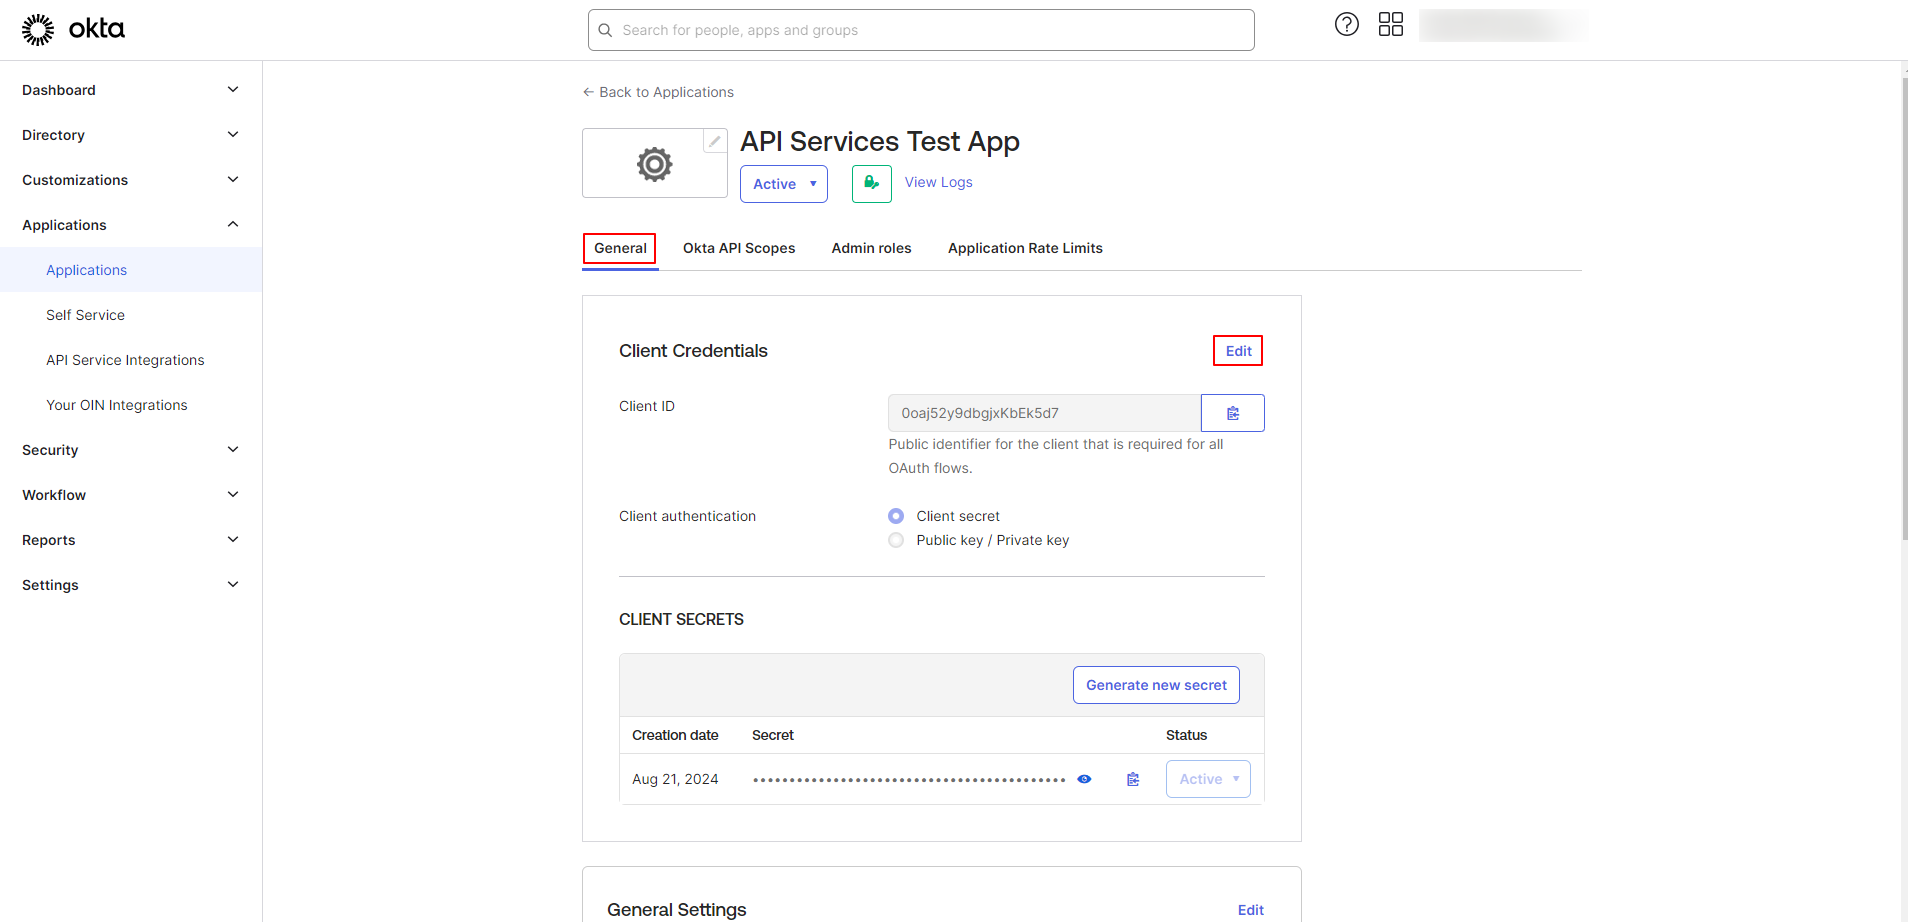
Under the Client Credentials section, click Edit.
-
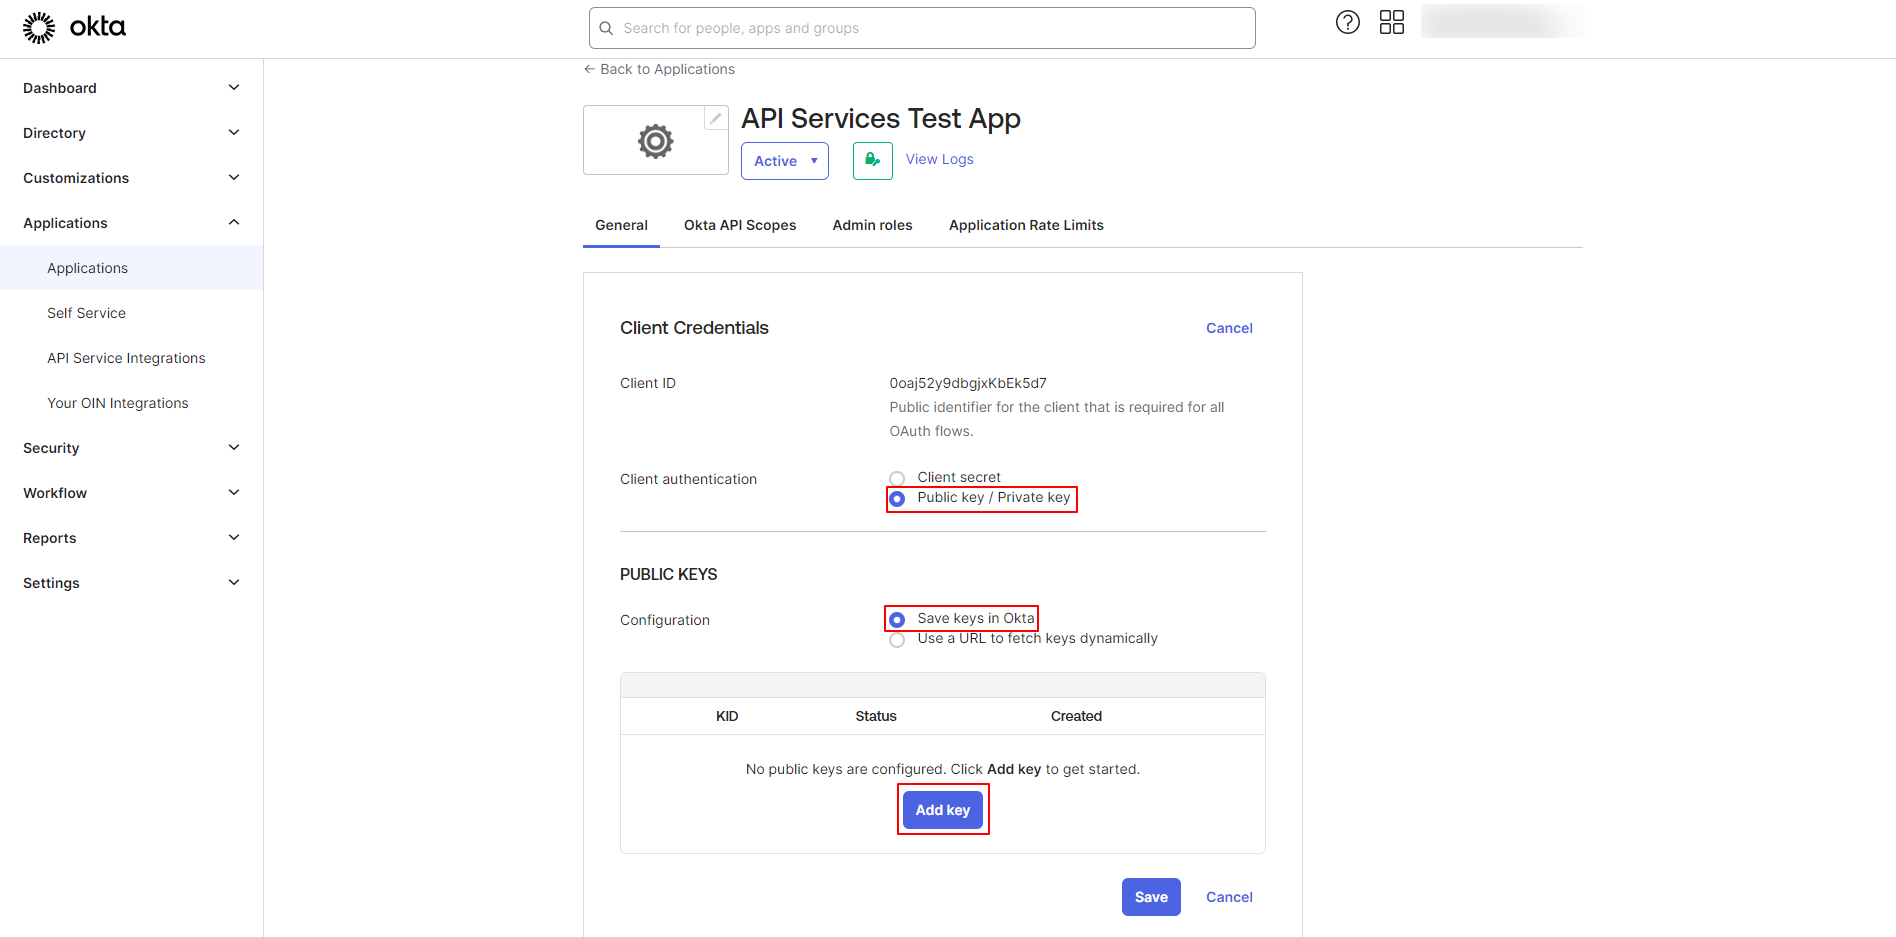
Change the Client authentication method to Public key / Private key & in the PUBLIC KEYS section, select Save Keys to Okta and click Add key.
-
Click Generate new key to have Okta generate a public/private key pair for you.
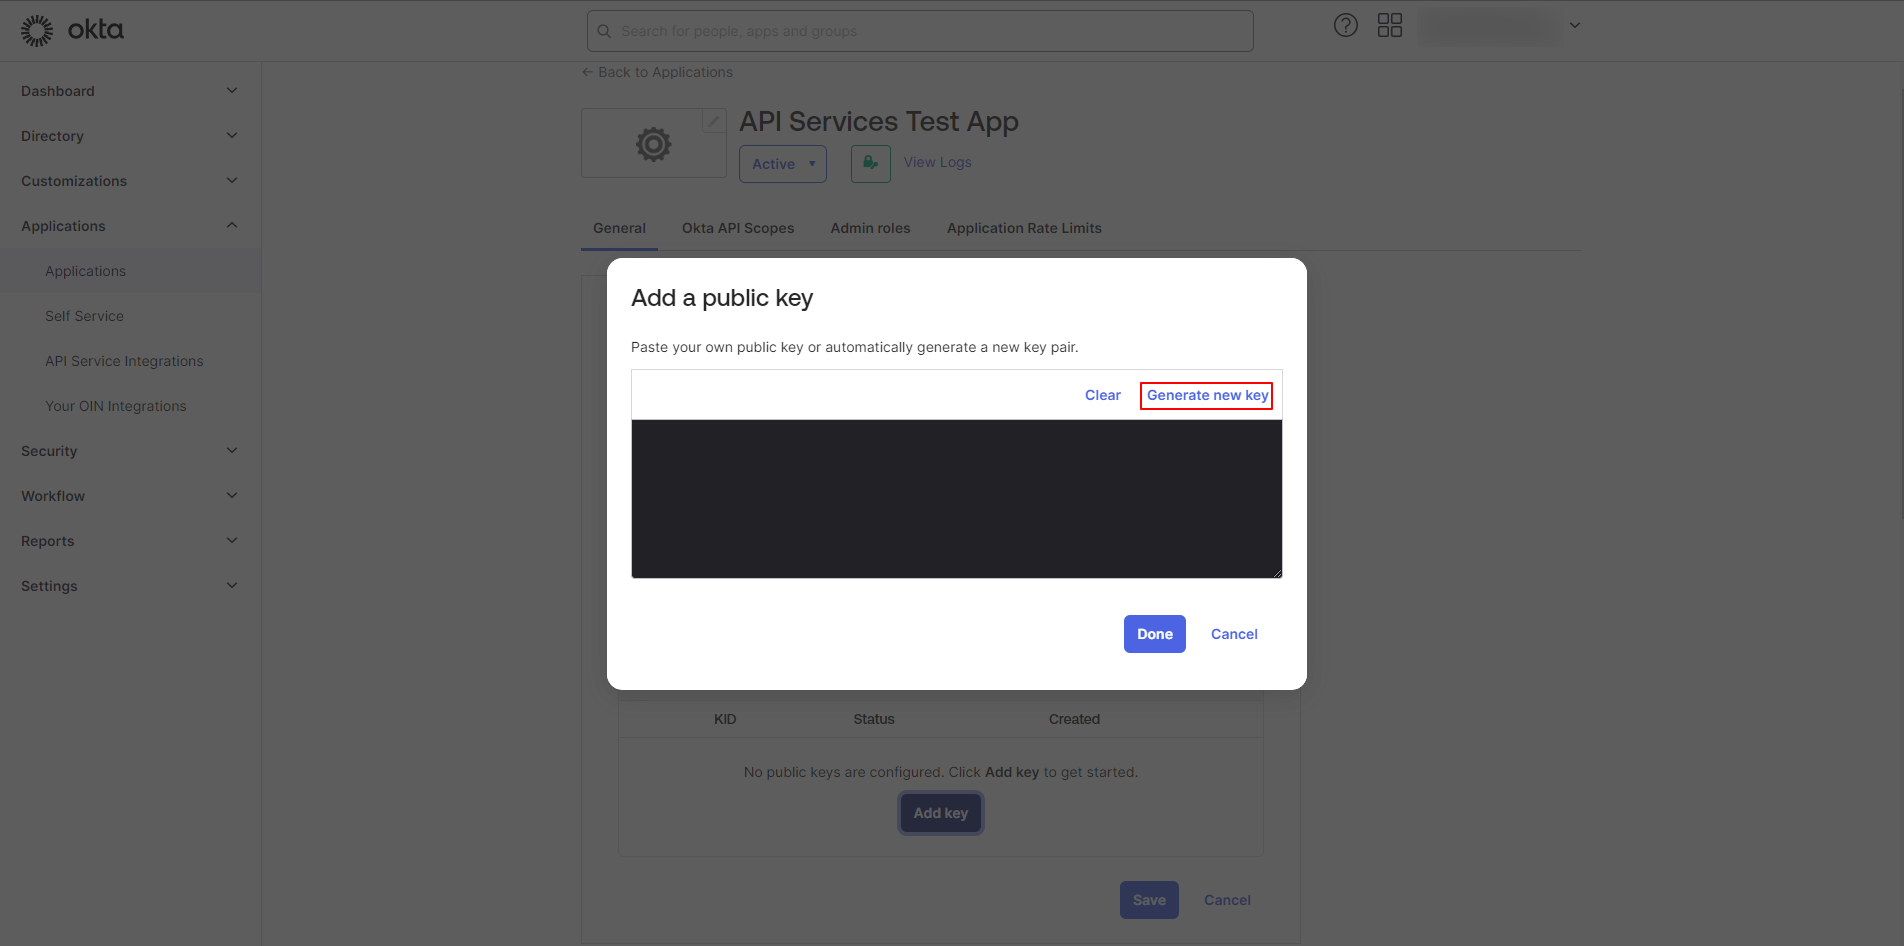
-
Copy and securely save the Private Key (PEM format) displayed in the dialog — this is the only time it will be shown.
Note: Save the Private Key to a secure location. Once the dialog is closed, the private key cannot be retrieved again from Okta.
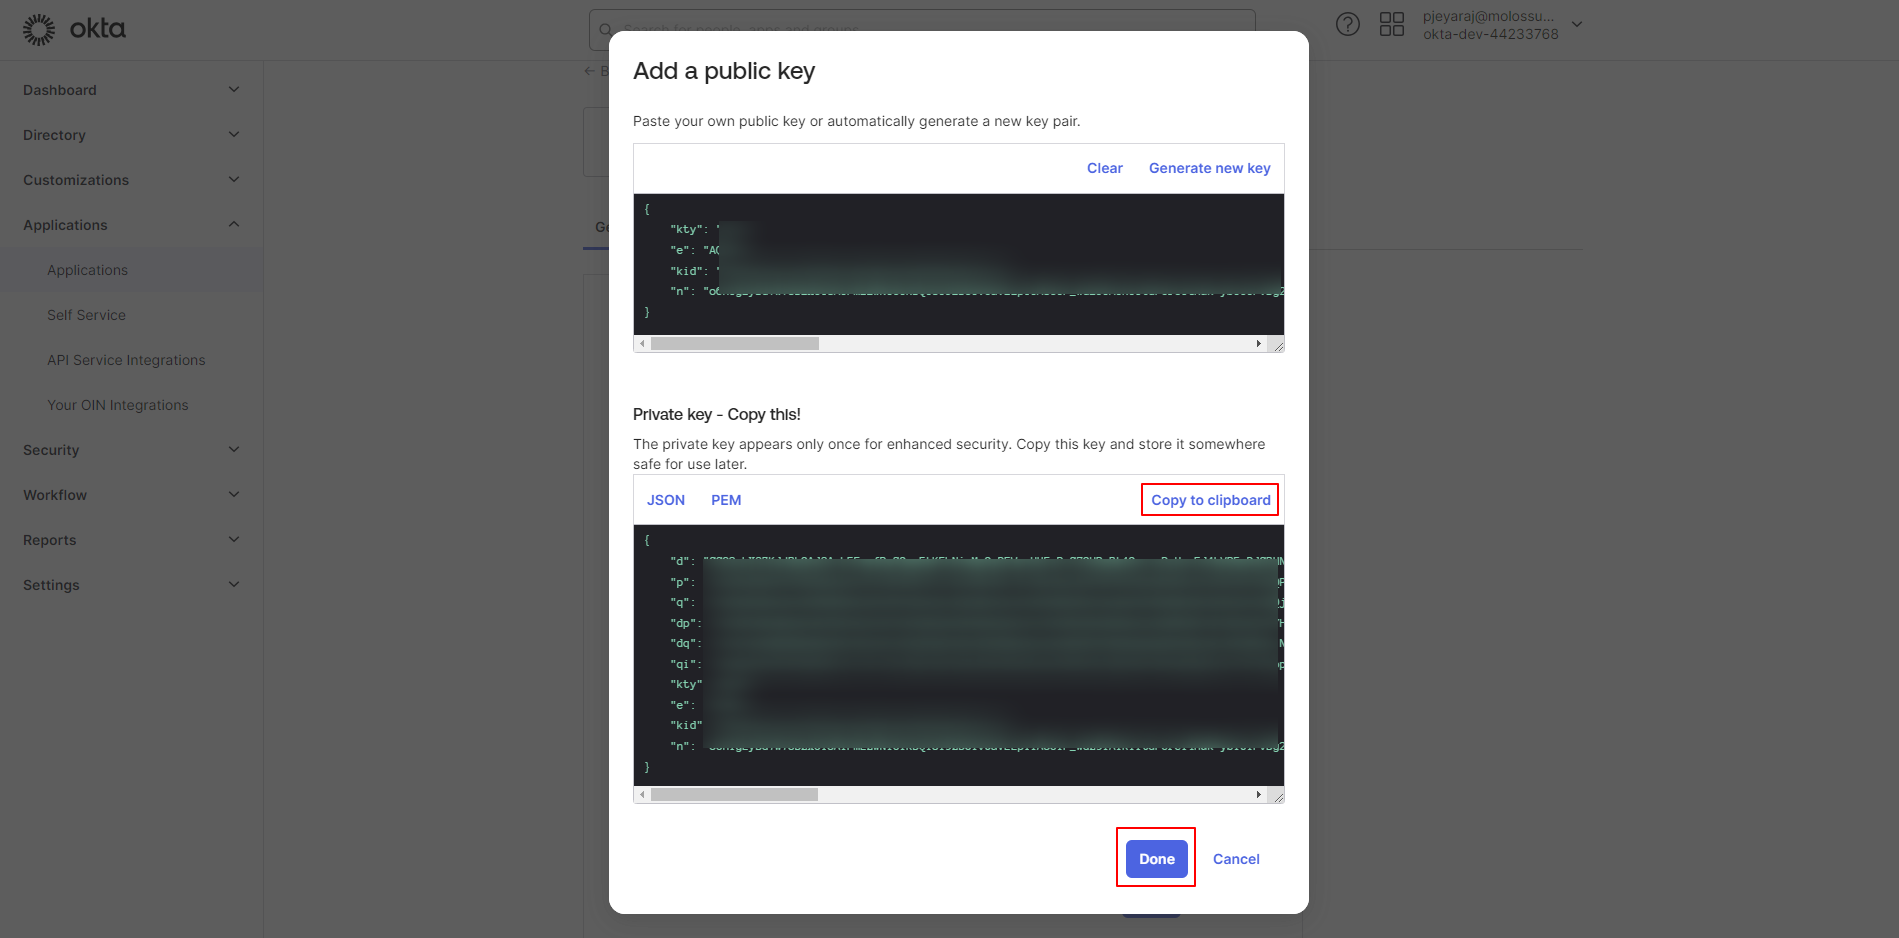
-
Click Save to add the public key to the application.
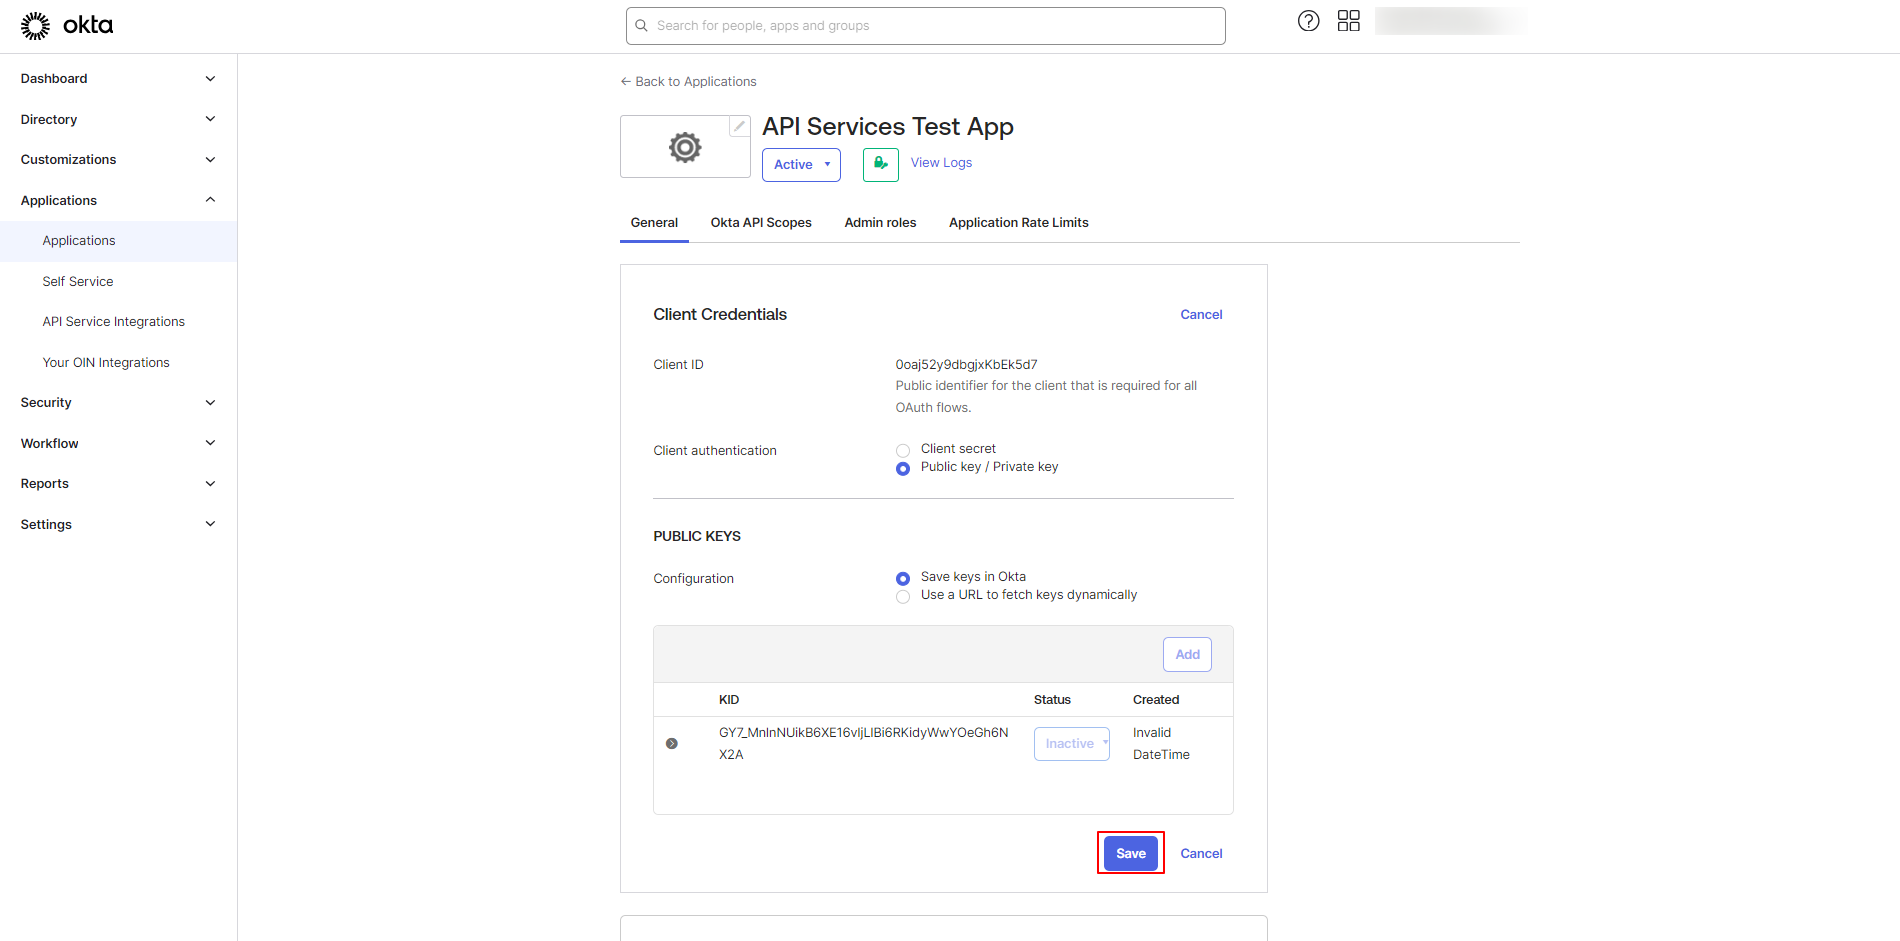
Step 4: Copy the Client ID and Okta Domain
-
From the General tab of the application, copy the Client ID.
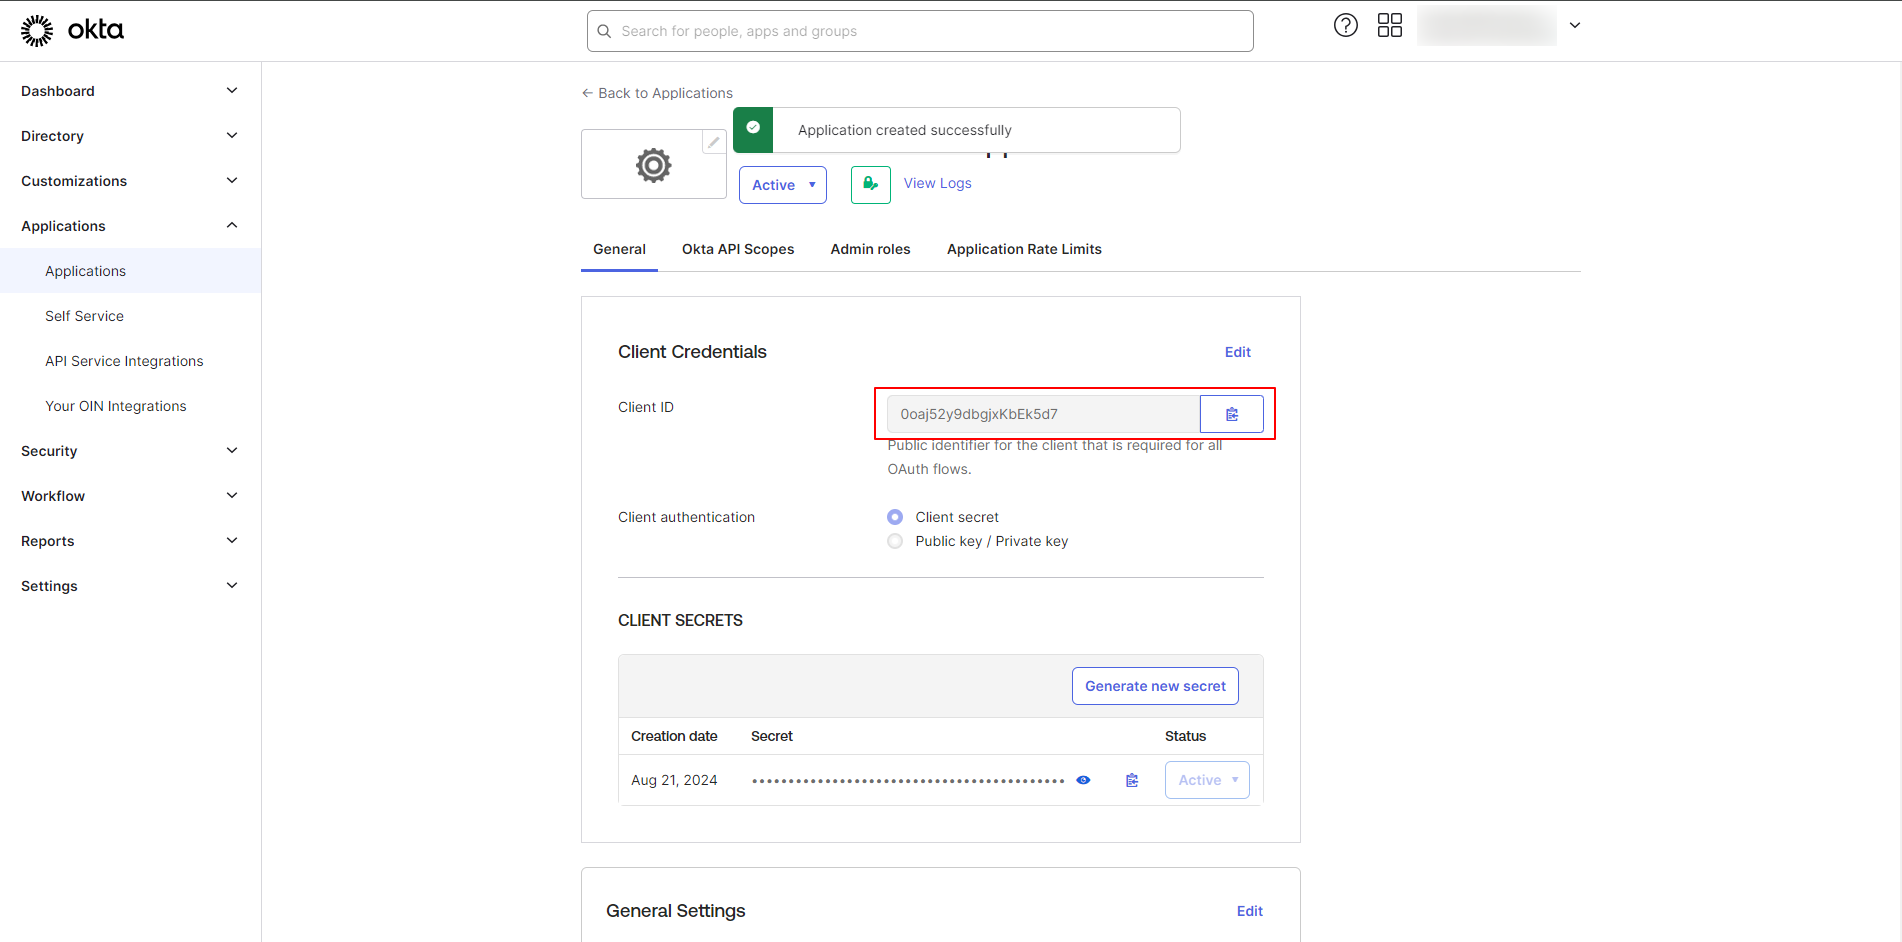
-
The Okta Domain (Base URL) can be found in the top-right corner of the Admin Console or under Settings -> Customization -> Domain. The format is:
https://your-domain.okta.com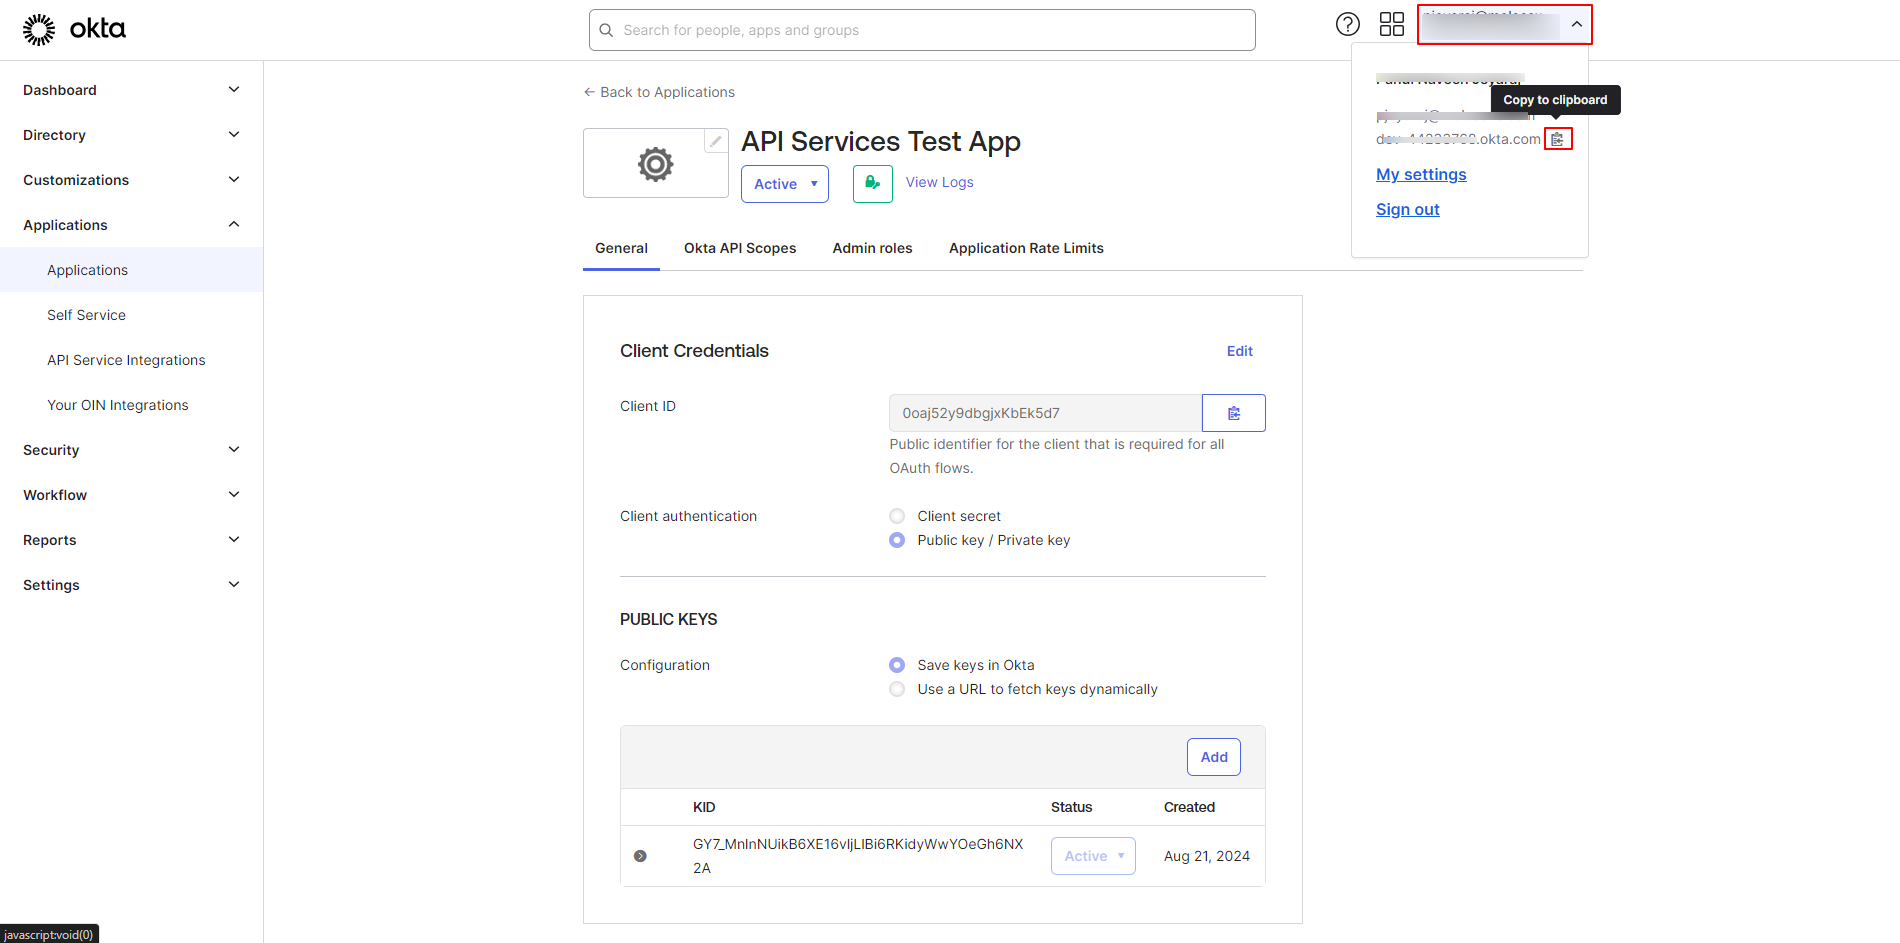
The Client ID, Private Key (PEM file), and Okta Domain are to be configured in Scope Setup: Step 1 for initiating the Okta log ingestion.
Scope Setup
Step 1: Okta Cloud Source Registration in the Scope Application
Once the credentials are generated, they must be configured in the Scope application to establish the connection and enable data ingestion from the Okta environment.
In the Scope application, to register an Okta cloud source, navigate to the cloud source registration page –
-
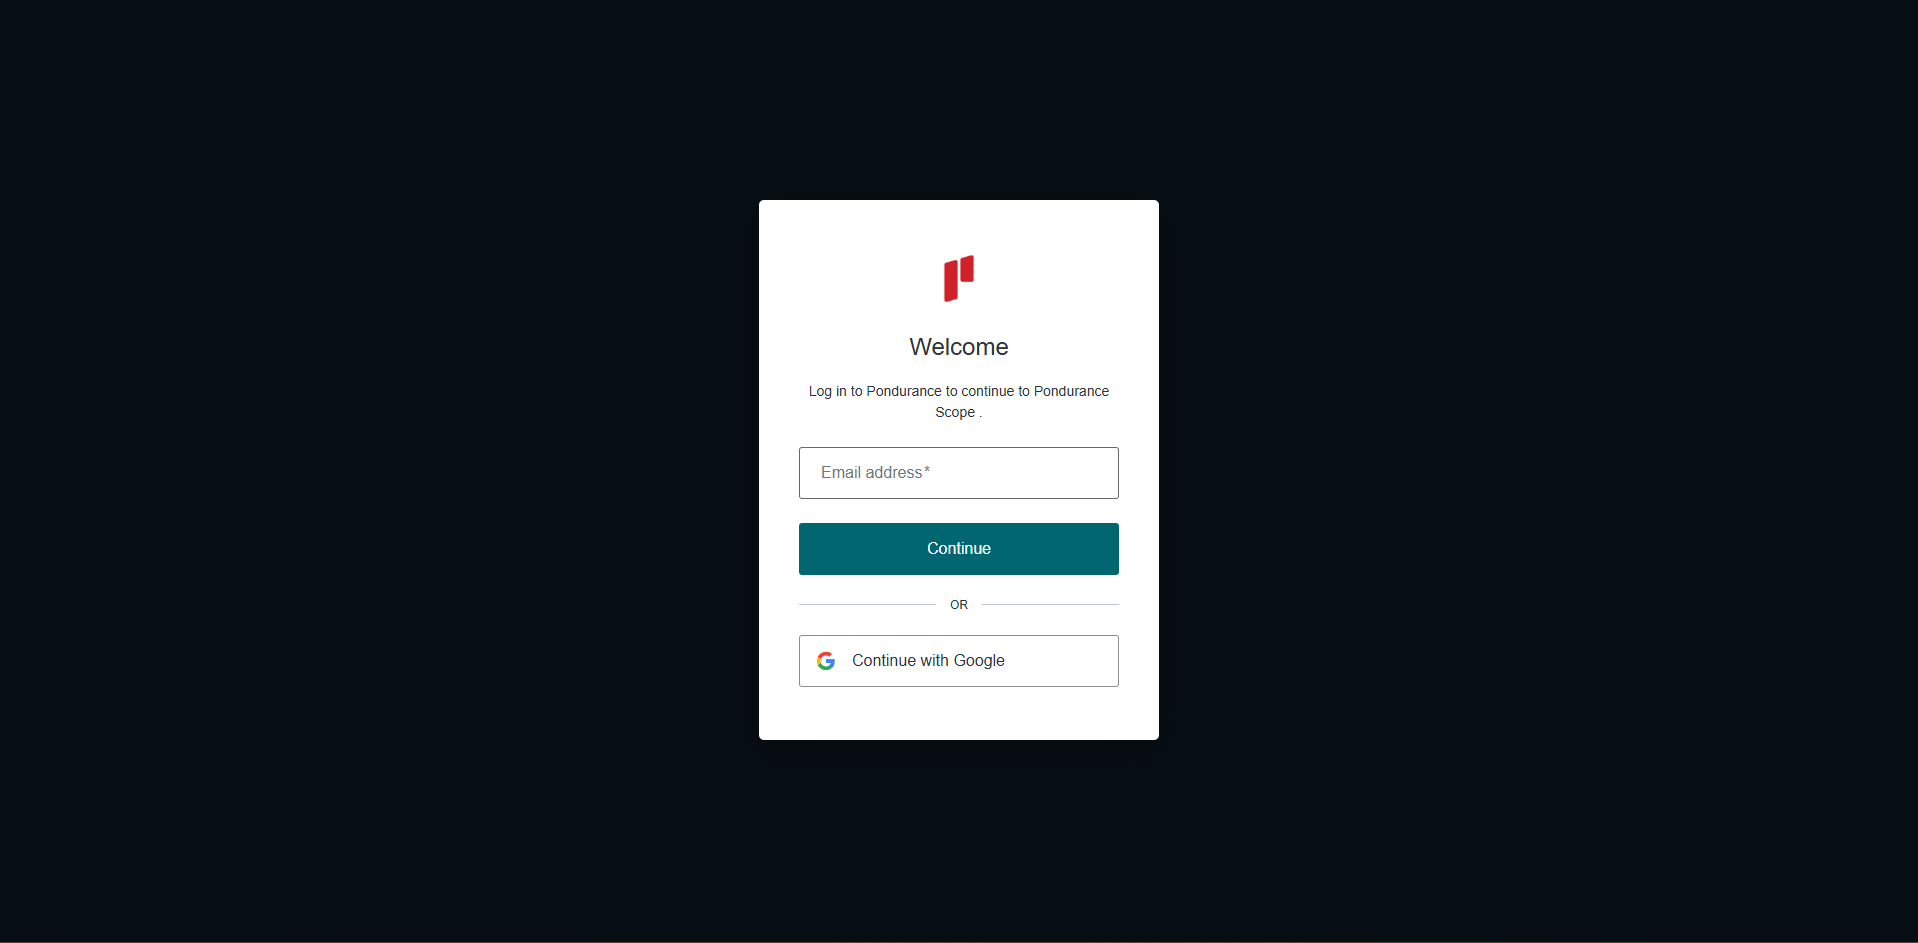
Log into the Scope application
-
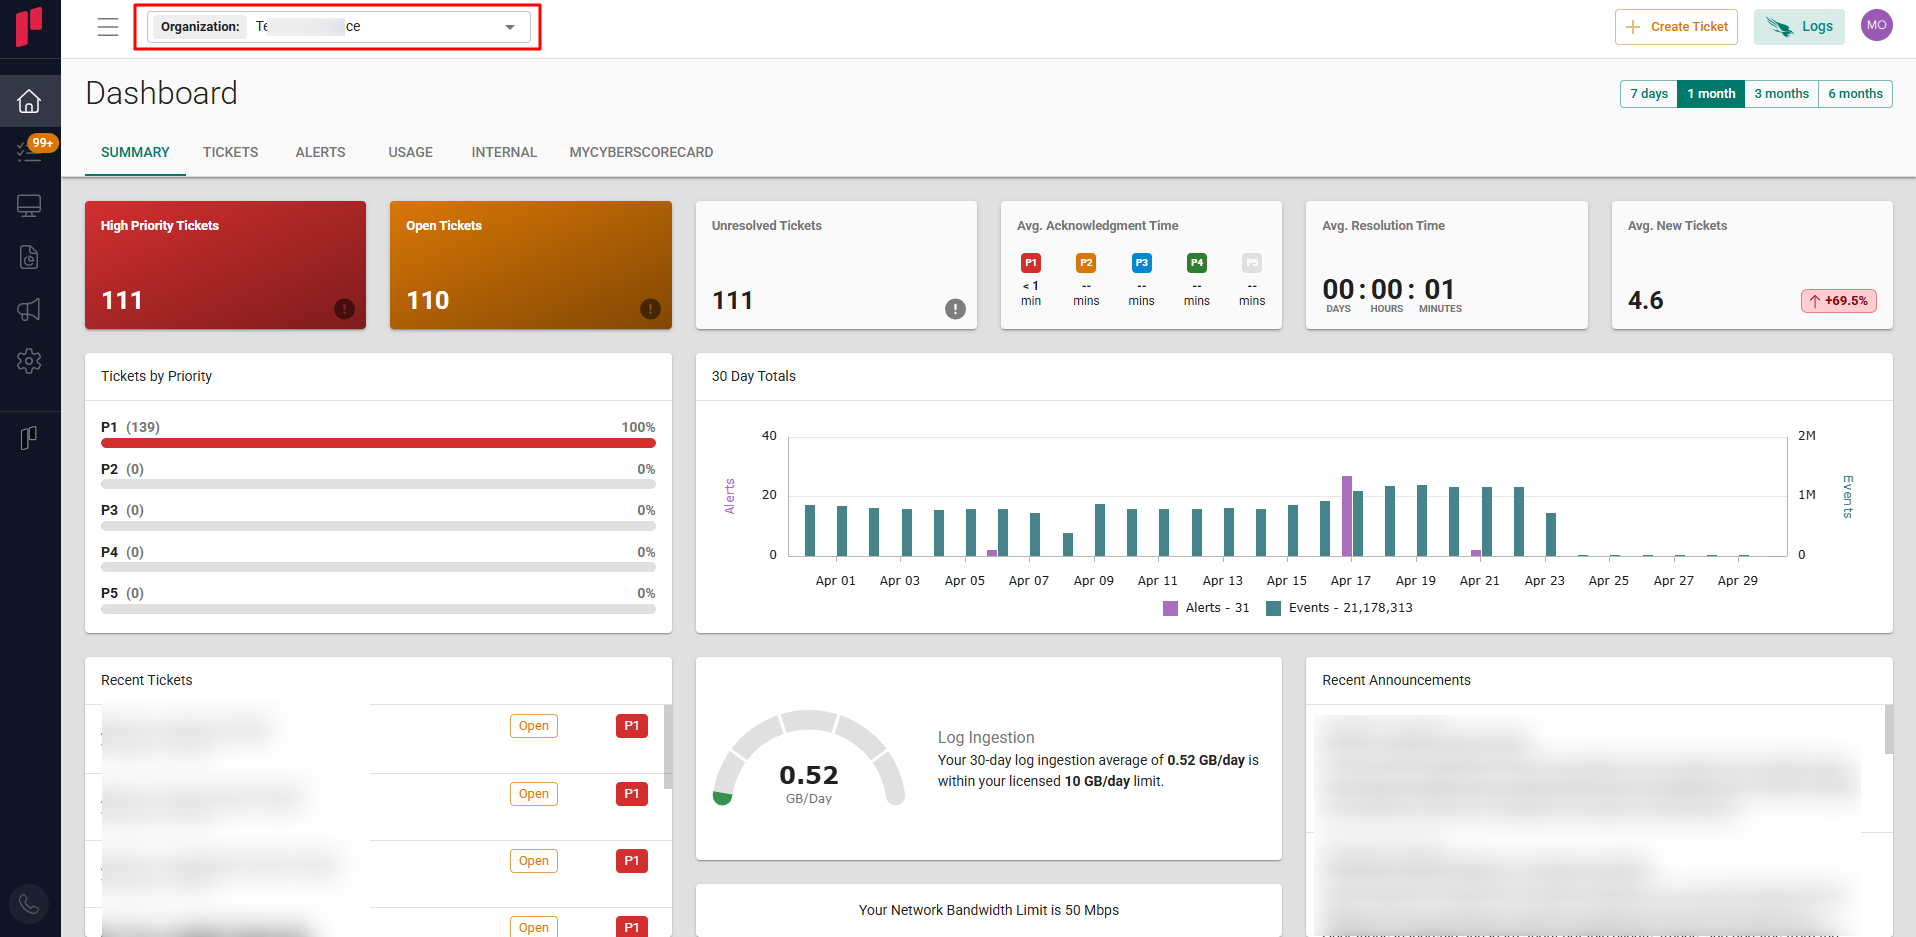
Select the required Organization from the Organization dropdown
-
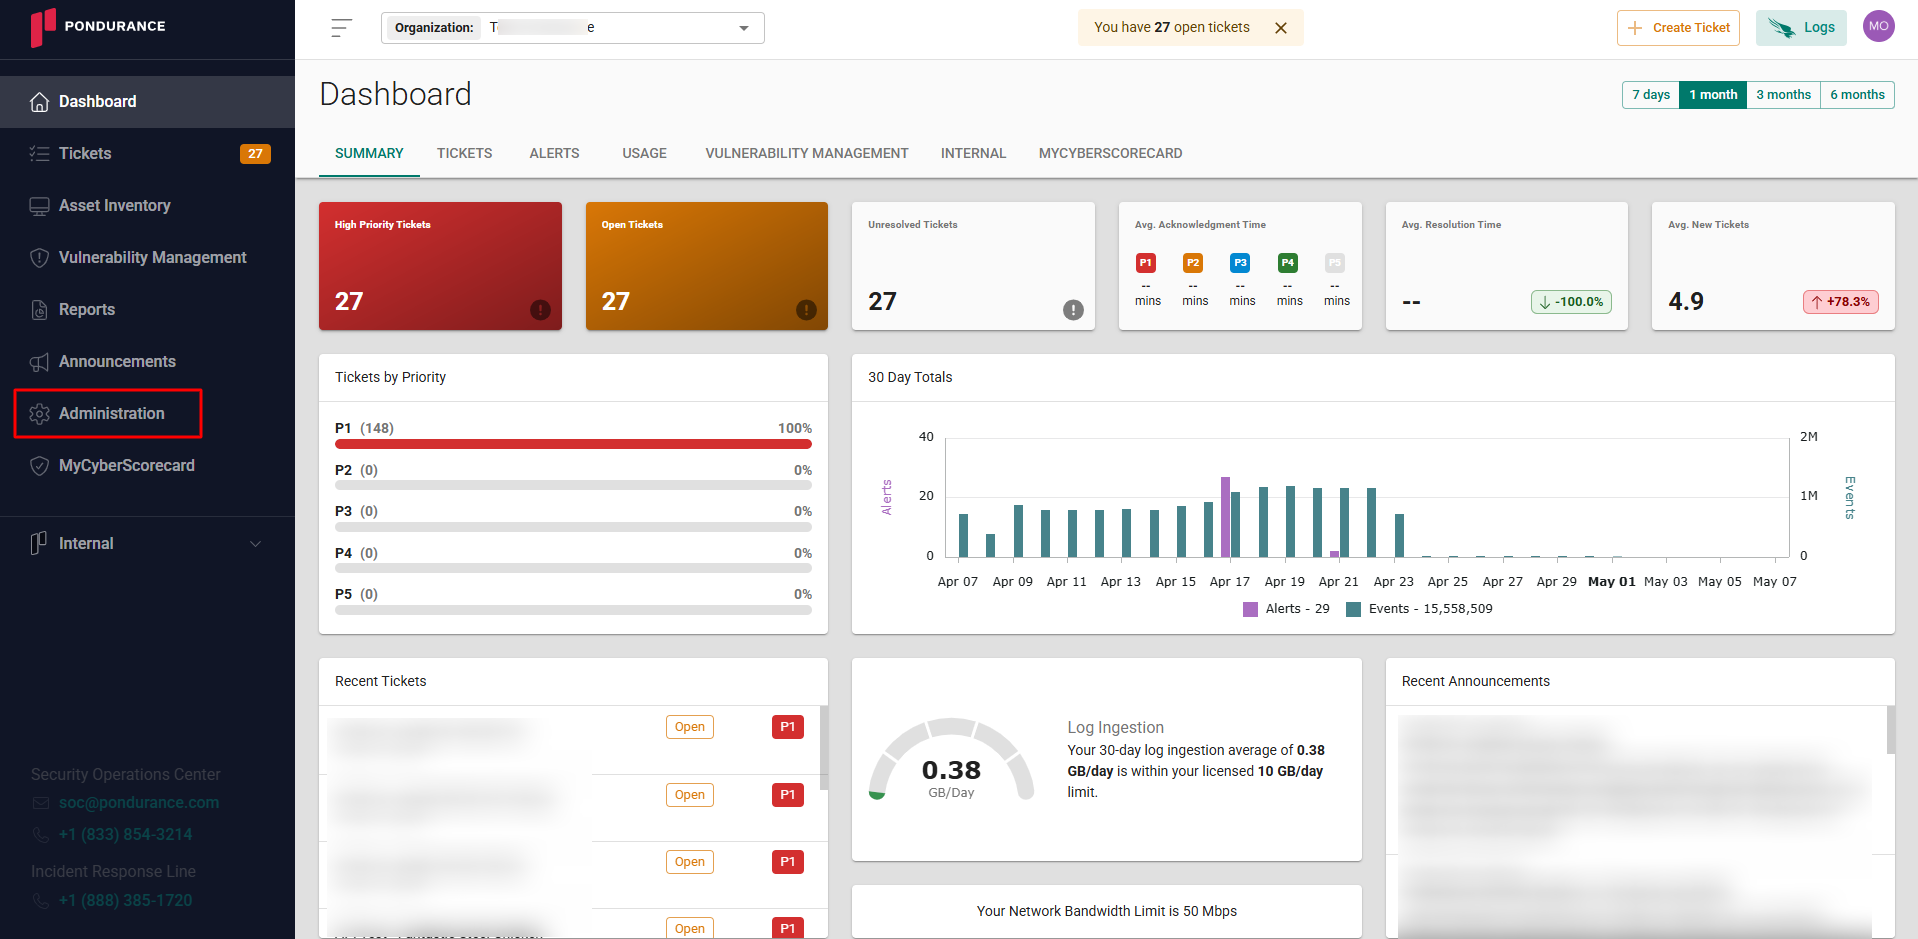
Navigate to the side menu -> Administration
-
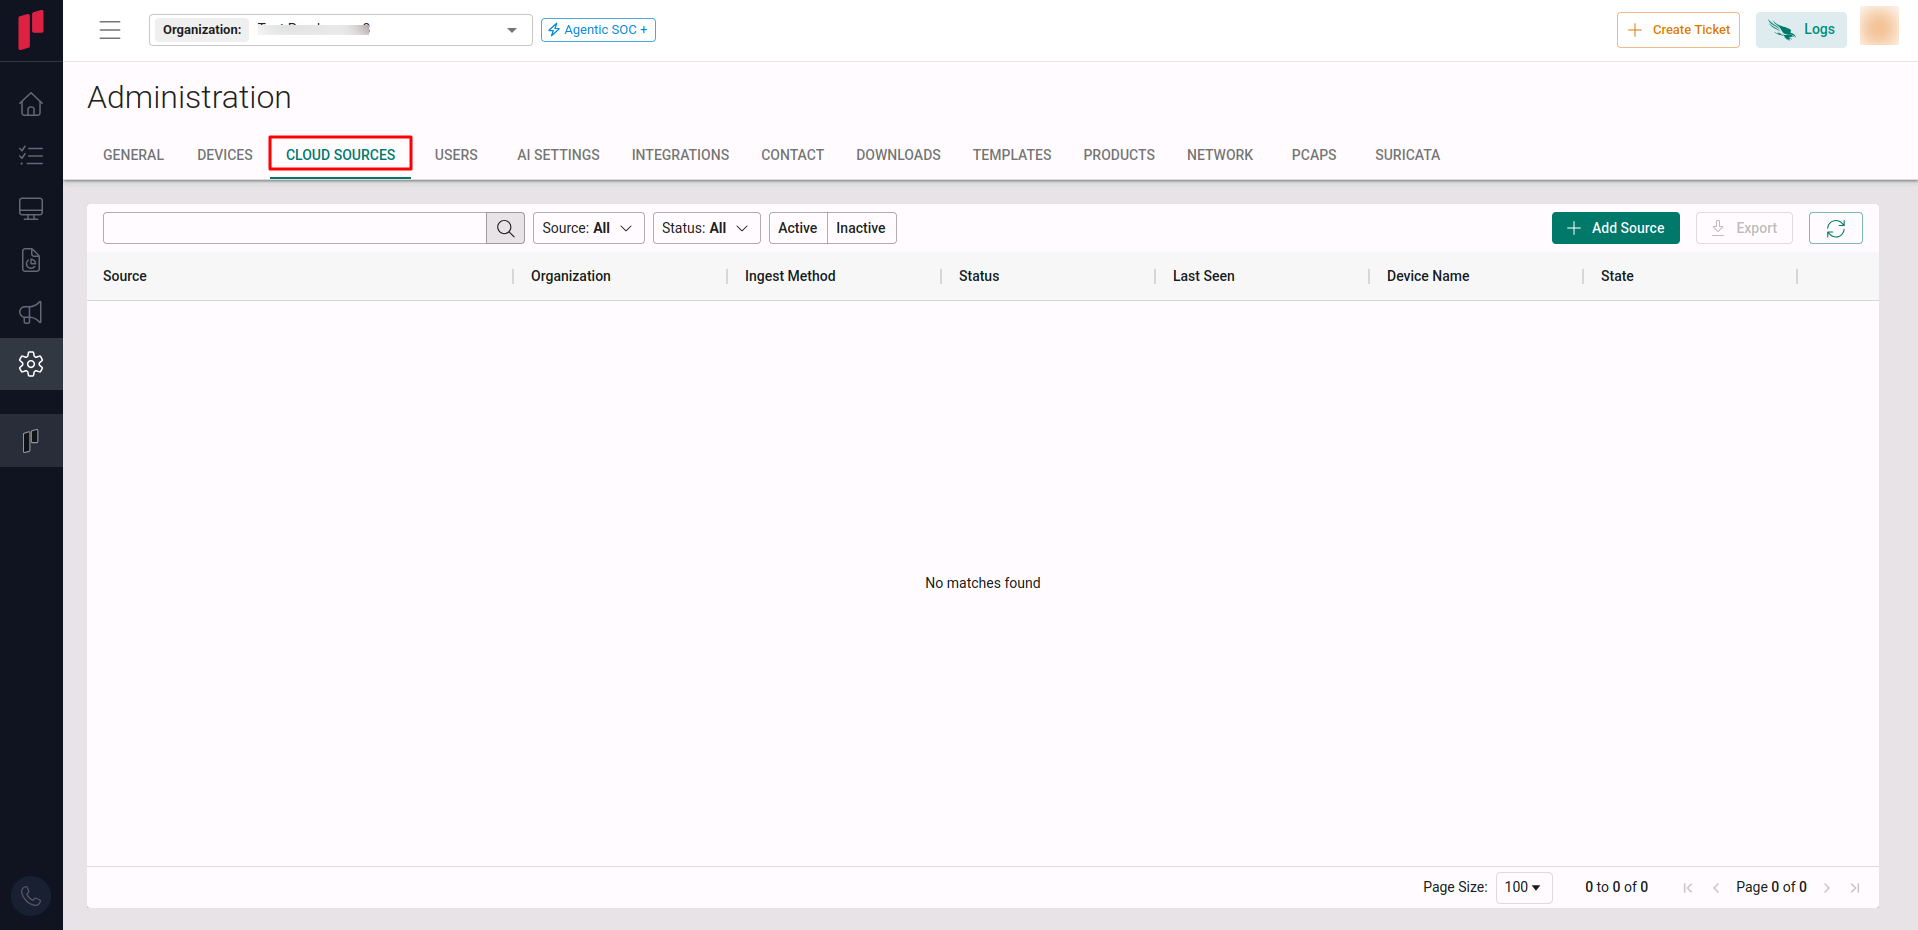
Navigate to the Cloud sources tab
-
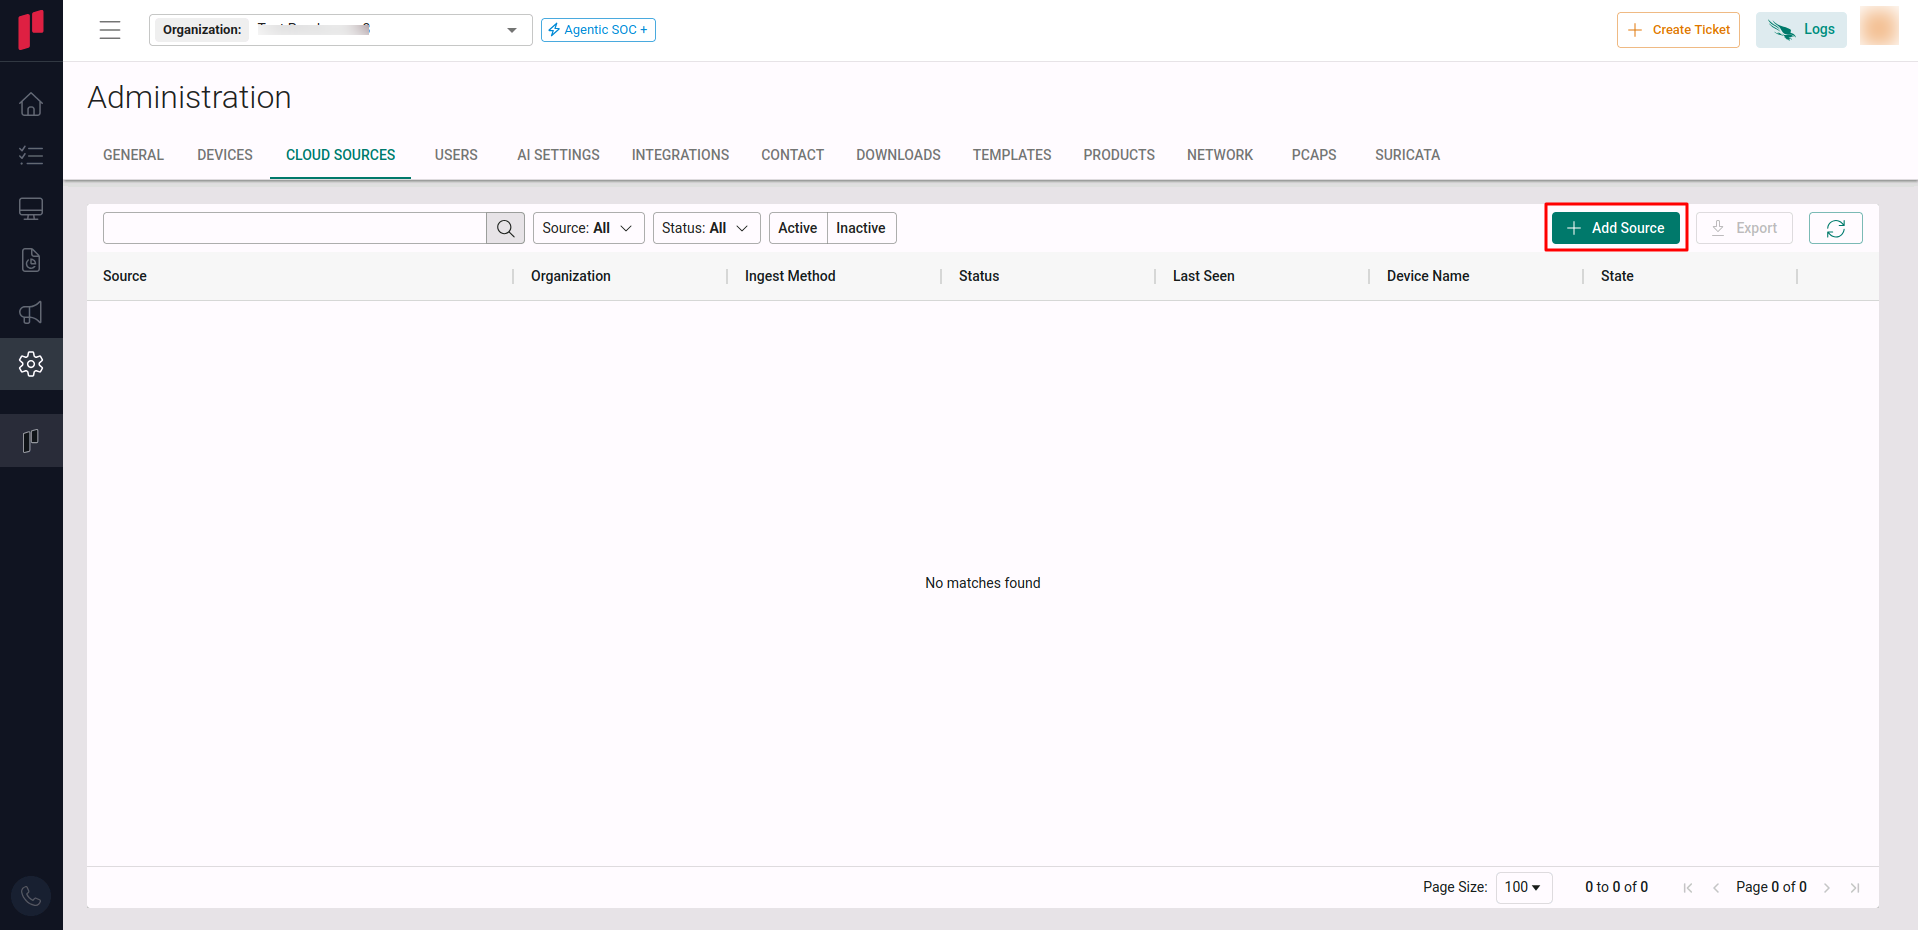
Click on the +Add Source button
-
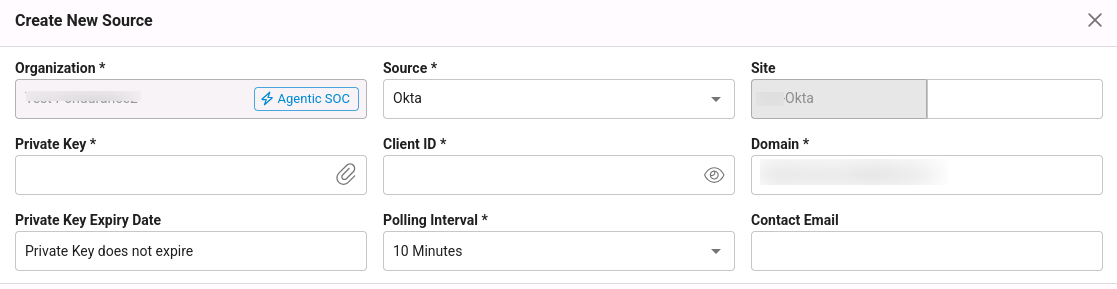
In the Add Source pop-up, provide the parameters below.
-
Source: Select the Okta source from the Source dropdown.
-
Site: The user defined name for the Okta cloud source.
-
Private Key File: Upload the RSA Private Key file (PEM format) generated in Step 3.
-
Client ID: The Client ID from Step 4.
-
Domain: The Okta Domain URL from Step 4 (e.g.,
https://your-domain.okta.com). -
Polling Interval: The polling interval for making periodic API calls to the Okta API. The user can select the time interval from the dropdown.
-
Contact Email: The email address of the person who registers the Okta cloud source in Scope.
-
Once the required connection parameters are entered, the Okta cloud source registration is complete in Scope and is ready for ingestion of Okta logs.