Azure Virtual Network Flow Logs
Overview
Configuring a cloud source in Scope is a two-step process.
-
Creating flow logs and obtaining storage credentials in the Azure Portal. Please refer to Section 1 – Azure VNet Flow Logs Setup
-
Setting up the Azure Virtual Network Flow Logs cloud source in the Scope application. Please refer to Section 2 – Scope Setup
Azure Virtual Network Flow Logs Setup
To get started, you’ll need to obtain the following credentials from the Azure Portal –
- Container Name
- Storage Account Connection String
- Storage Account Connection String Expiry Date
Step 1: Create a Flow Log
-
Log in to the Azure Portal.
-
In the search box, enter
network watcherand select Network Watcher from the results. -
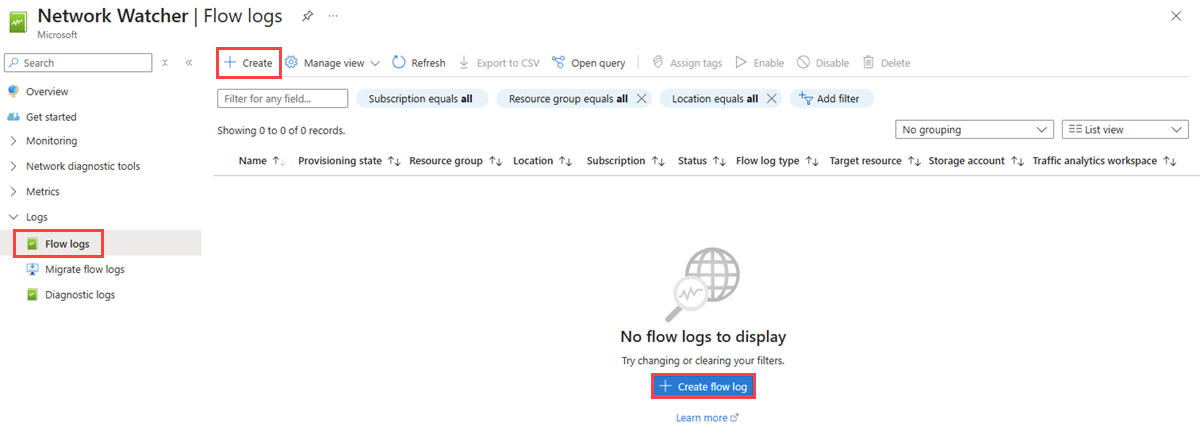
Under Logs, select Flow logs, then select + Create or click the Create flow log button.
-
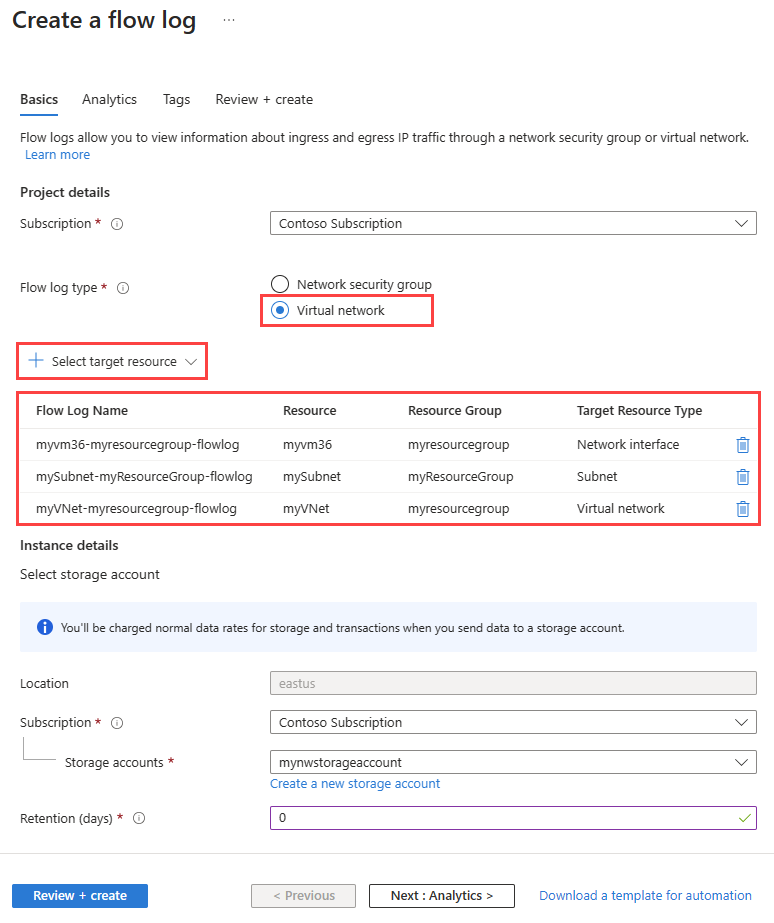
On the Basics tab, configure the following:
Project Details:
- Subscription: Select the Azure subscription of your virtual network.
- Flow log type: Select Virtual network, then select + Select target resource. Choose the resources to log (Virtual network, Subnet, or Network interface), then click Confirm selection.
- Flow Log Name: Enter a name, or leave the default (
{ResourceName}-{ResourceGroupName}-flowlog).
Instance Details:
- Subscription: Select the Azure subscription of the storage account.
- Storage accounts: Select the storage account to save the flow logs to. To create a new one, select Create a new storage account.
- Retention (days): Enter the retention period in days (this option is only available with Standard general-purpose v2 storage accounts). Enter
0to retain data indefinitely.
-
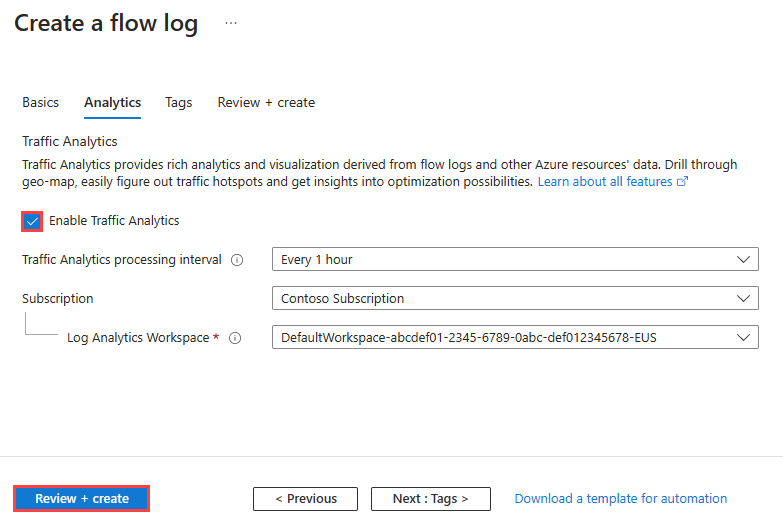
Click the Analytics tab to enable Traffic Analytics:
- Enable traffic analytics: Select the checkbox.
- Traffic analytics processing interval: Select the polling interval that you prefer. The available options are Every 1 hour or Every 10 mins.
- Subscription: Select the Azure subscription of your Log Analytics workspace.
- Log Analytics Workspace: Select the appropriate workspace. By default, Azure portal creates
DefaultWorkspace-{SubscriptionID}-{Region}Log Analytics workspace indefaultresourcegroup-{Region}resource group.
Note* - To create and select a Log Analytics workspace other than the default one, see Create a Log Analytics workspace - Caution - Traffic analytics creates and manages data collection rule and data collection endpoint resources in the same resource group as the workspace, prefixed with NWTA. If you perform any operation on these resources, traffic analytics might not function as expected.
-
Click Review + create, then click Create.
Step 2: Get the Container Name
-
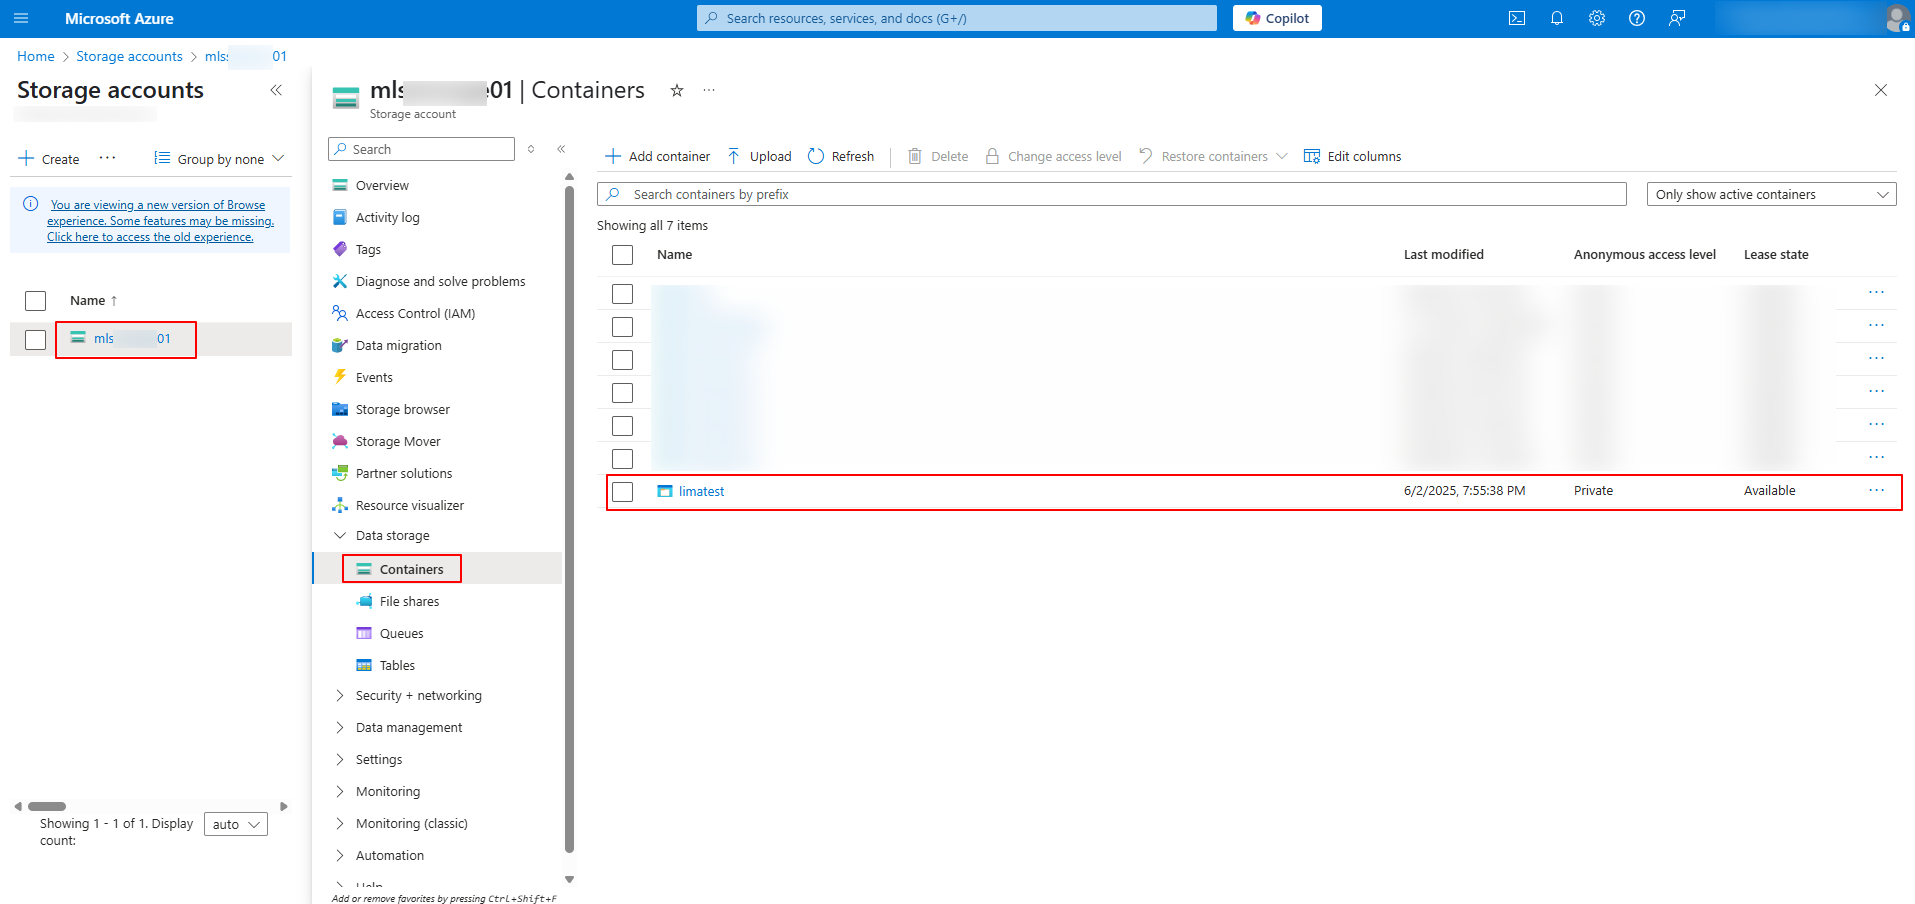
Navigate to: Azure Portal -> Storage Accounts -> select the Storage Account for which Virtual Network Flow Logs are ingested -> Containers (under Data storage).
-
Copy the container name from the existing list.
Step 3: Get the Storage Account Connection String
-
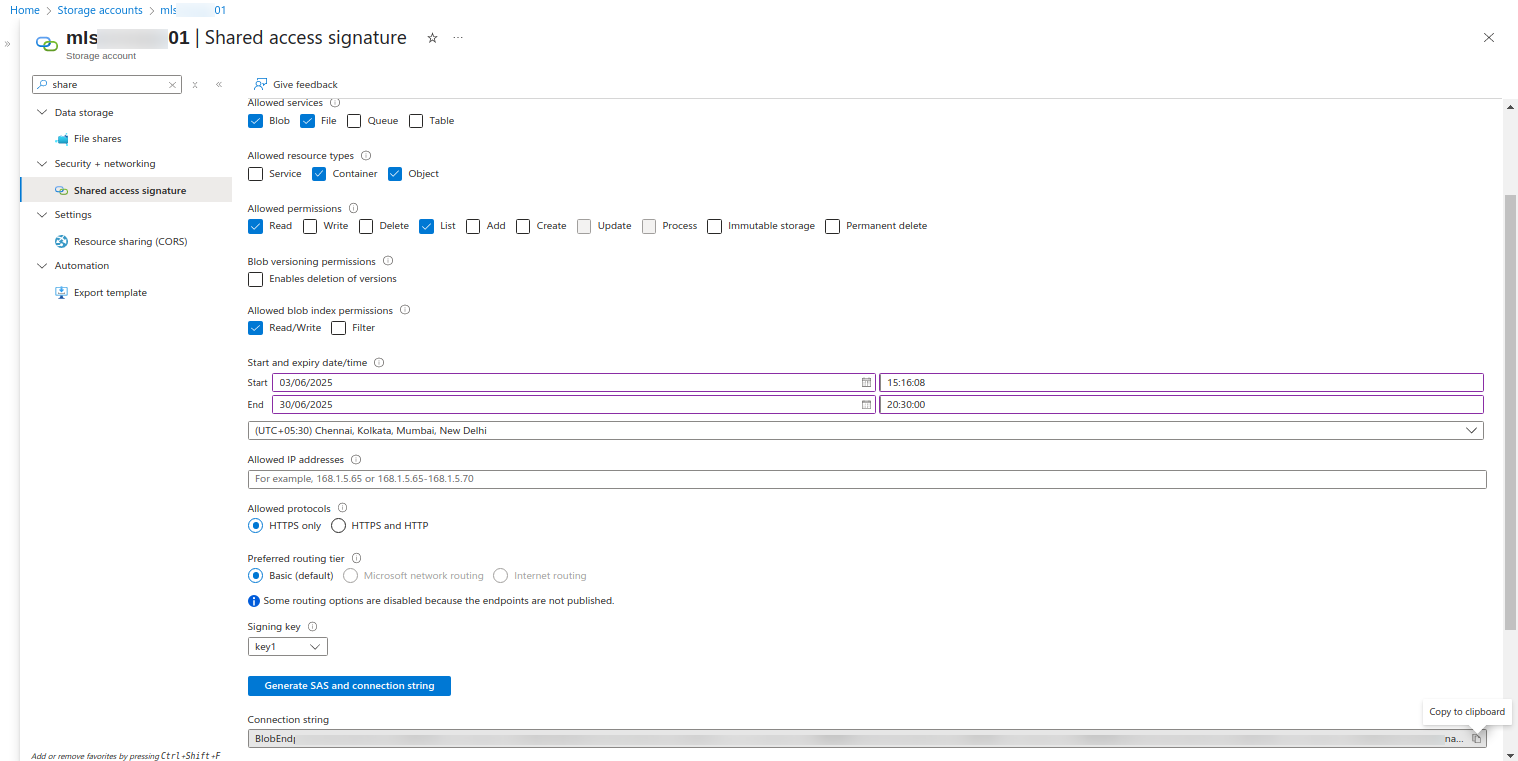
Navigate to: Azure Portal -> Storage Accounts -> select the required Storage Account -> Shared Access Signature (under Security + Networking).
-
Configure the following minimum selections before generating:
Setting Required Value Allowed Services Blob, File Allowed Resource Types Container, Object Allowed Permissions Read, List Allowed Blob Index Permissions Read/Write Start and Expiry Date/Time Set as required -
Click Generate SAS and connection string and copy the Storage Account Connection String.
Note: The Storage Account Connection String is generated only once. Store it in a safe location for future reference.
The Container Name, Storage Account Connection String, and Expiry Date are to be configured in Scope Setup: Step 1 for initiating the Azure VNet Flow Logs ingestion.
Scope Setup
Step 1: Azure Virtual Network Flow Logs Cloud Source Registration in the Scope Application
Once the credentials are obtained, they must be configured in the Scope application to establish the connection and enable data ingestion from Azure Virtual Network Flow Logs.
In the Scope application, to register an Azure Virtual Network Flow Logs cloud source, navigate to the cloud source registration page –
-
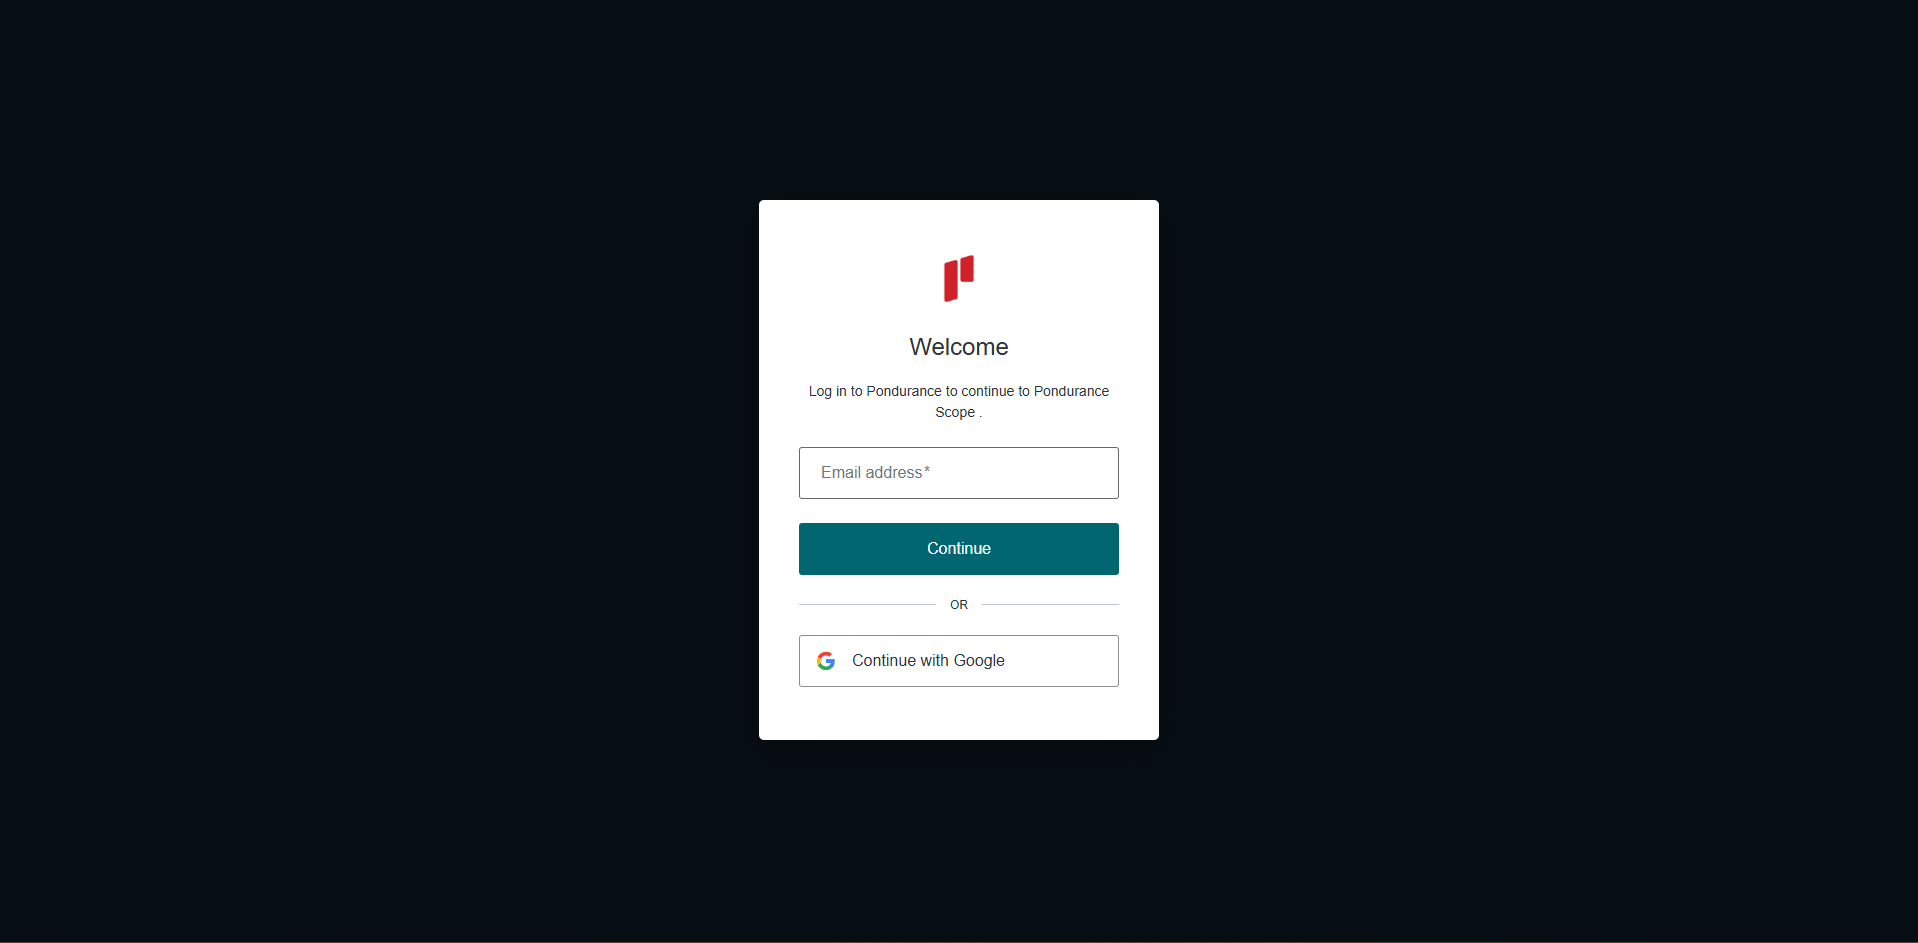
Log into the Scope application
-
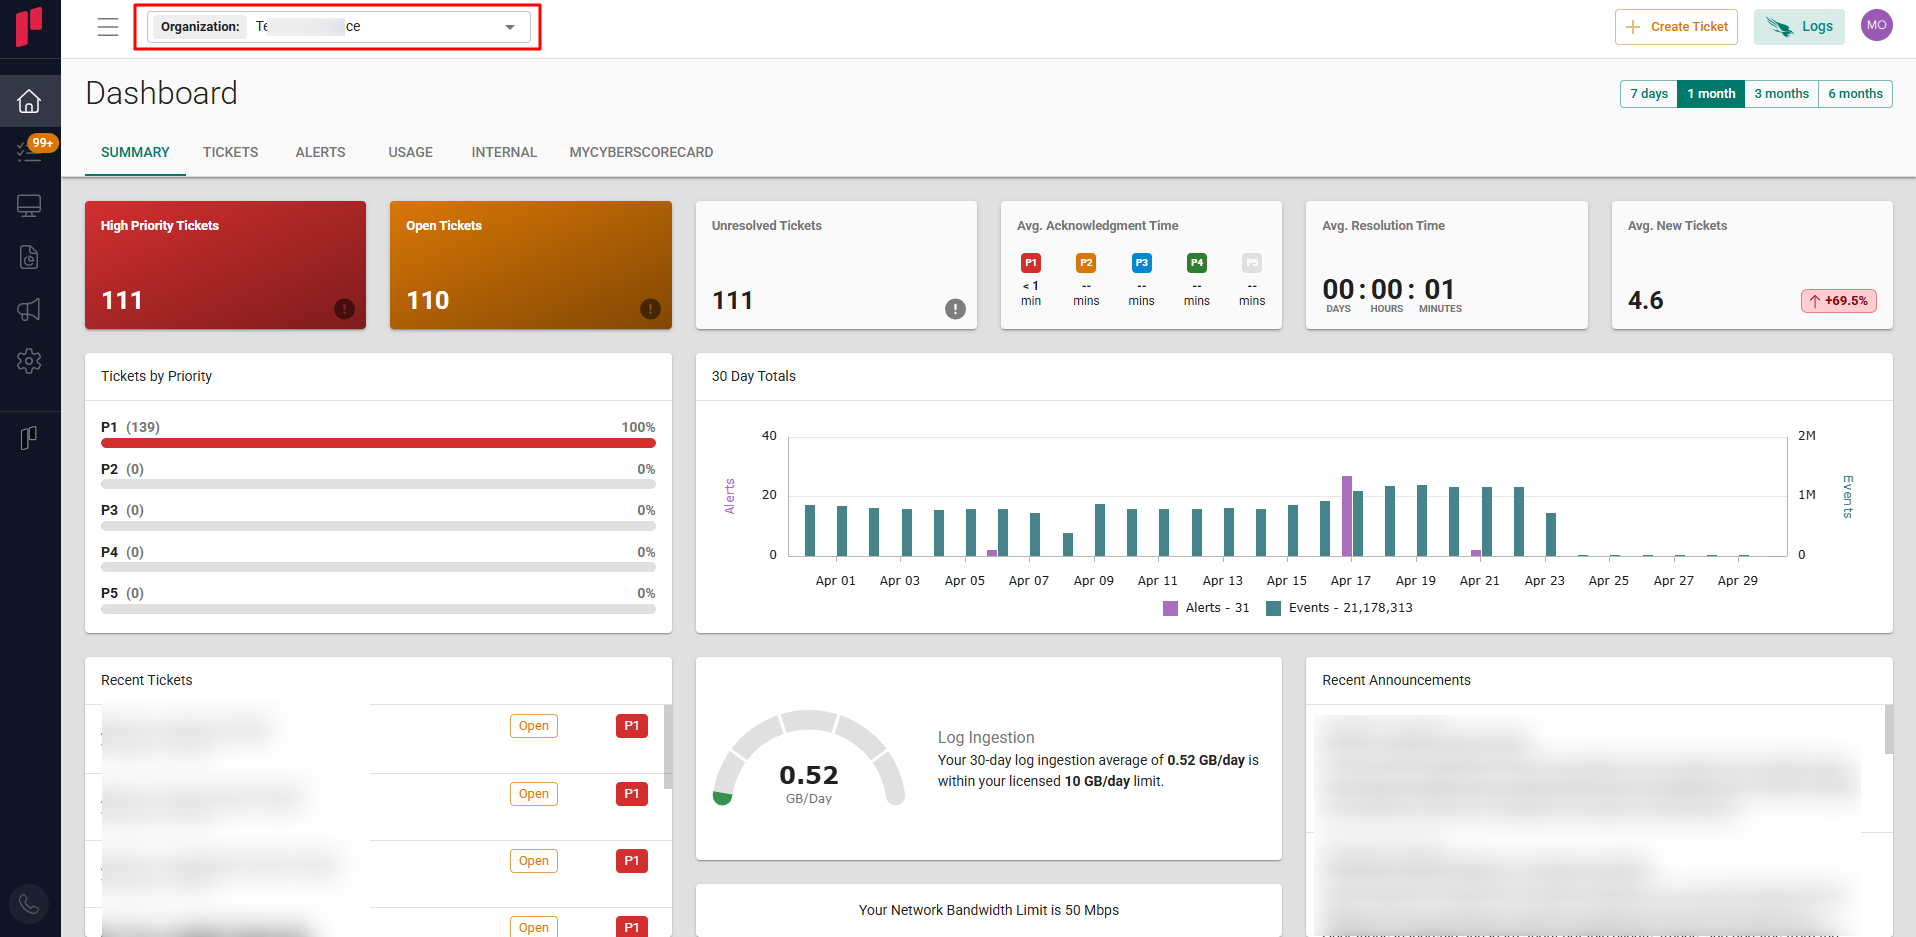
Select the required Organization from the Organization dropdown
-
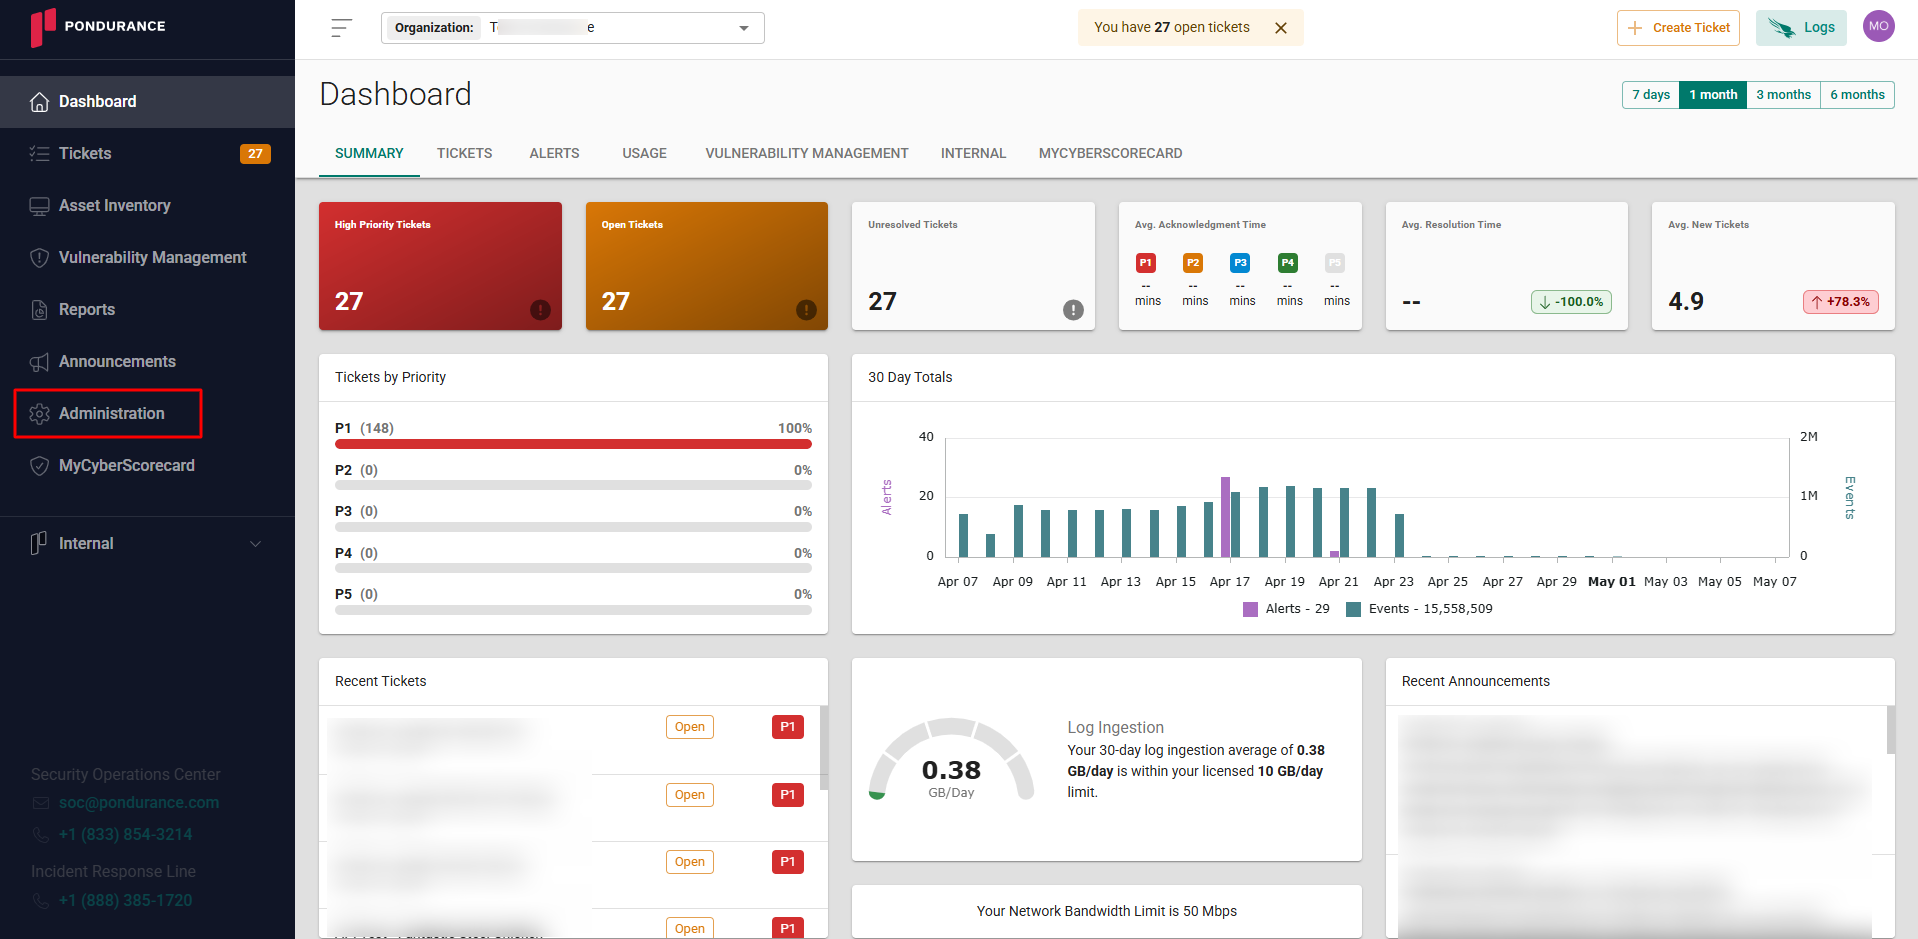
Navigate to the side menu -> Administration
-
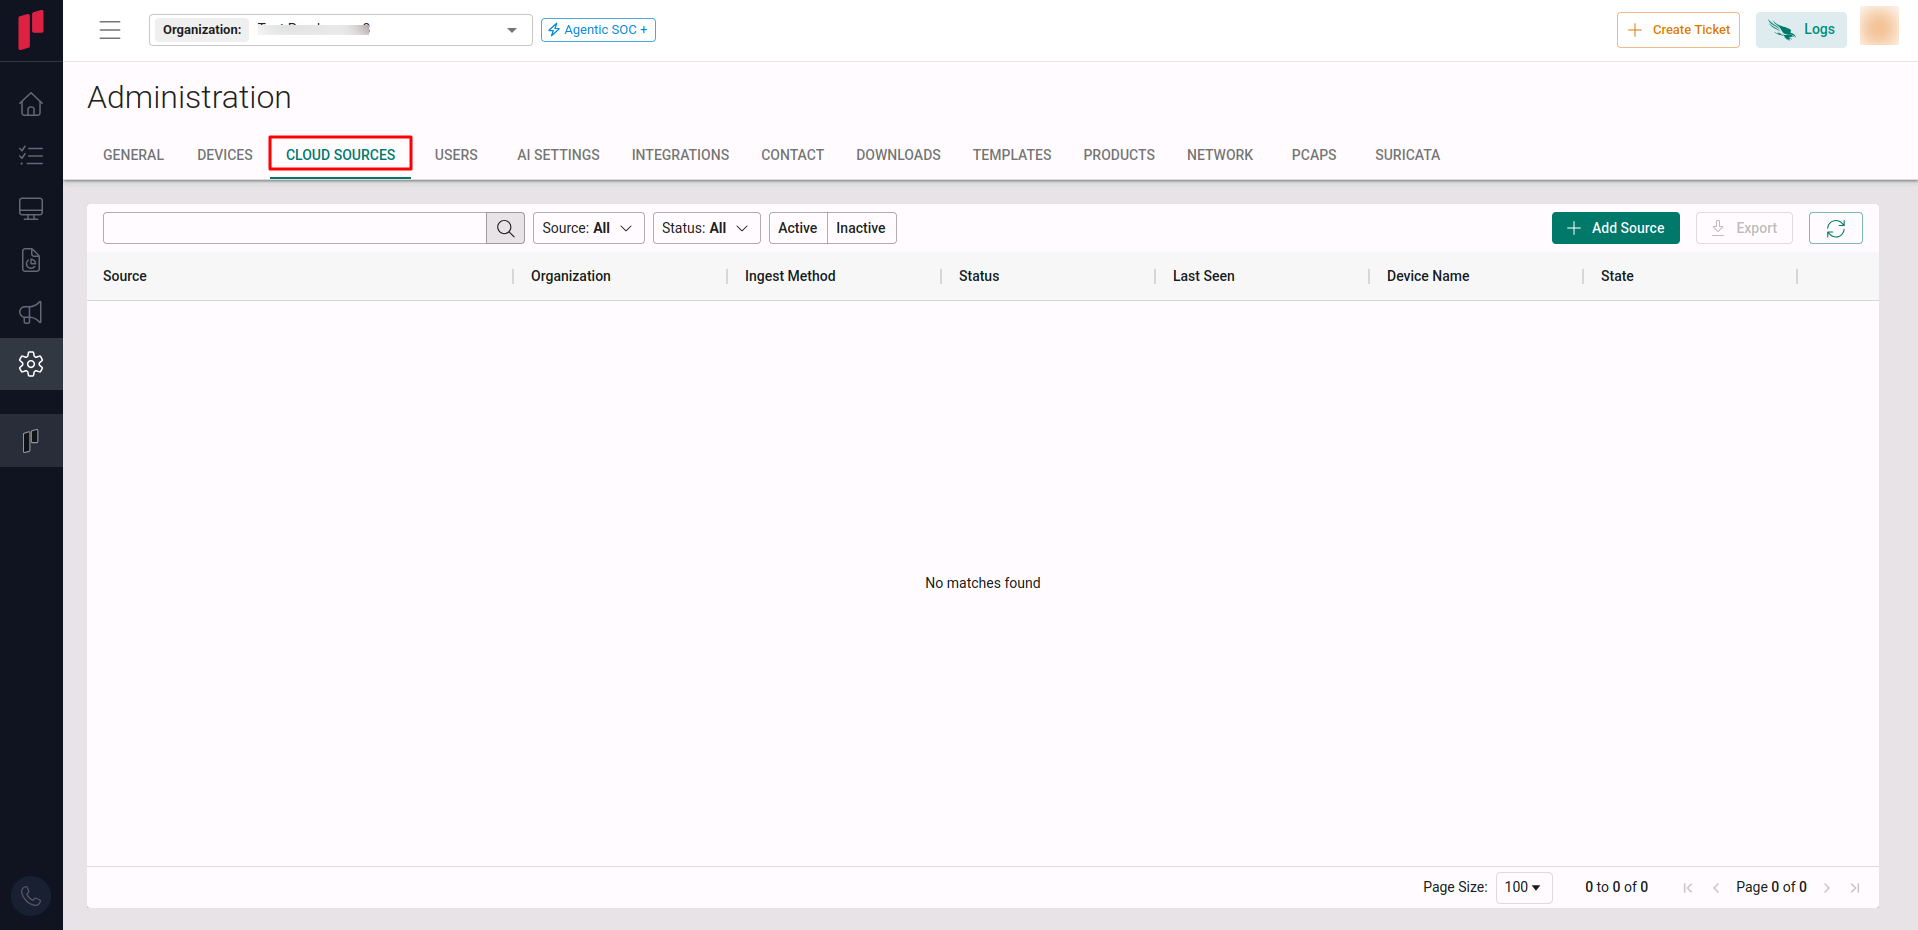
Navigate to the Cloud sources tab
-
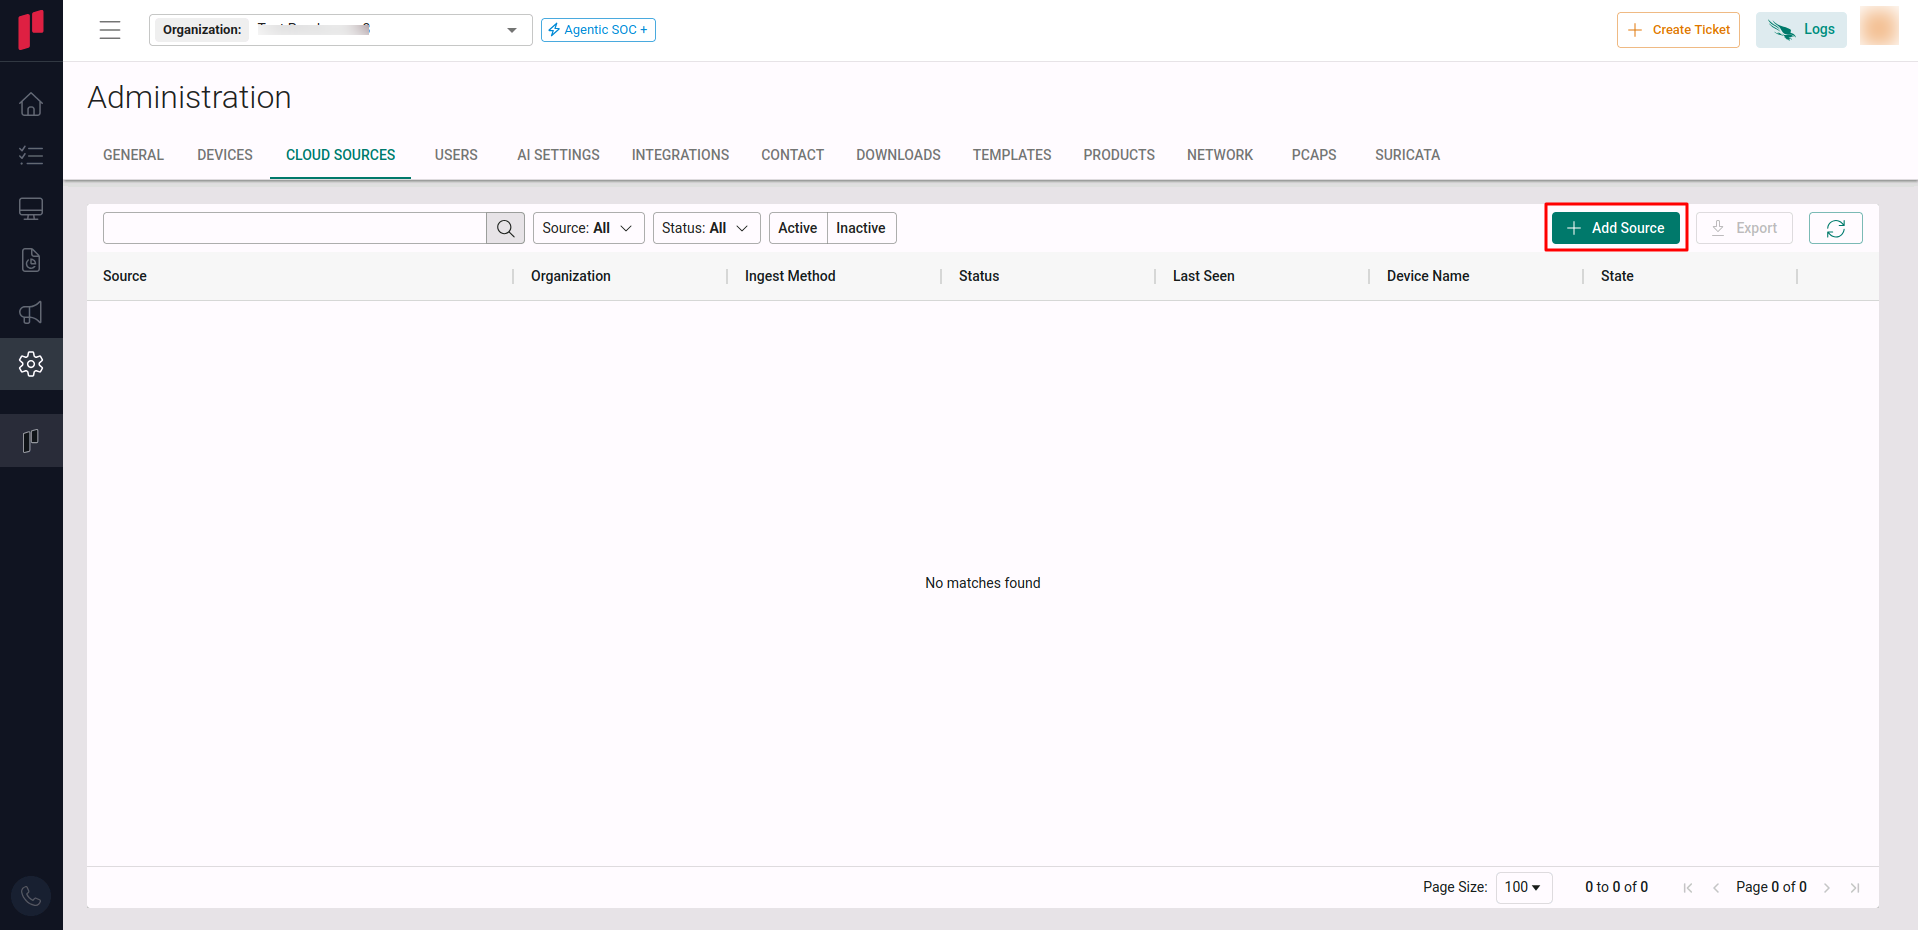
Click on the +Add Source button
-
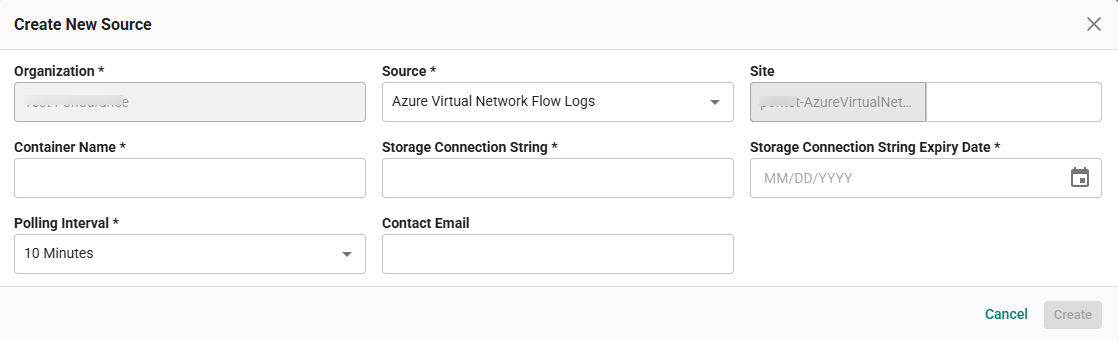
In the Add Source pop-up, provide the parameters below.
-
Source: Select the Azure Virtual Network Flow Logs source from the Source dropdown.
-
Site: The user defined name for the Azure Virtual Network Flow Logs cloud source.
-
Container Name: Container name obtained in Step 2.
-
Storage Connection String: The Storage Account Connection String from Step 3, which includes authorization information for accessing data from the Azure Storage account.
-
Storage Connection String Expiry Date: Expiry date of the Storage Connection String from Step 3.
-
Polling Interval: The polling interval for making periodic API calls to the Azure Virtual Network Flow Logs. The user can select the time interval from the dropdown.
-
Contact Email: The email address of the person who registers the Azure Virtual Network Flow Logs cloud source in Scope.
-
Once the required connection parameters are entered, the Azure Virtual Network Flow Logs cloud source registration is complete in Scope and is ready for ingestion of Azure Virtual Network Flow logs.