Salesforce
Overview
Configuring a cloud source in Scope is a two-step process.
-
Generating Salesforce client credentials in the Salesforce portal. Please refer to Section 1 – Salesforce Setup
-
Setting up the Salesforce cloud source in the Scope application. Please refer to Section 2 – Scope Setup
Salesforce Setup
To get started, you’ll need to generate the following credentials in the Salesforce portal –
- Client ID (Consumer Key)
- Client Secret (Consumer Secret)
- Base URL
Step 1: Enable Events Generation in the Salesforce Portal
-
Log in to your Salesforce account and navigate to Settings -> Security -> Event Monitoring -> Event Monitoring Settings.
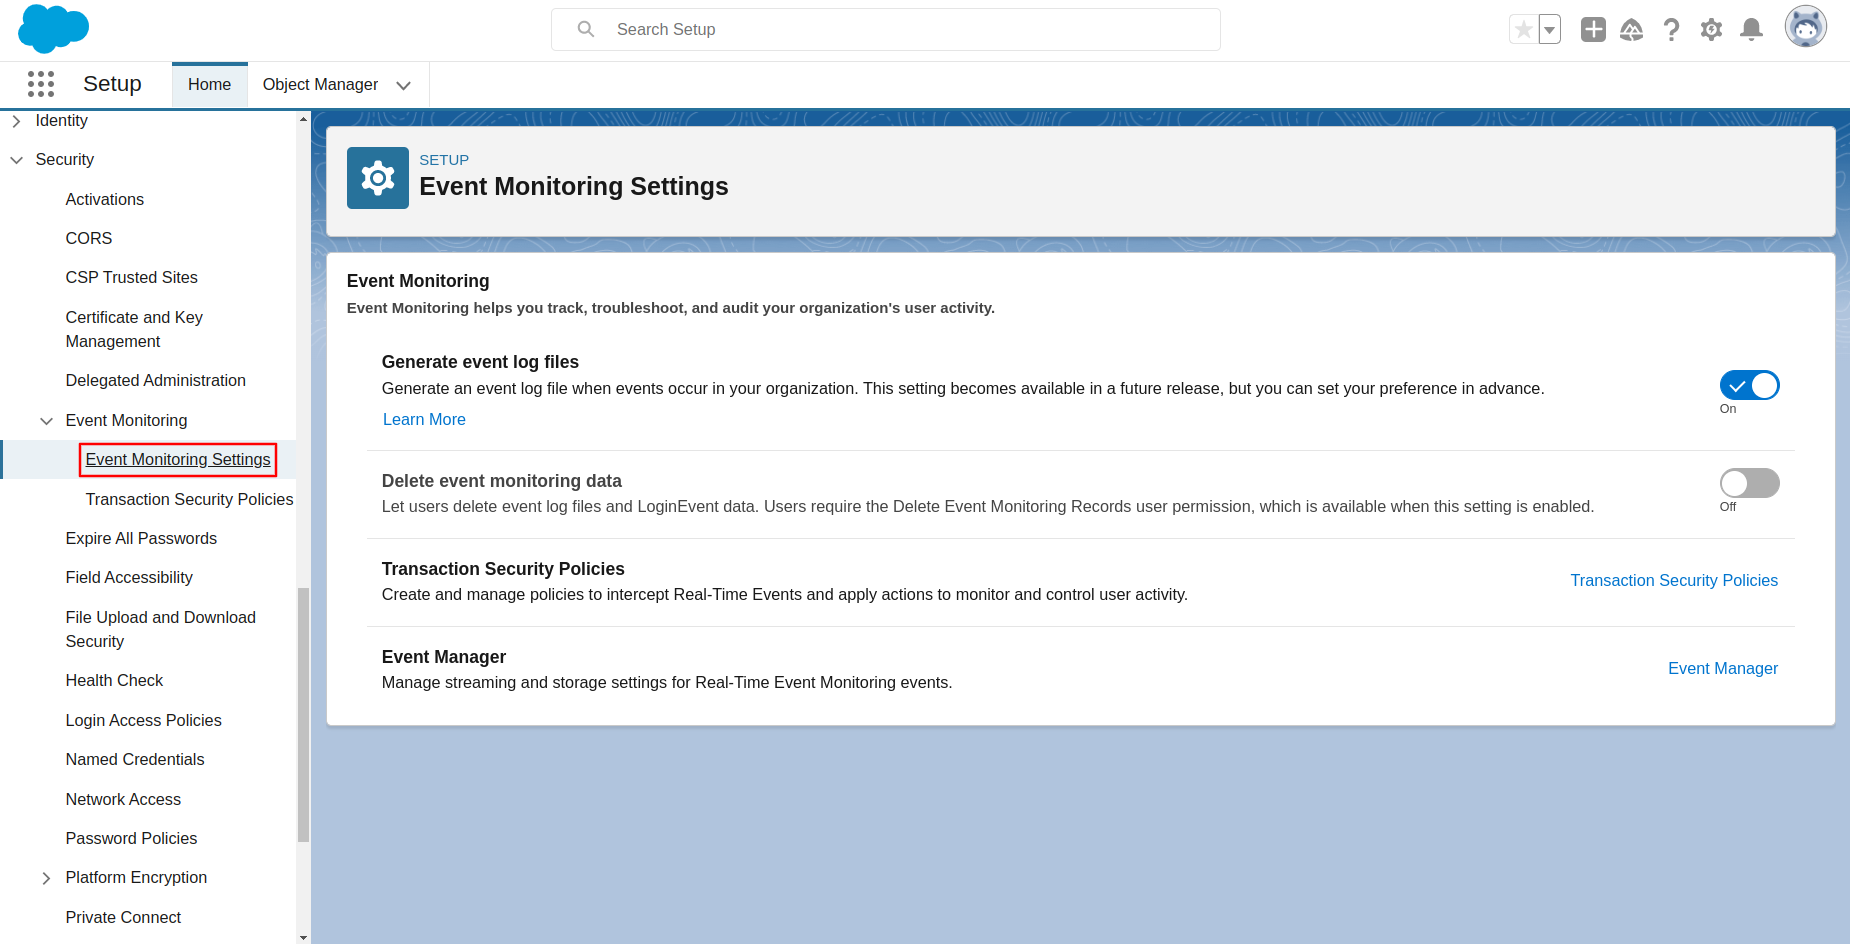
-
Enable the Generate event log files toggle button.
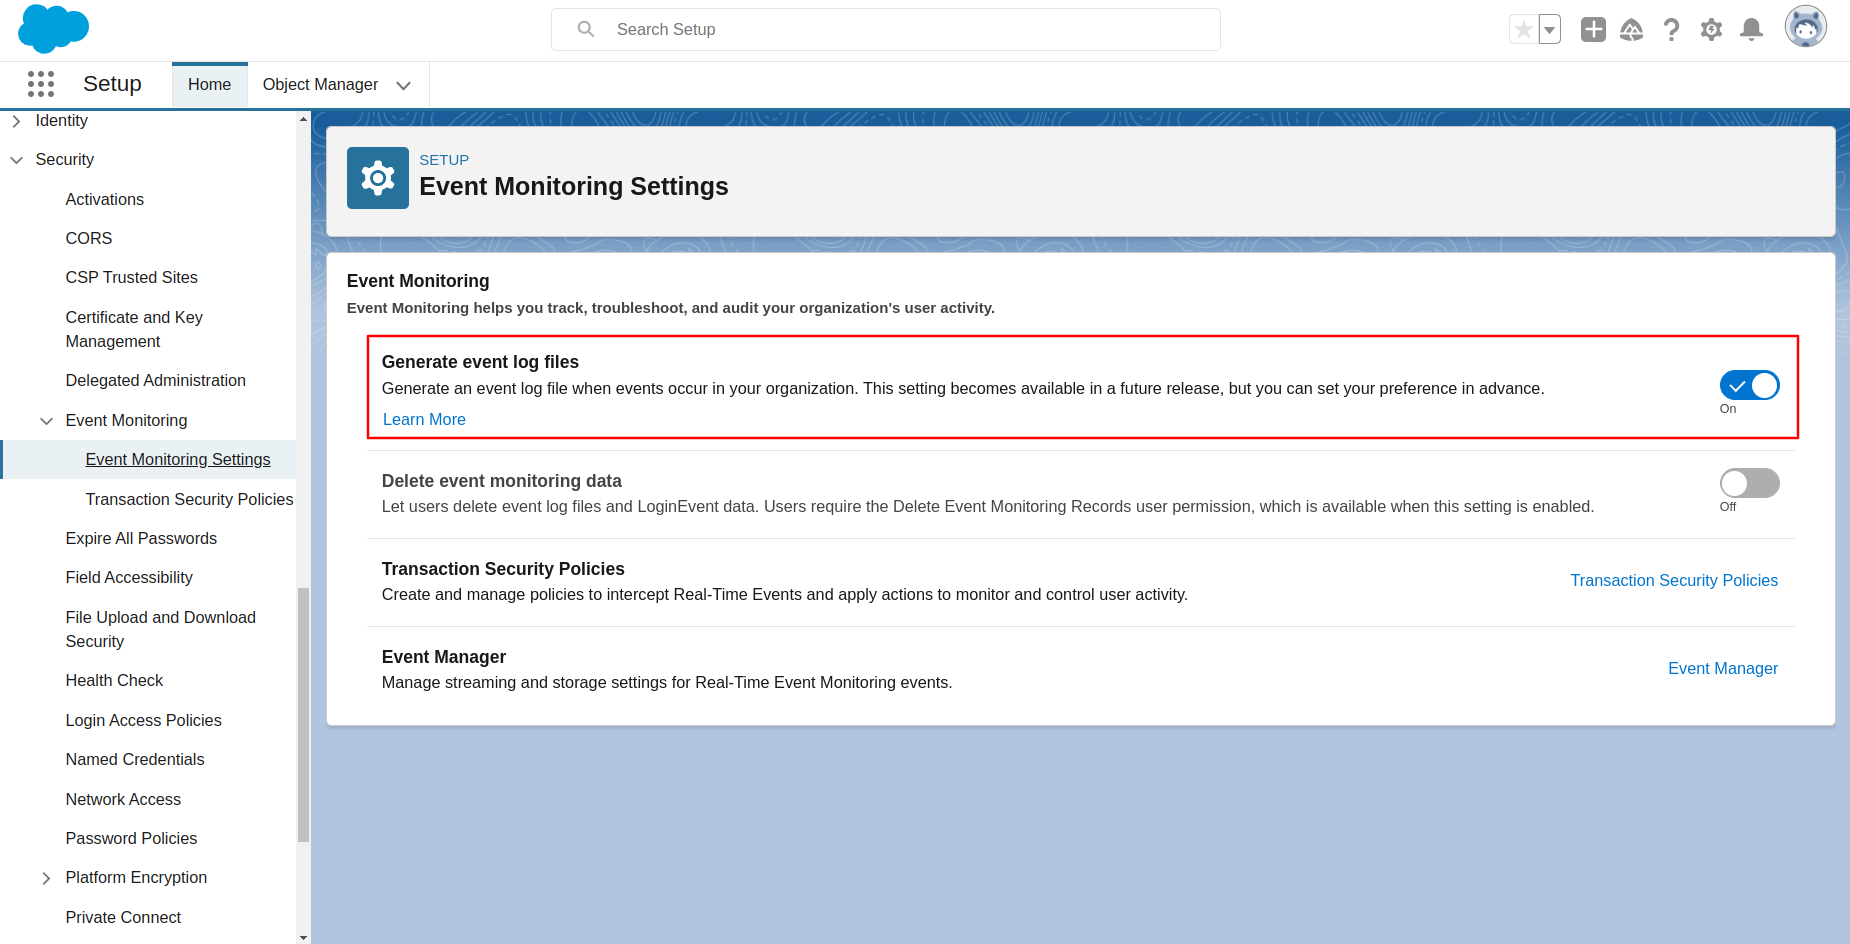
Note: Enabling this option will generate logs when events occur. Please ignore if already enabled.
Step 2: Create an External Client App
-
Navigate to Platform Tools -> Apps -> External Client App Manager.
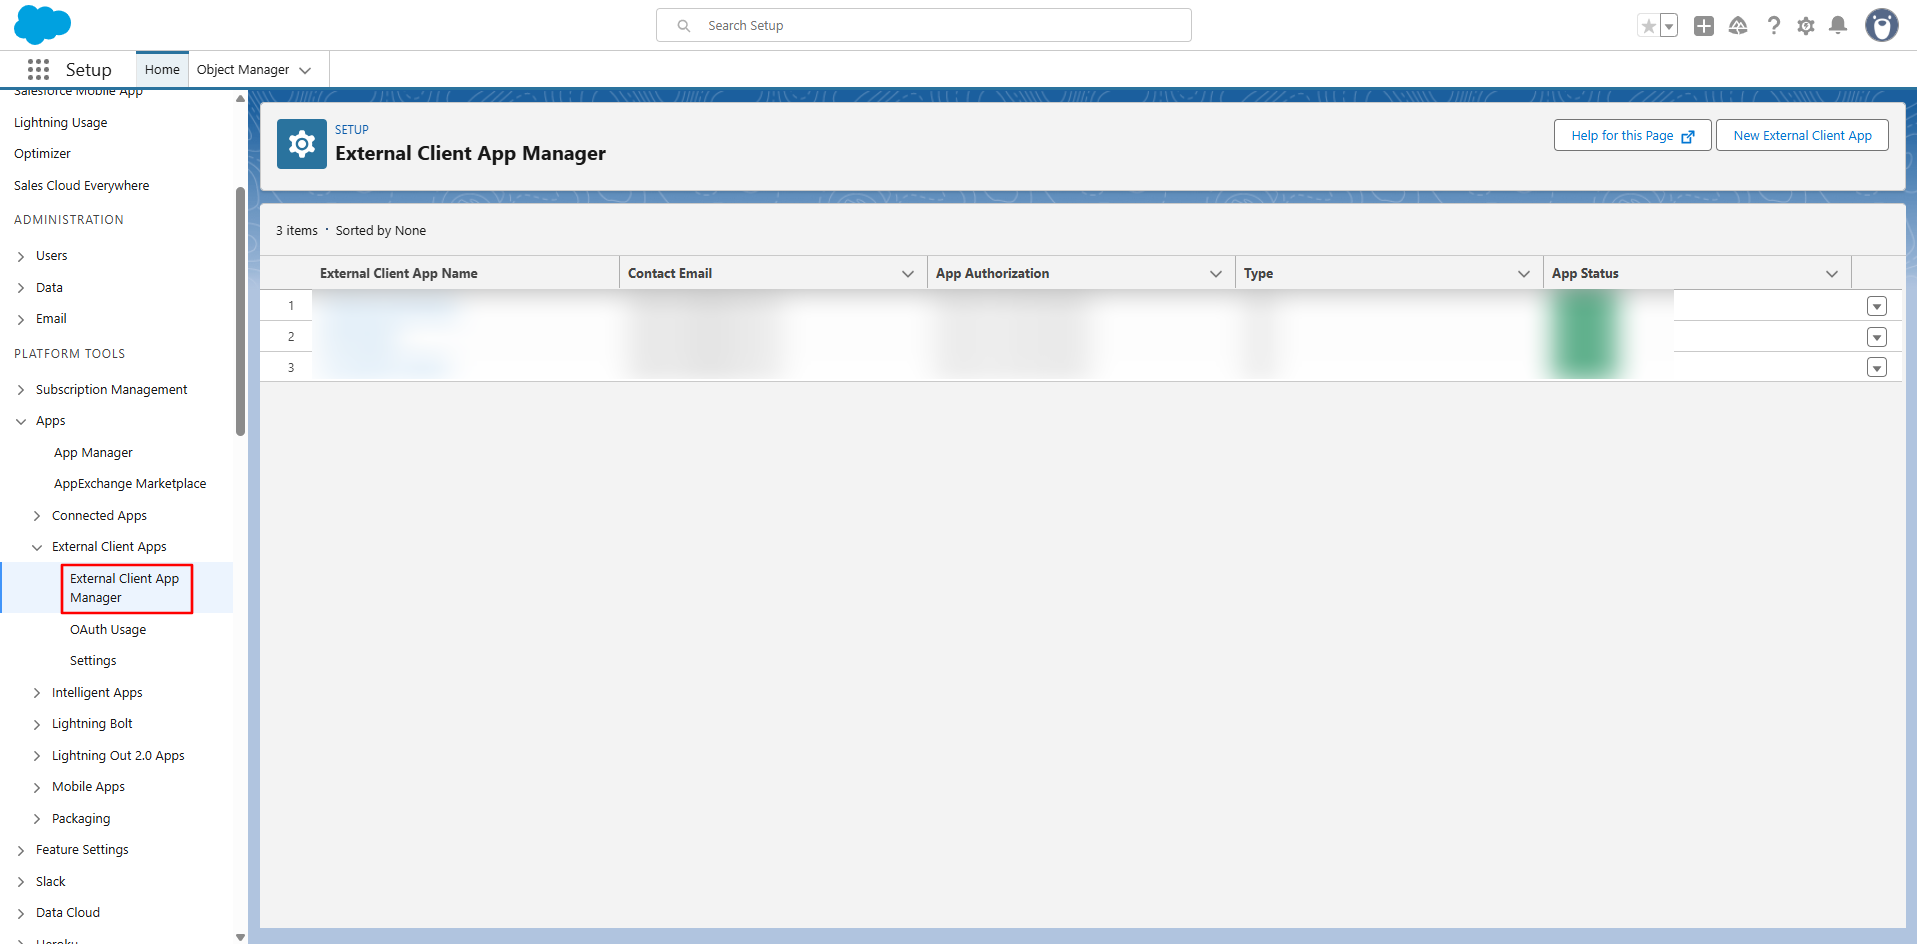
-
In the External Client App Manager page, select New External Client App.
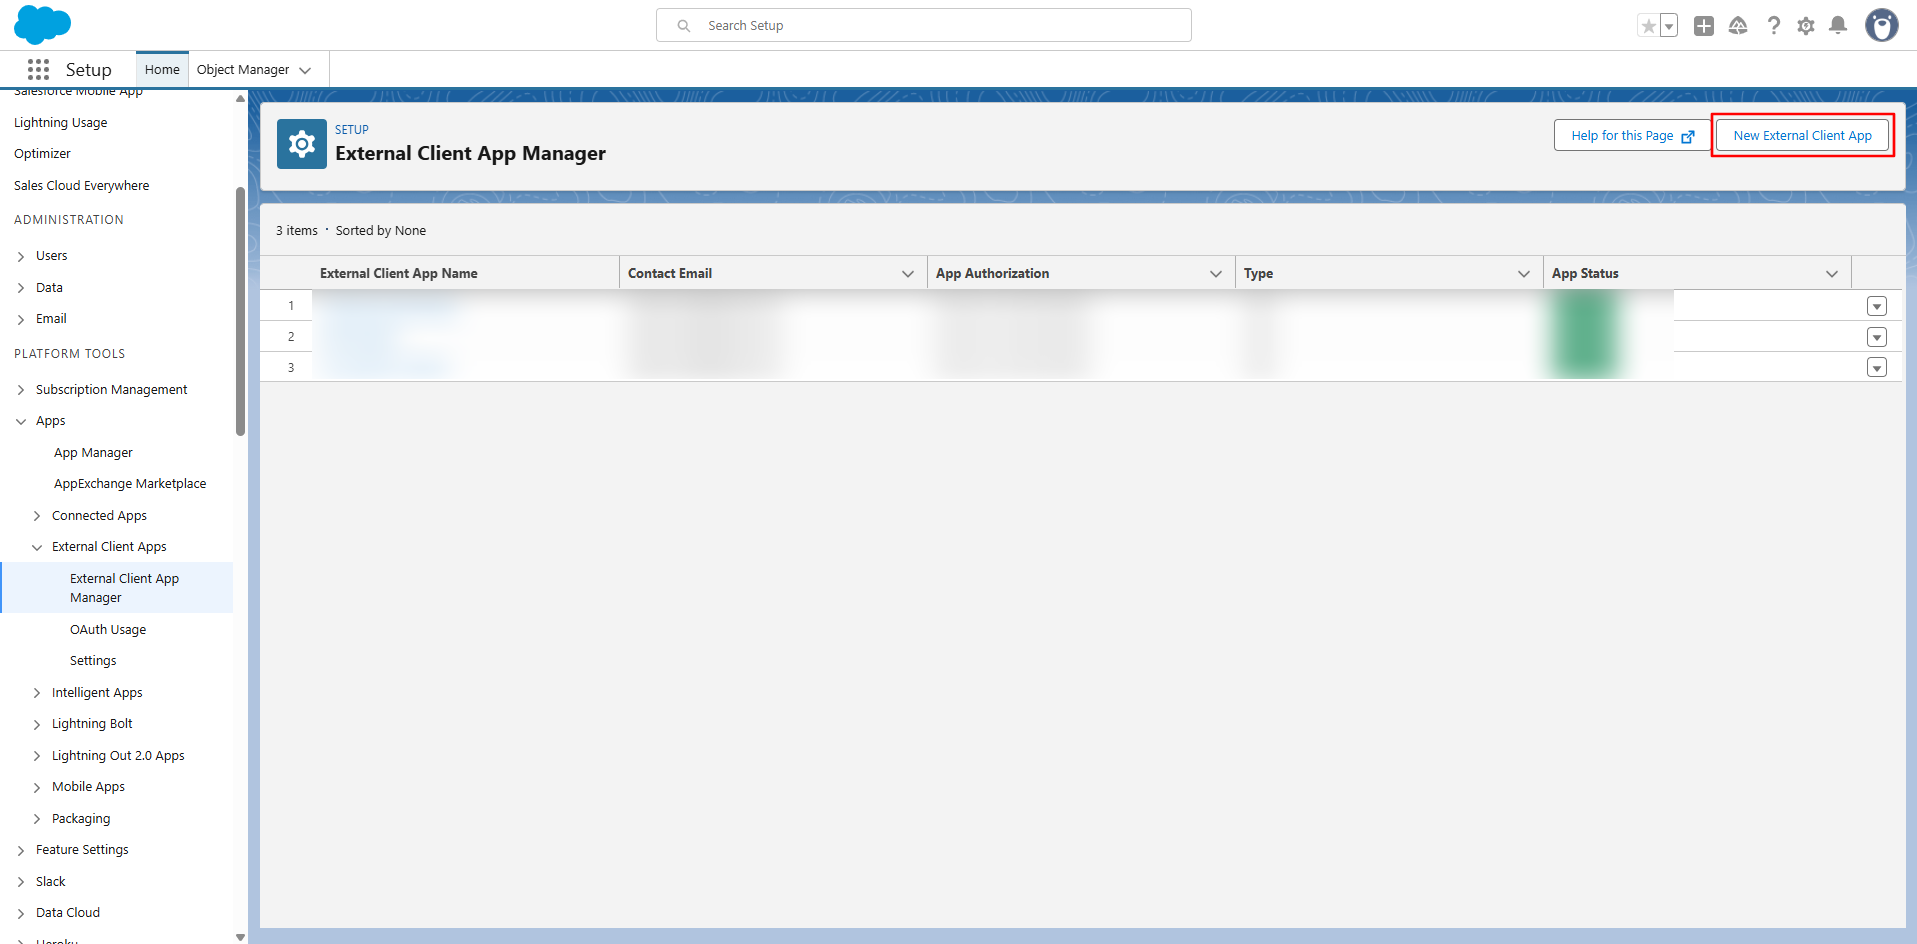
-
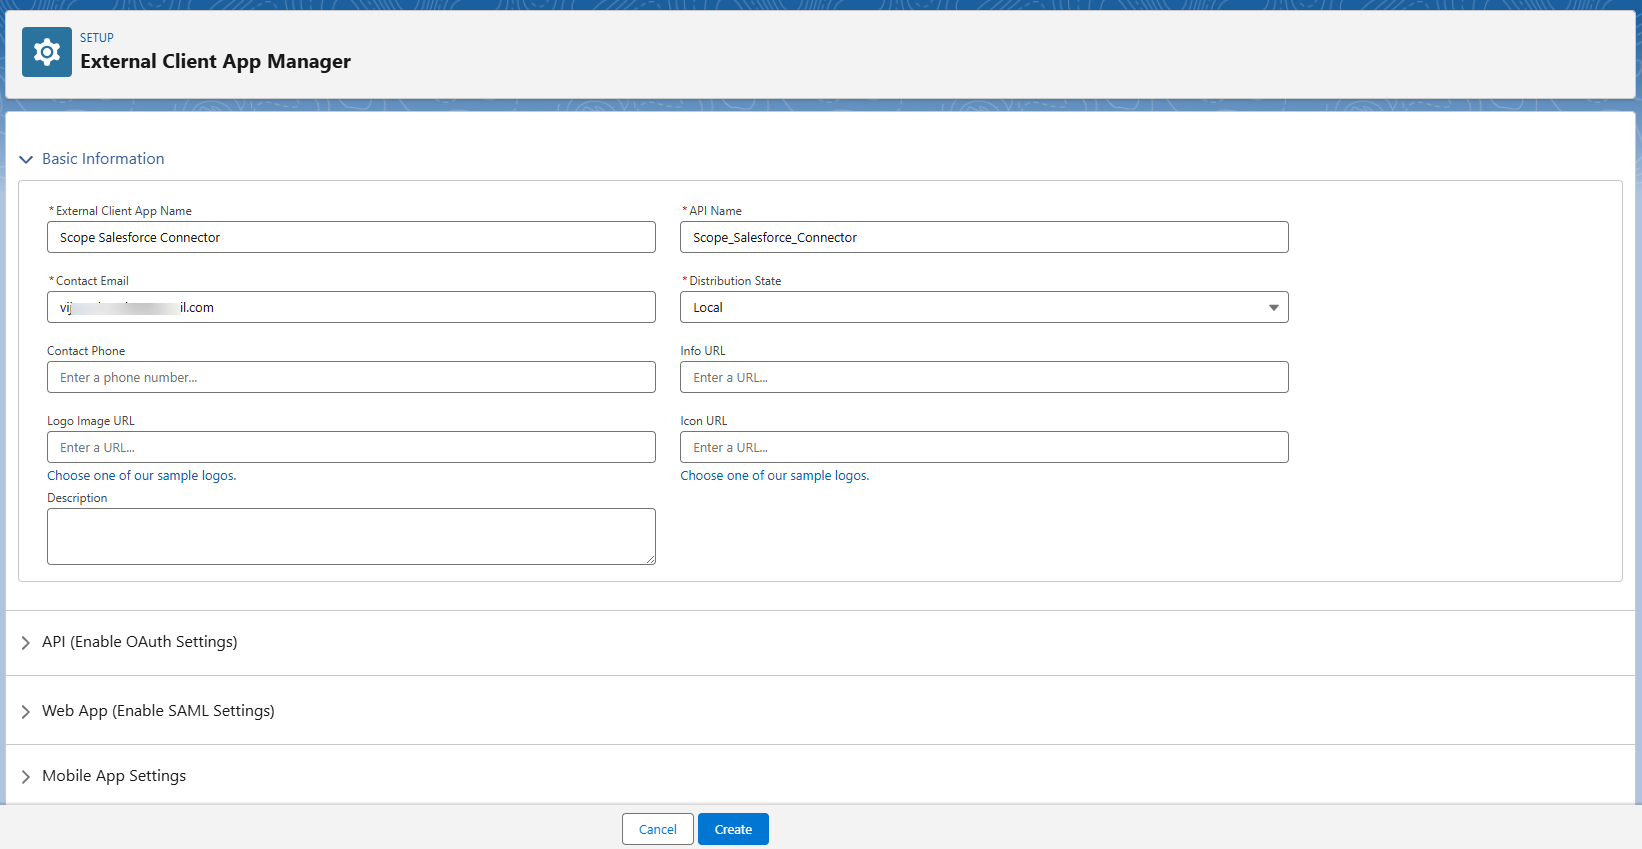
In the Basic Information section:
- Provide the External Client App Name (e.g.,
Scope Salesforce Connector). - Provide the Contact Email.
- Provide the External Client App Name (e.g.,
-
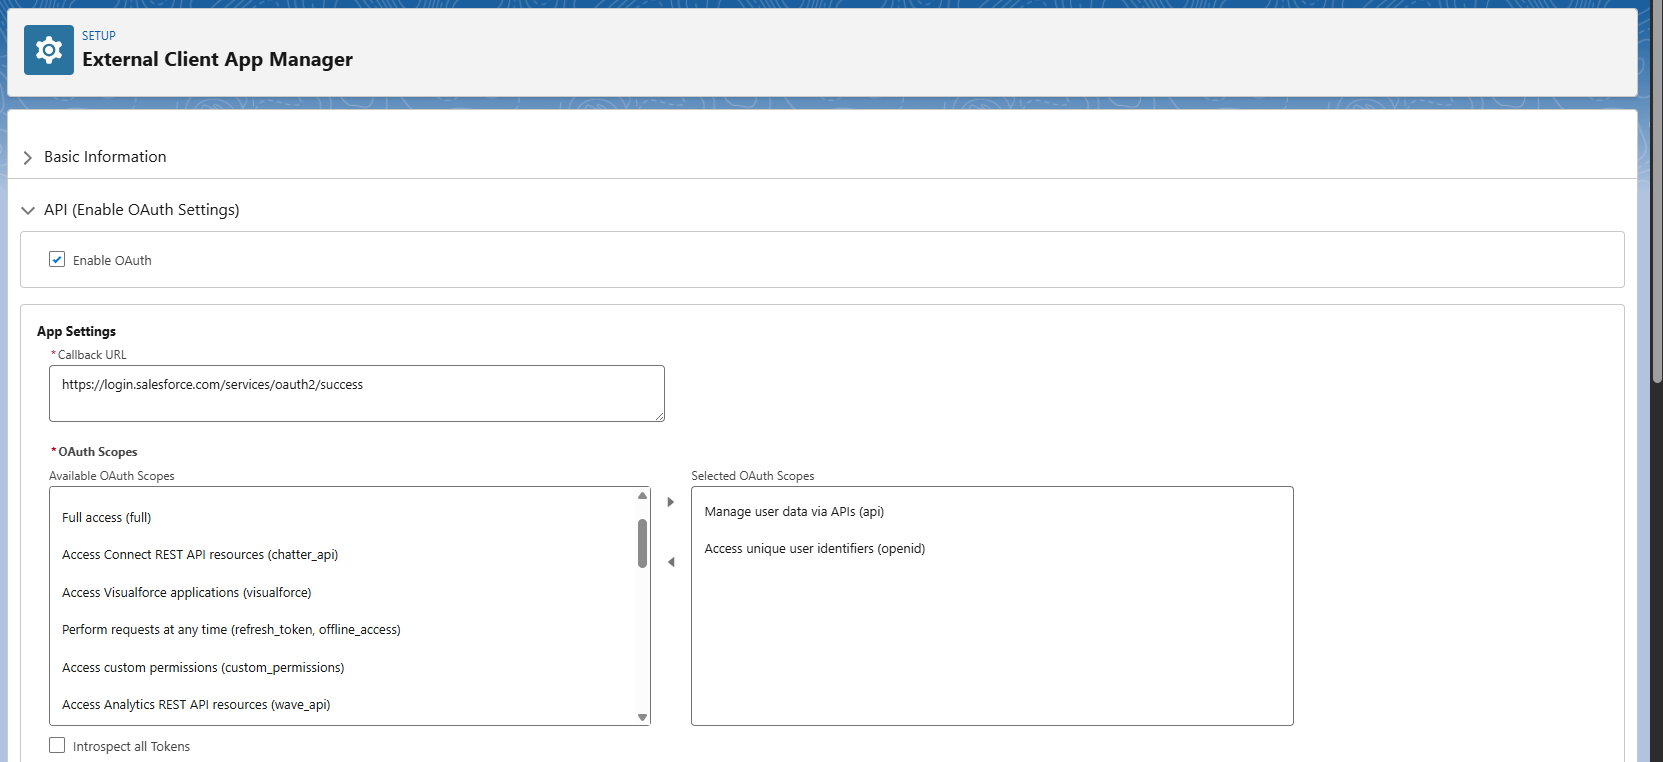
In the API (Enable OAuth Settings) section, select the Enable OAuth checkbox. Once selected:
- Under App Settings, provide the required Callback URL (e.g.,
https://login.salesforce.com/services/oauth2/success). - In OAuth Scopes, select Manage user data via APIs (api) and Access unique user identifiers (openid) from the Available OAuth Scopes list and add them to the Selected OAuth Scopes.
- Under App Settings, provide the required Callback URL (e.g.,
-
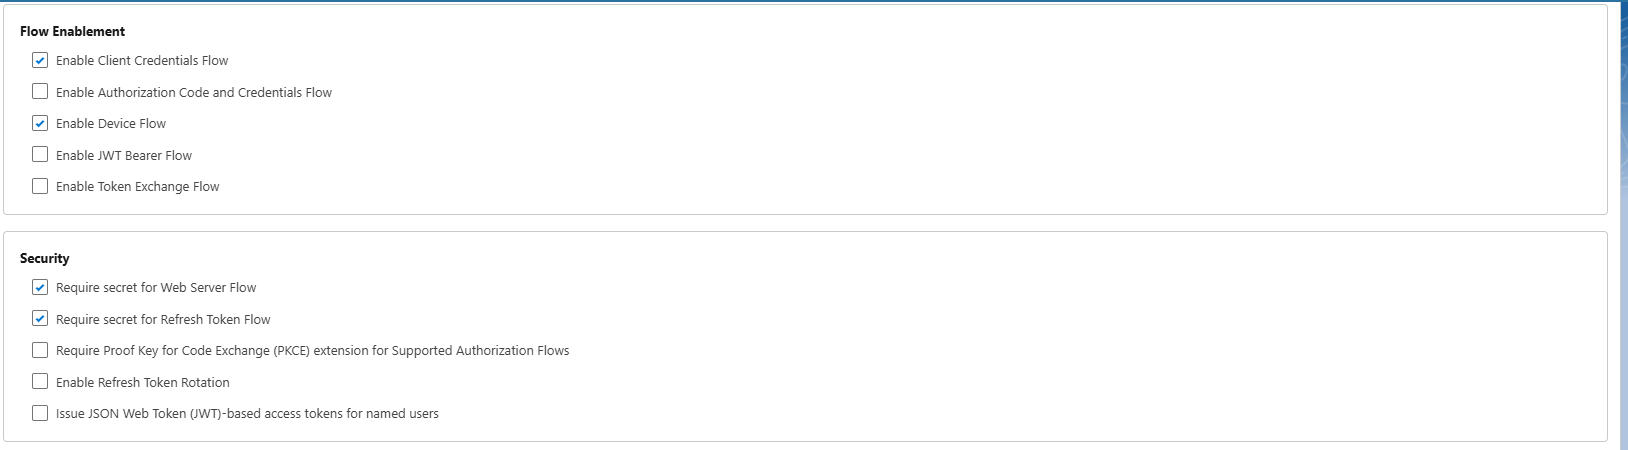
Under Flow Enablement:
- Select the Enable Client Credential Flow checkbox. Confirm the enablement by clicking OK in the confirmation dialog.
- Select the Enable for Device Flow checkbox.
-
Under Security:
- Select Require Secret for Web Server Flow.
- Select Require Secret for Refresh Token Flow.
-
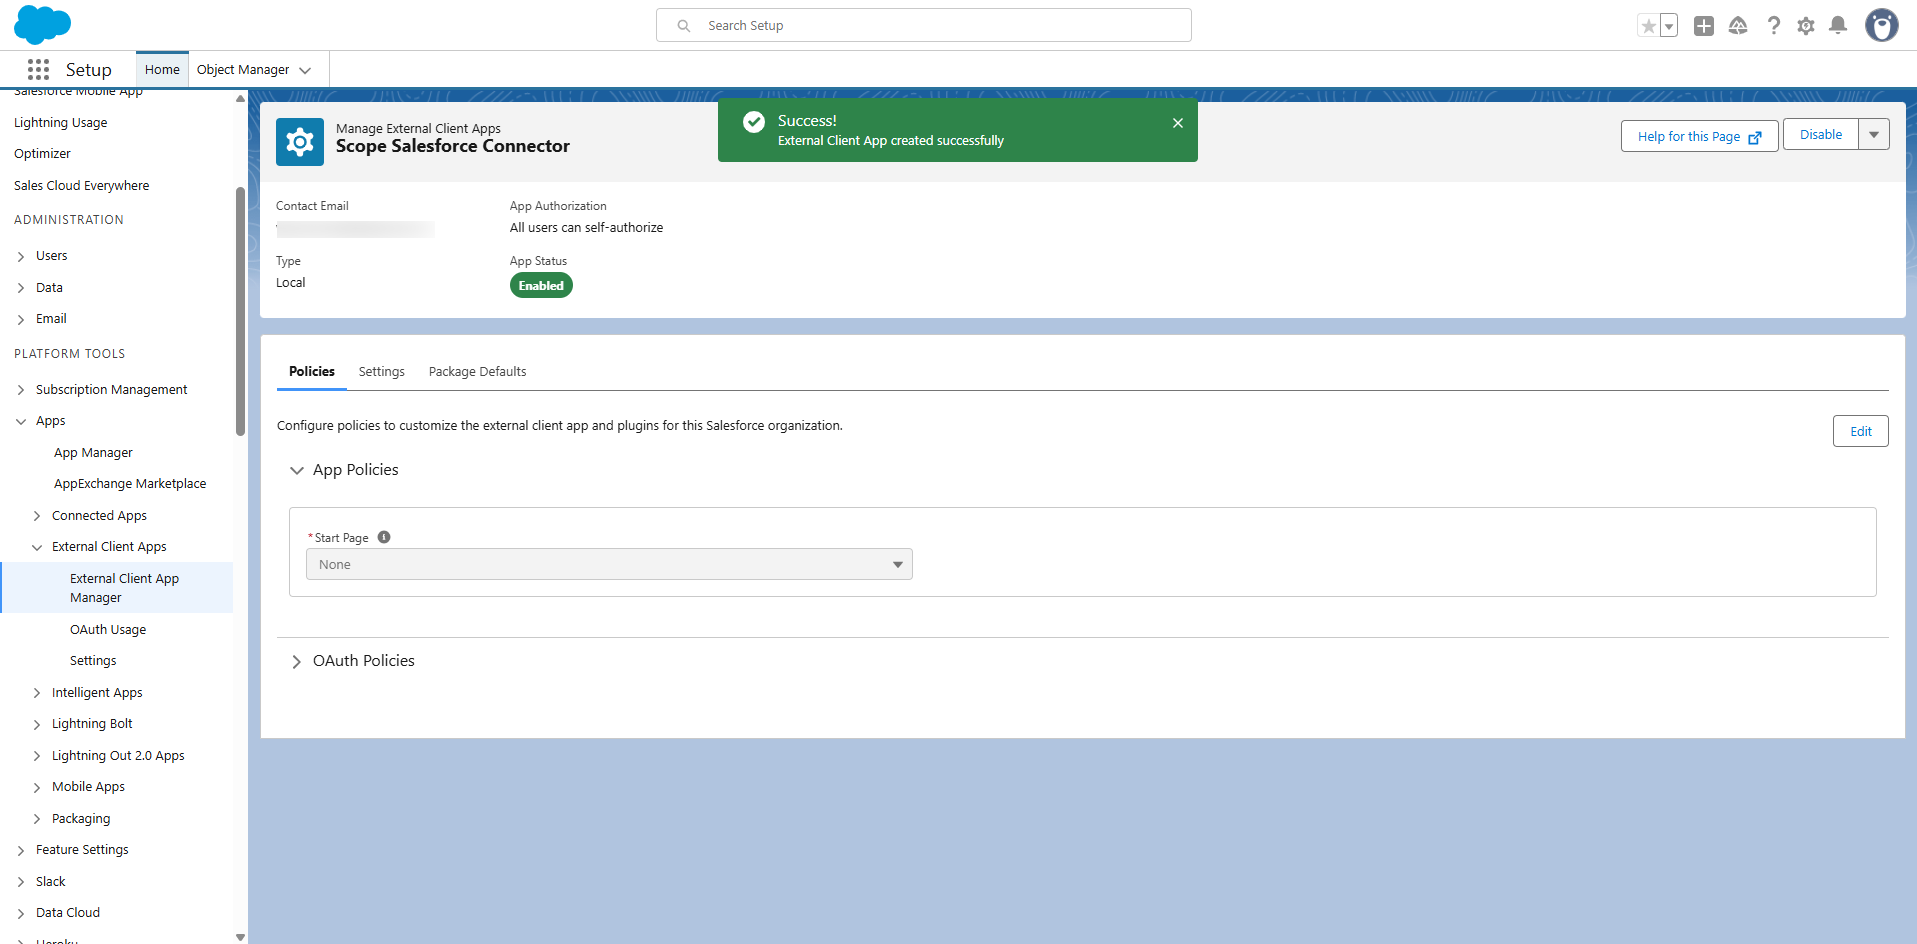
Click Create to create the External Client App.
Step 3: Map the Integration User with the Created App
-
Navigate to Platform Tools -> Apps -> External Client Apps -> External Client App Manager.
-
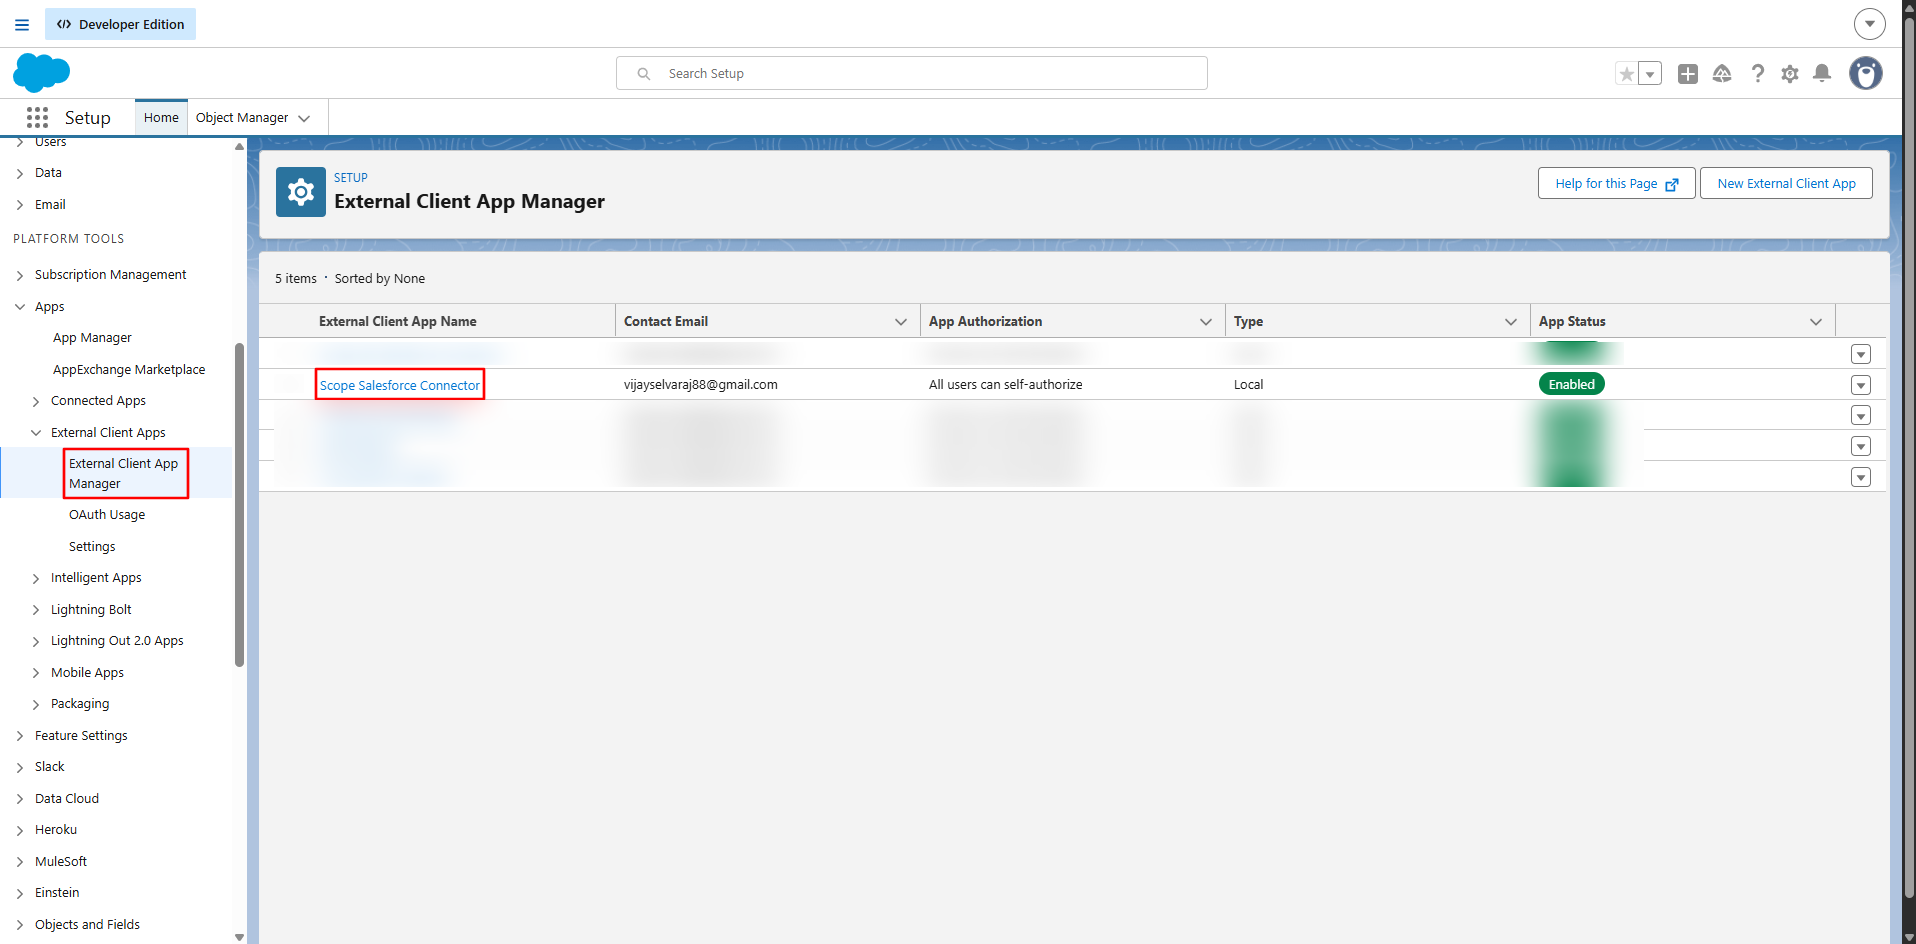
Click on the app you have created (e.g.,
Scope Salesforce Connector).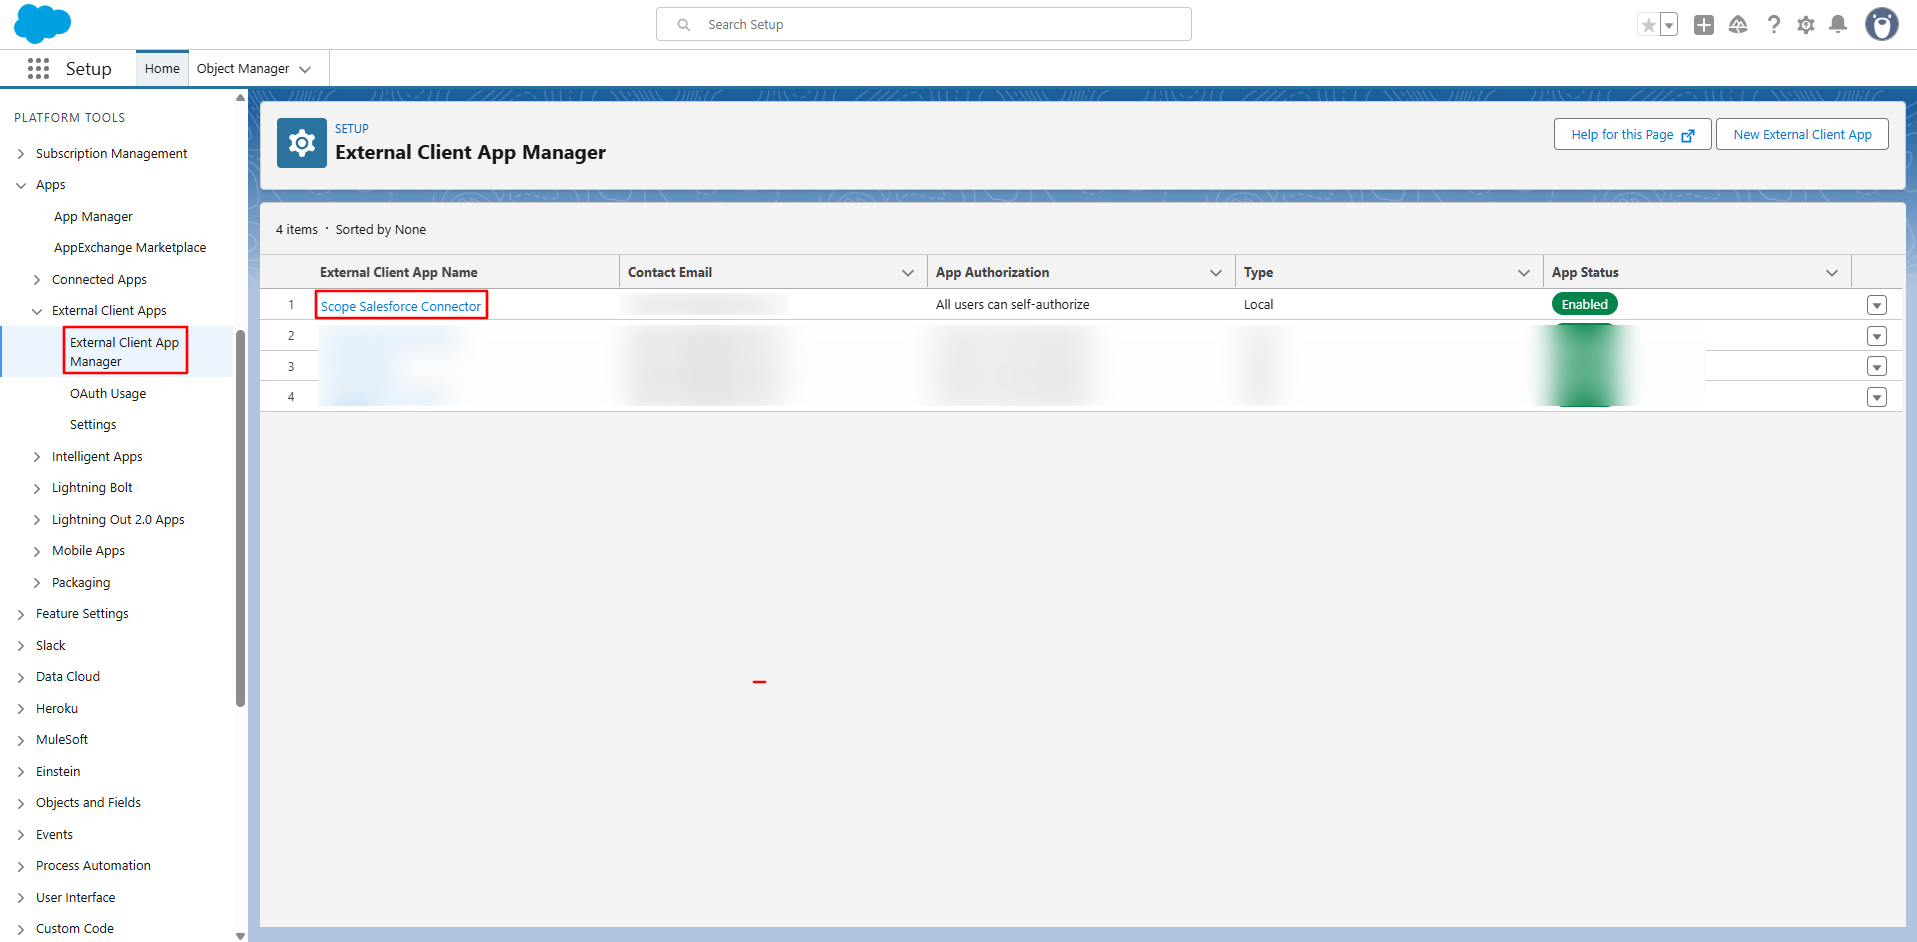
-
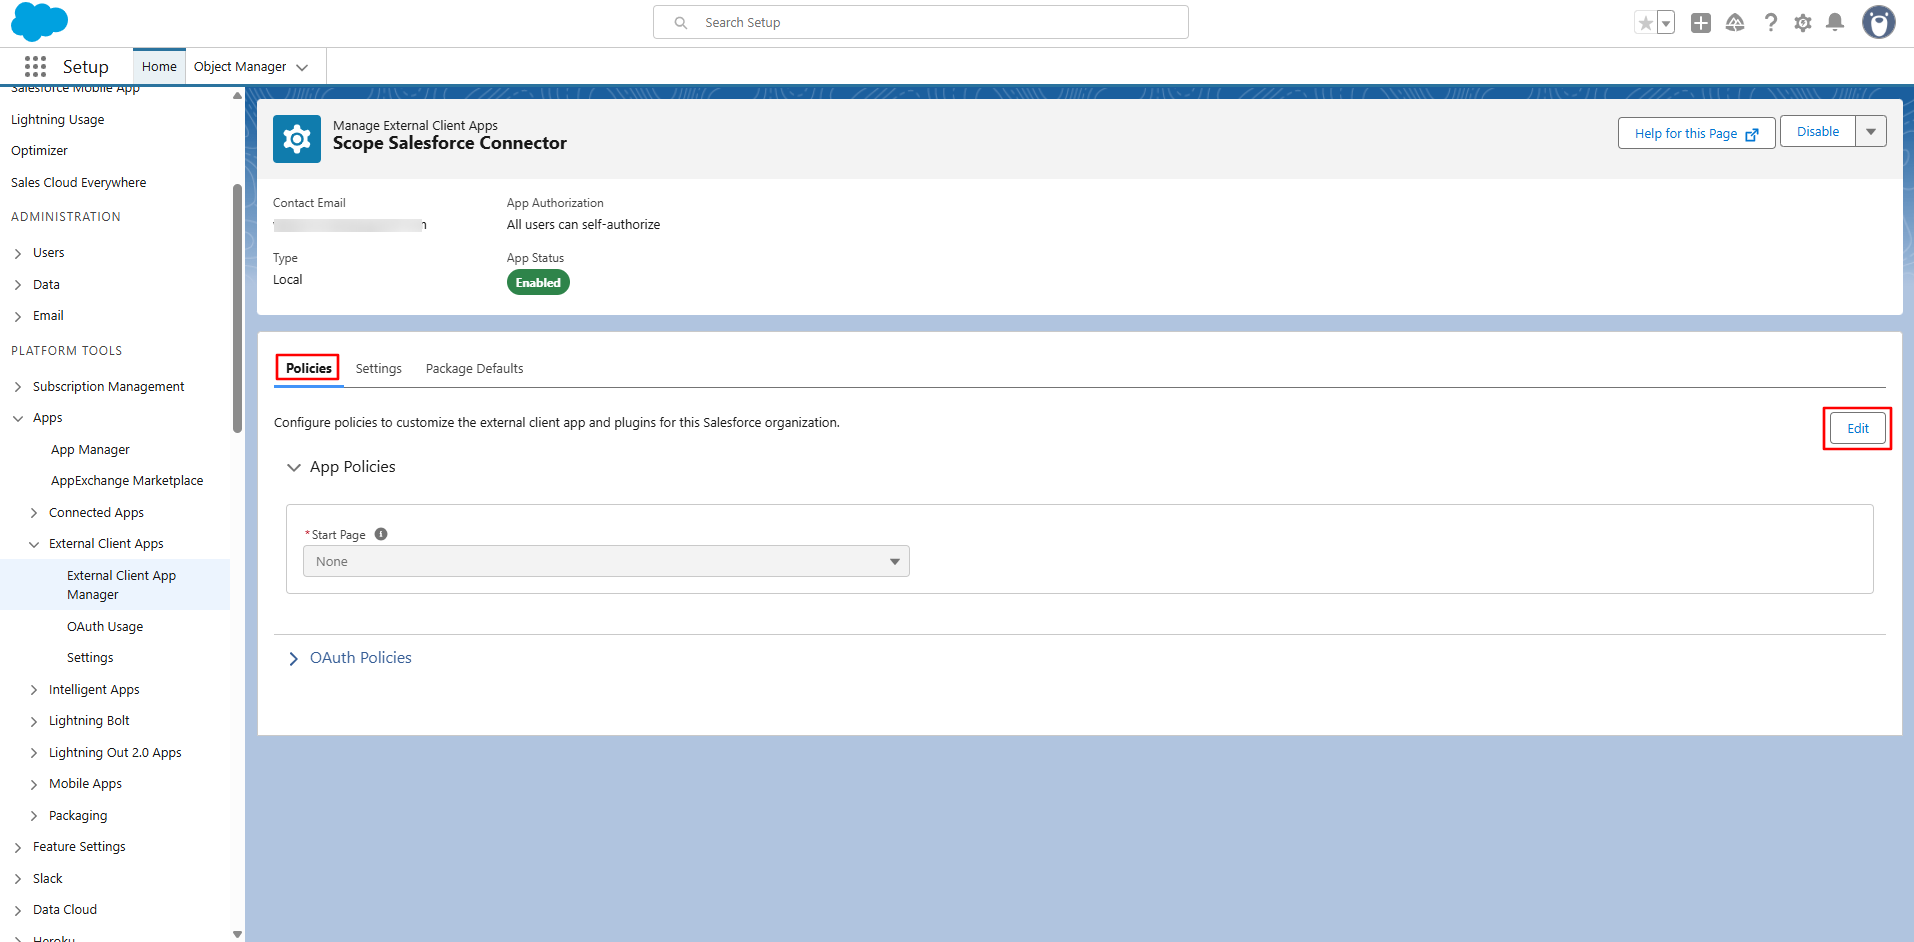
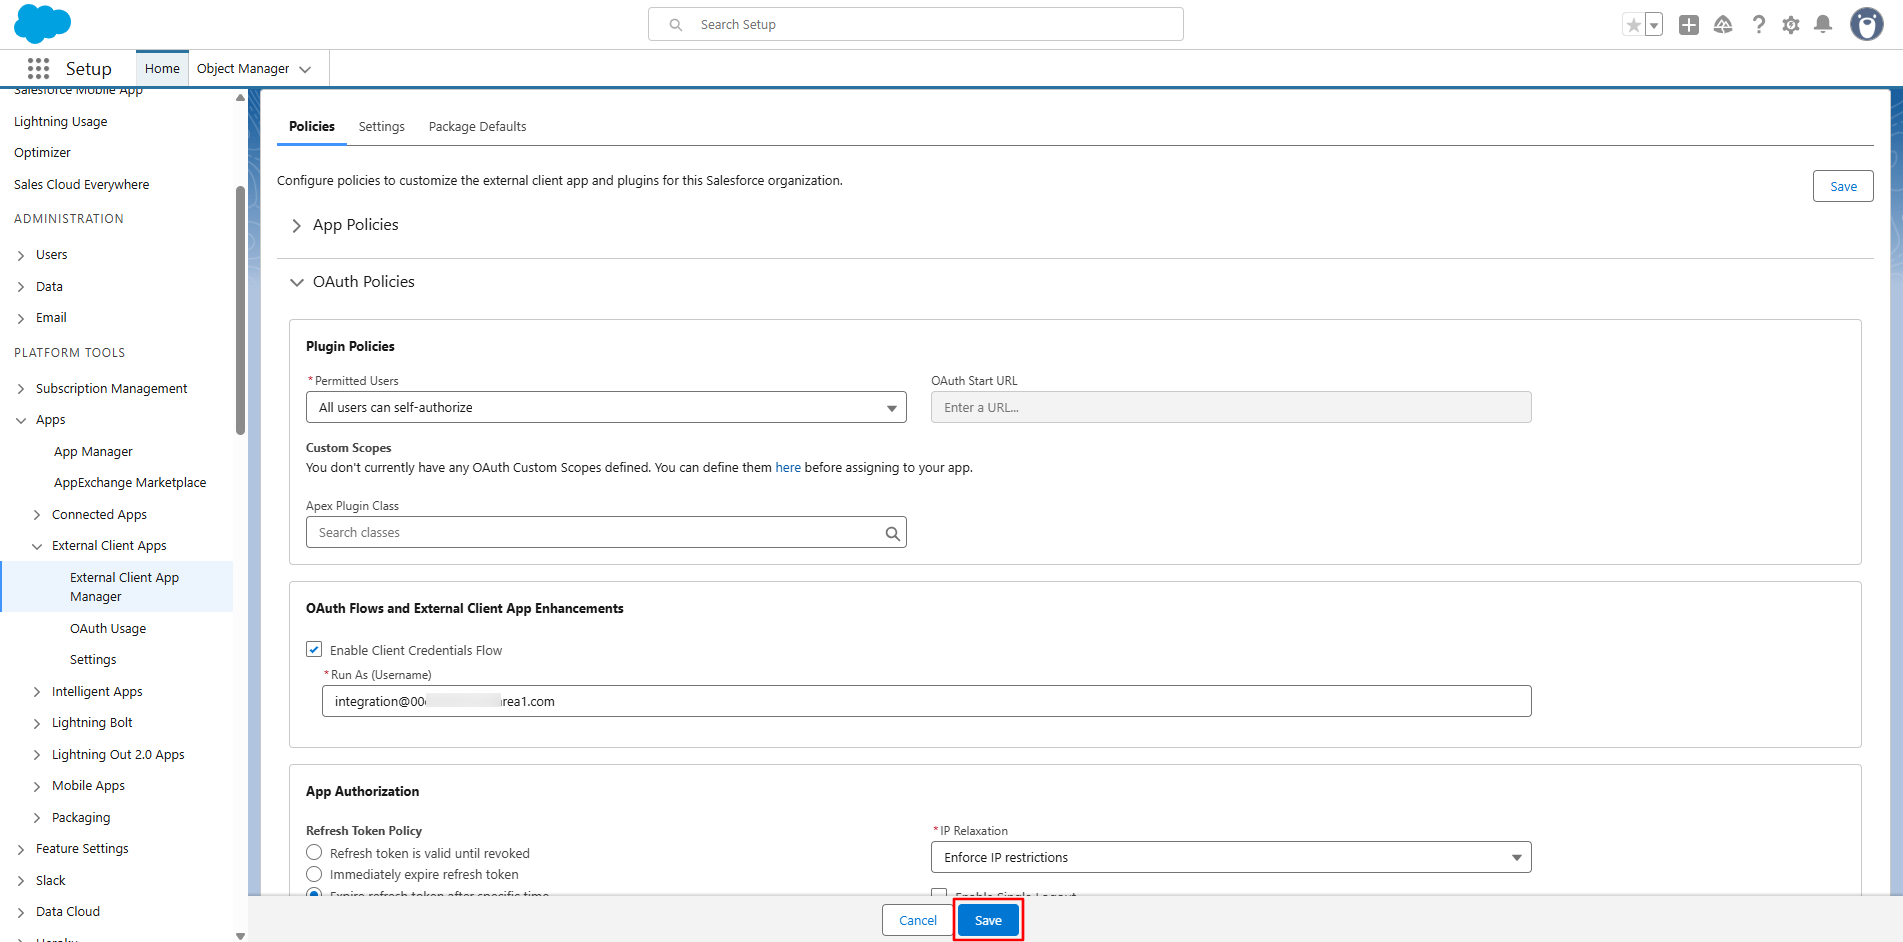
Under Policies, click Edit.
-
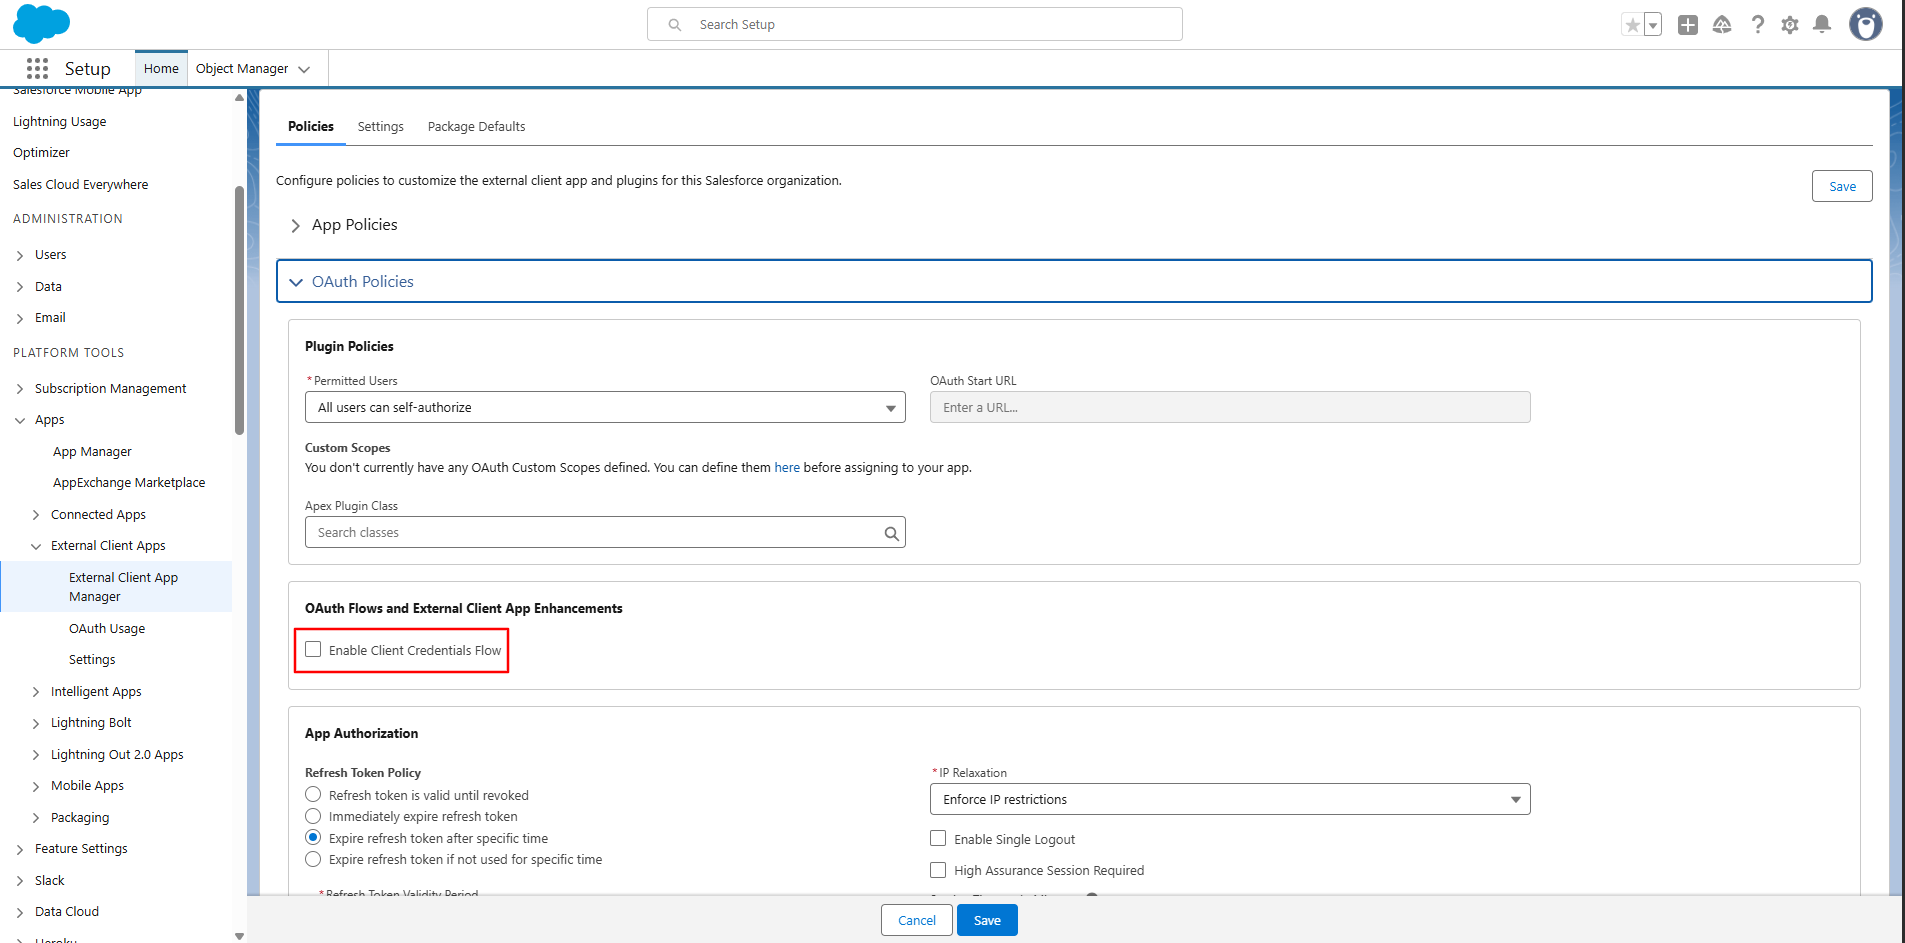
Under OAuth Policies -> OAuth Flows and External Client App Enhancements, click the Enable Client Credentials Flow checkbox.
-
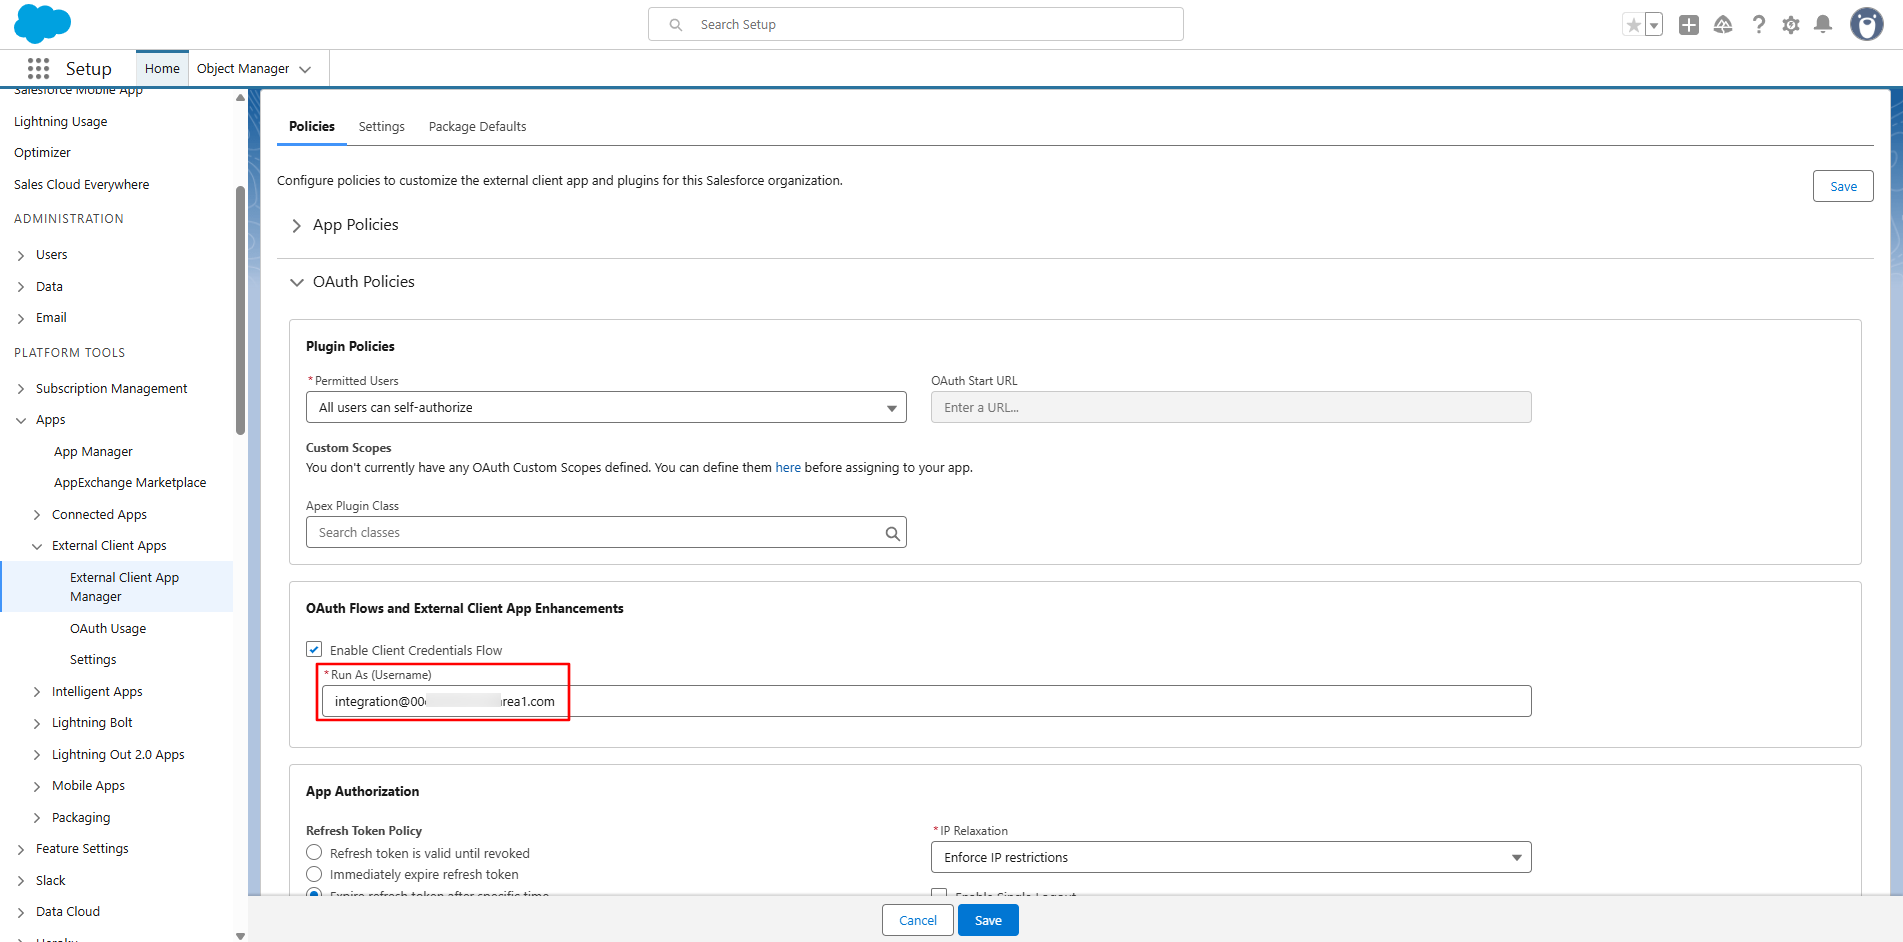
Provide the username of the Integration User in the user field.
-
Click the Save button.
Step 4: Generate Consumer Key & Consumer Secret
-
Open the created External App by navigating to Platform Tools -> External Client Apps -> External Client App Manager.
-
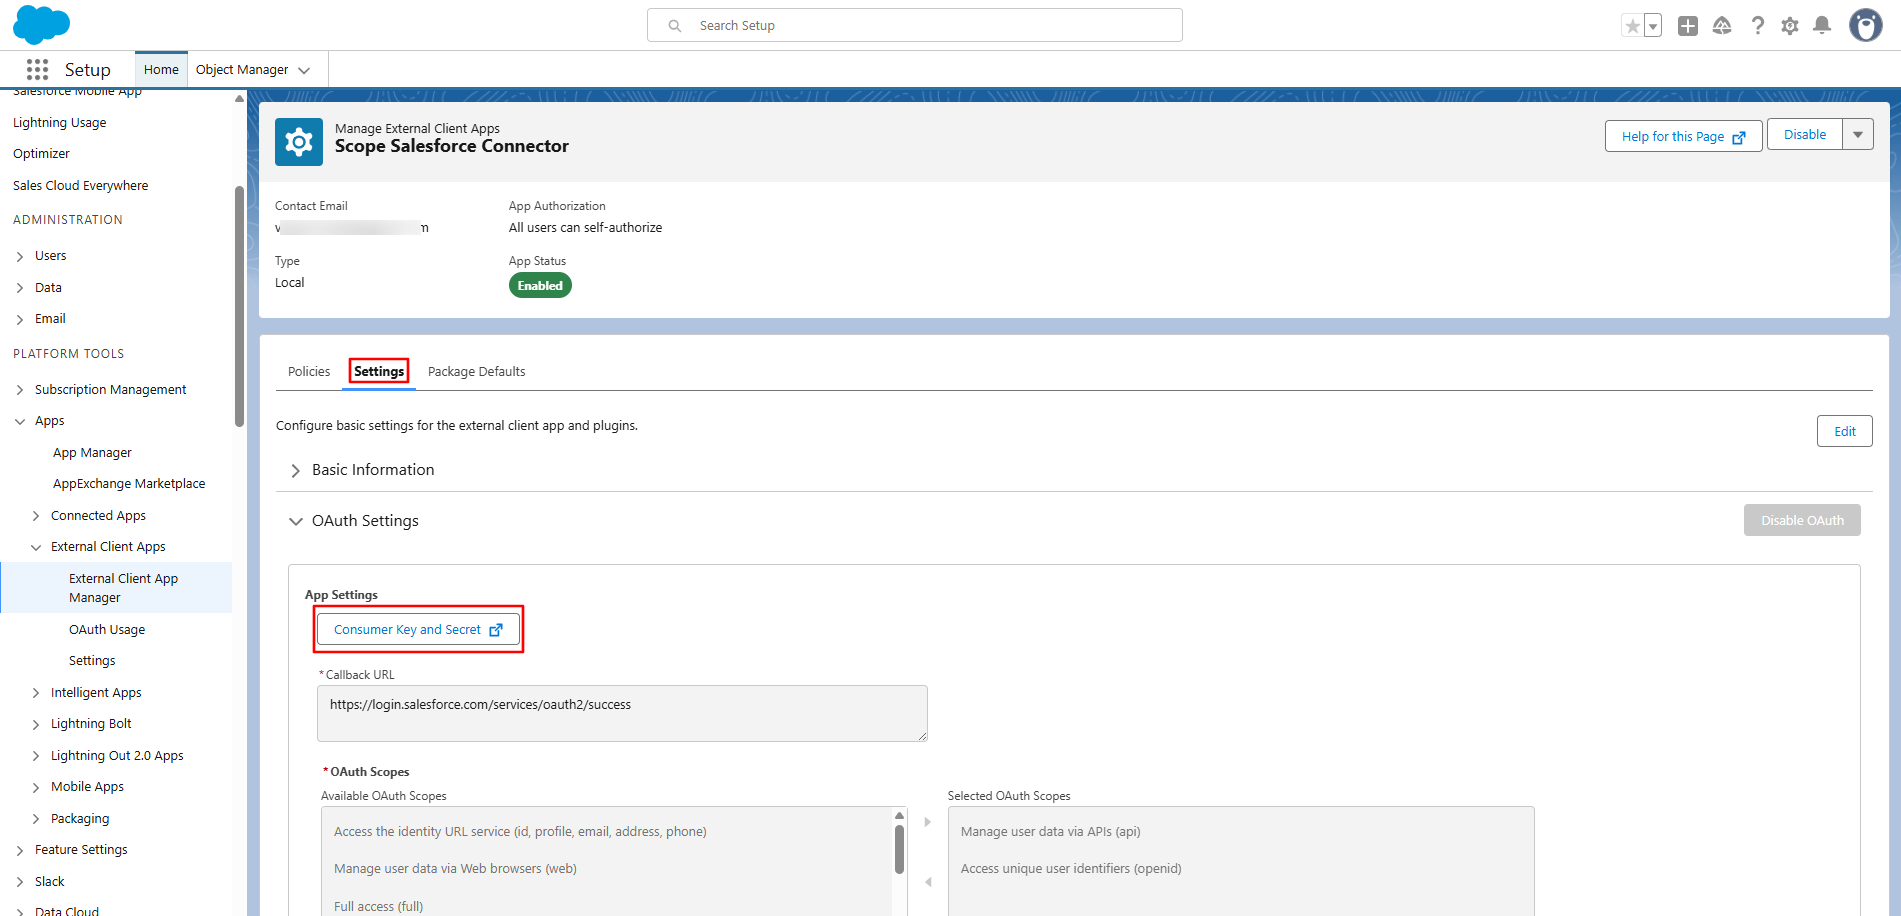
In the Settings tab, under the OAuth Settings tab, click Generate Consumer Key & Secret.
-
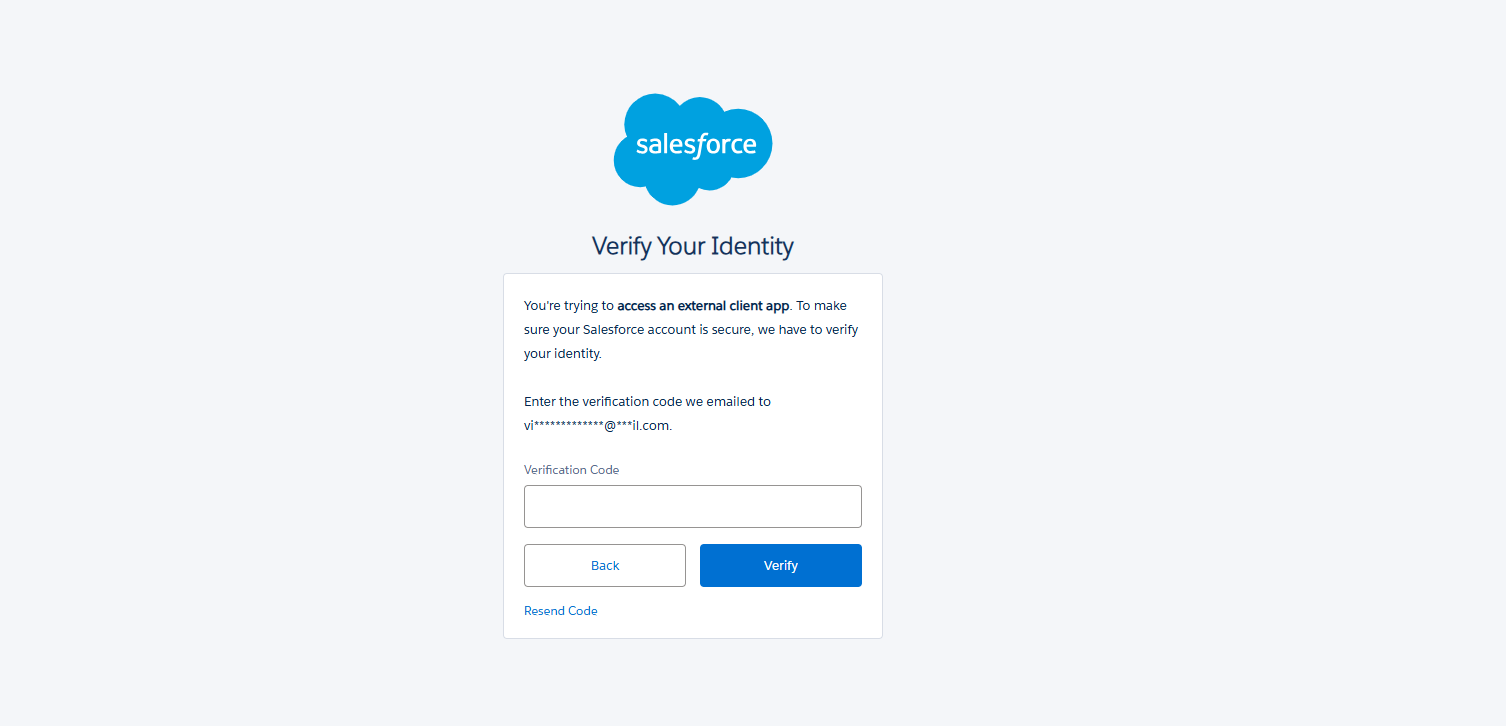
Salesforce will send a verification code to the registered email address. Enter the received verification code.
-
The Consumer Key (Client ID) and Consumer Secret (Client Secret) are now displayed. Copy and save them securely.
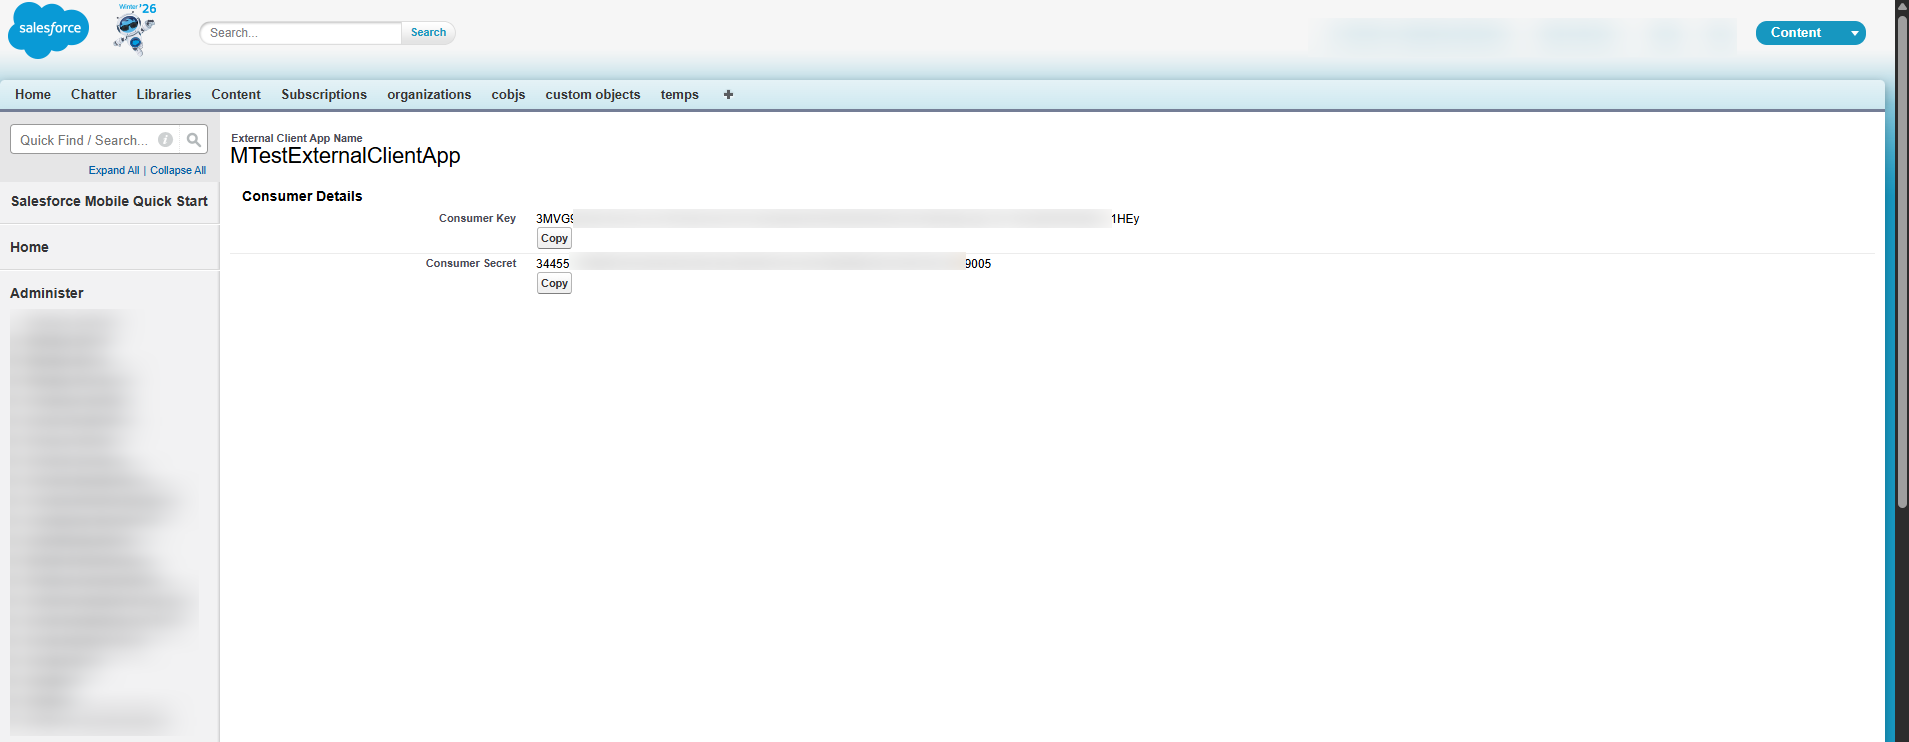
The generated Consumer Key (Client ID) and Consumer Secret (Client Secret) are to be configured in Scope Setup: Step 1 for initiating the Salesforce log ingestion.
Scope Setup
Step 1: Salesforce Cloud Source Registration in the Scope Application
Once the credentials are generated, they must be configured in the Scope application to establish the connection and enable data ingestion from the Salesforce environment.
In the Scope application, to register a Salesforce cloud source, navigate to the cloud source registration page –
-
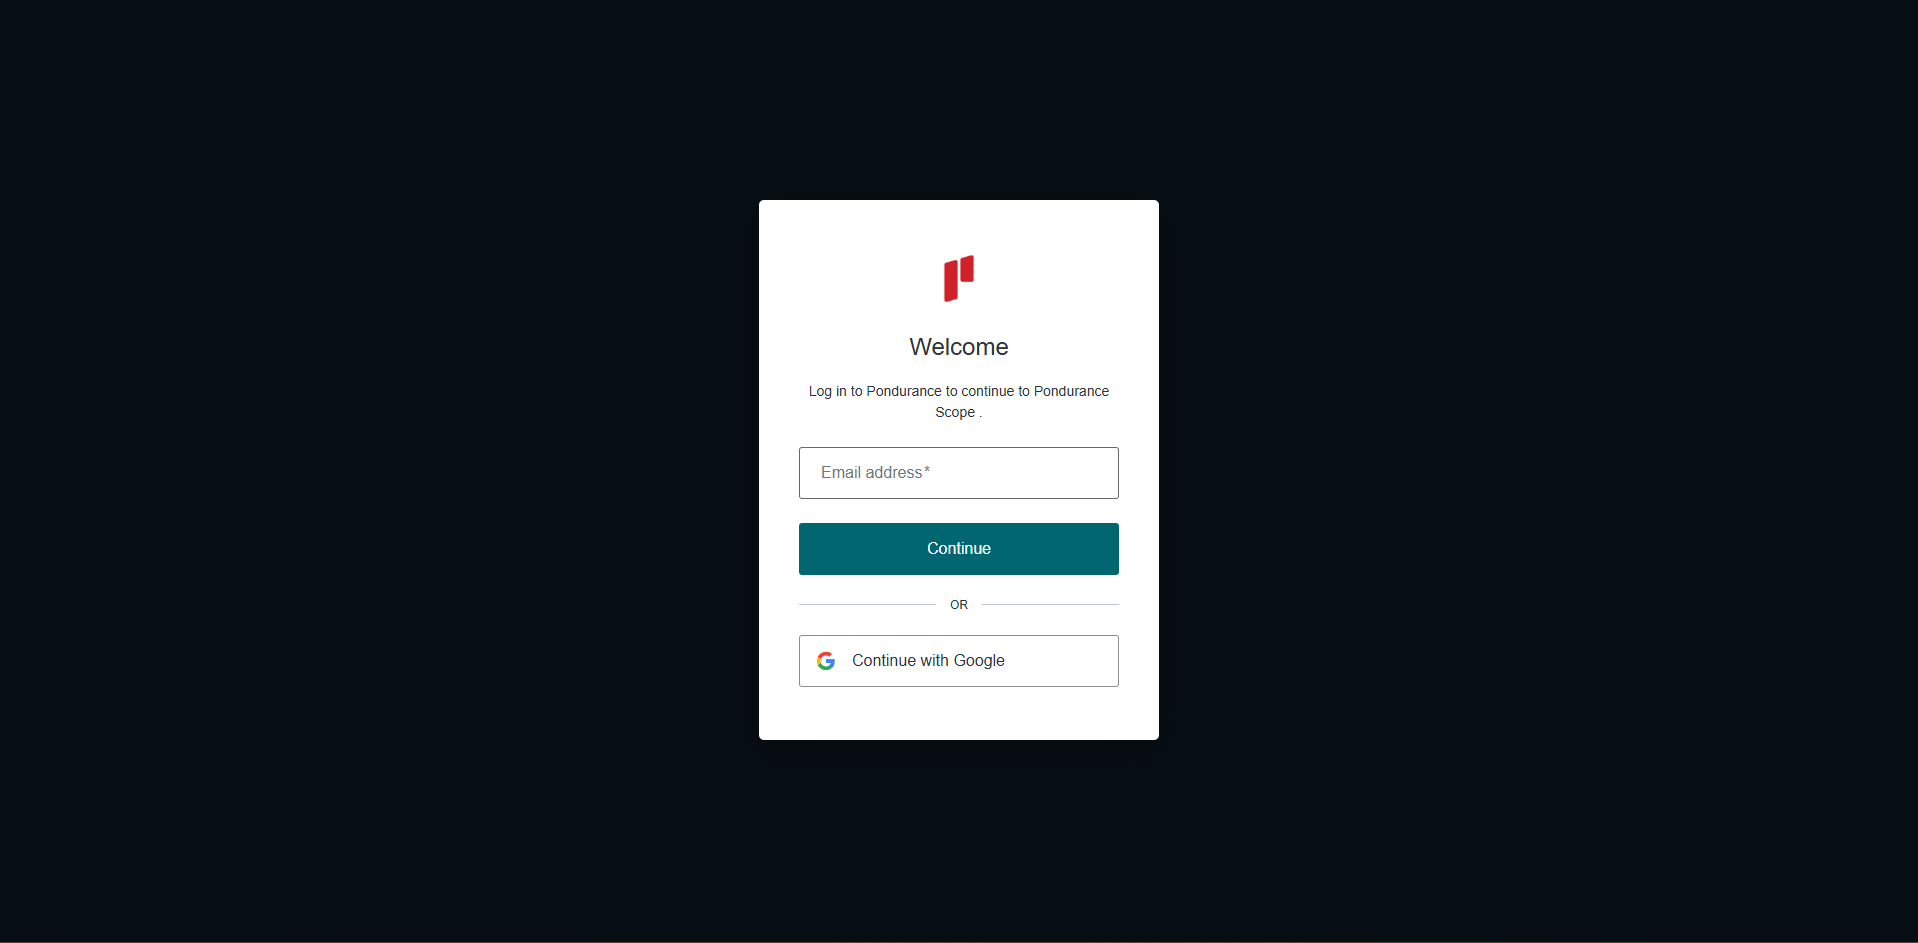
Log into the Scope application
-
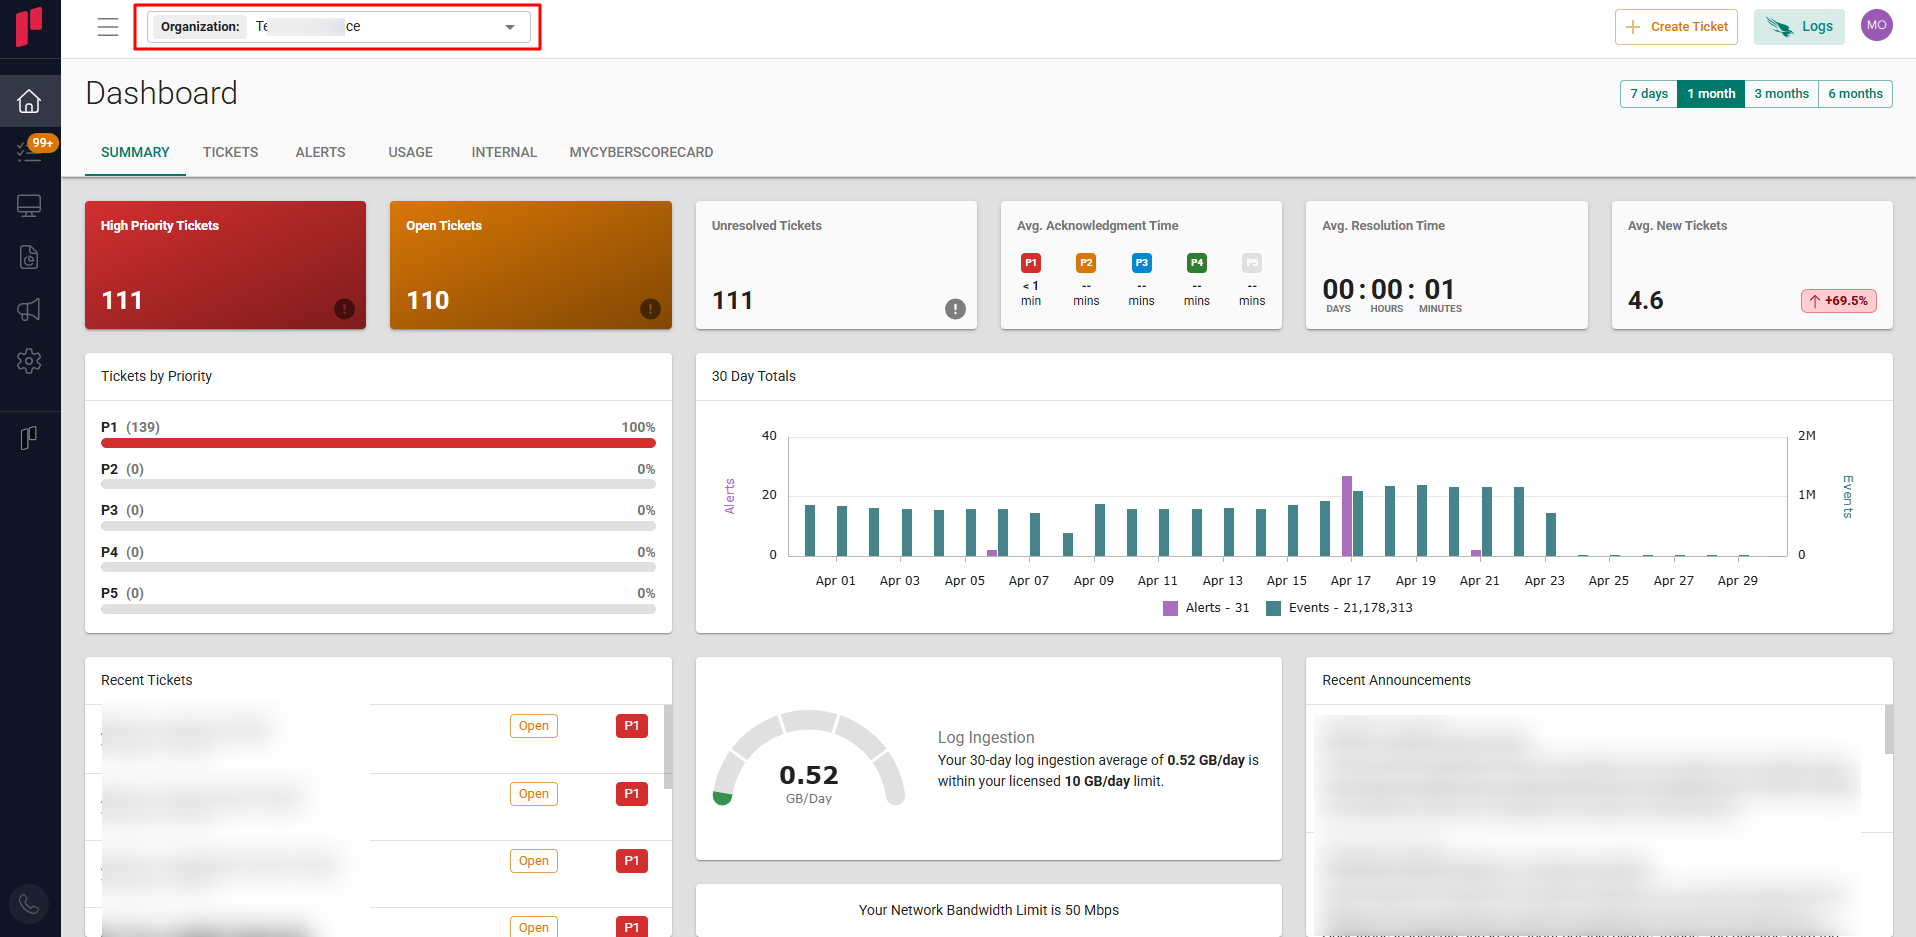
Select the required Organization from the Organization dropdown
-
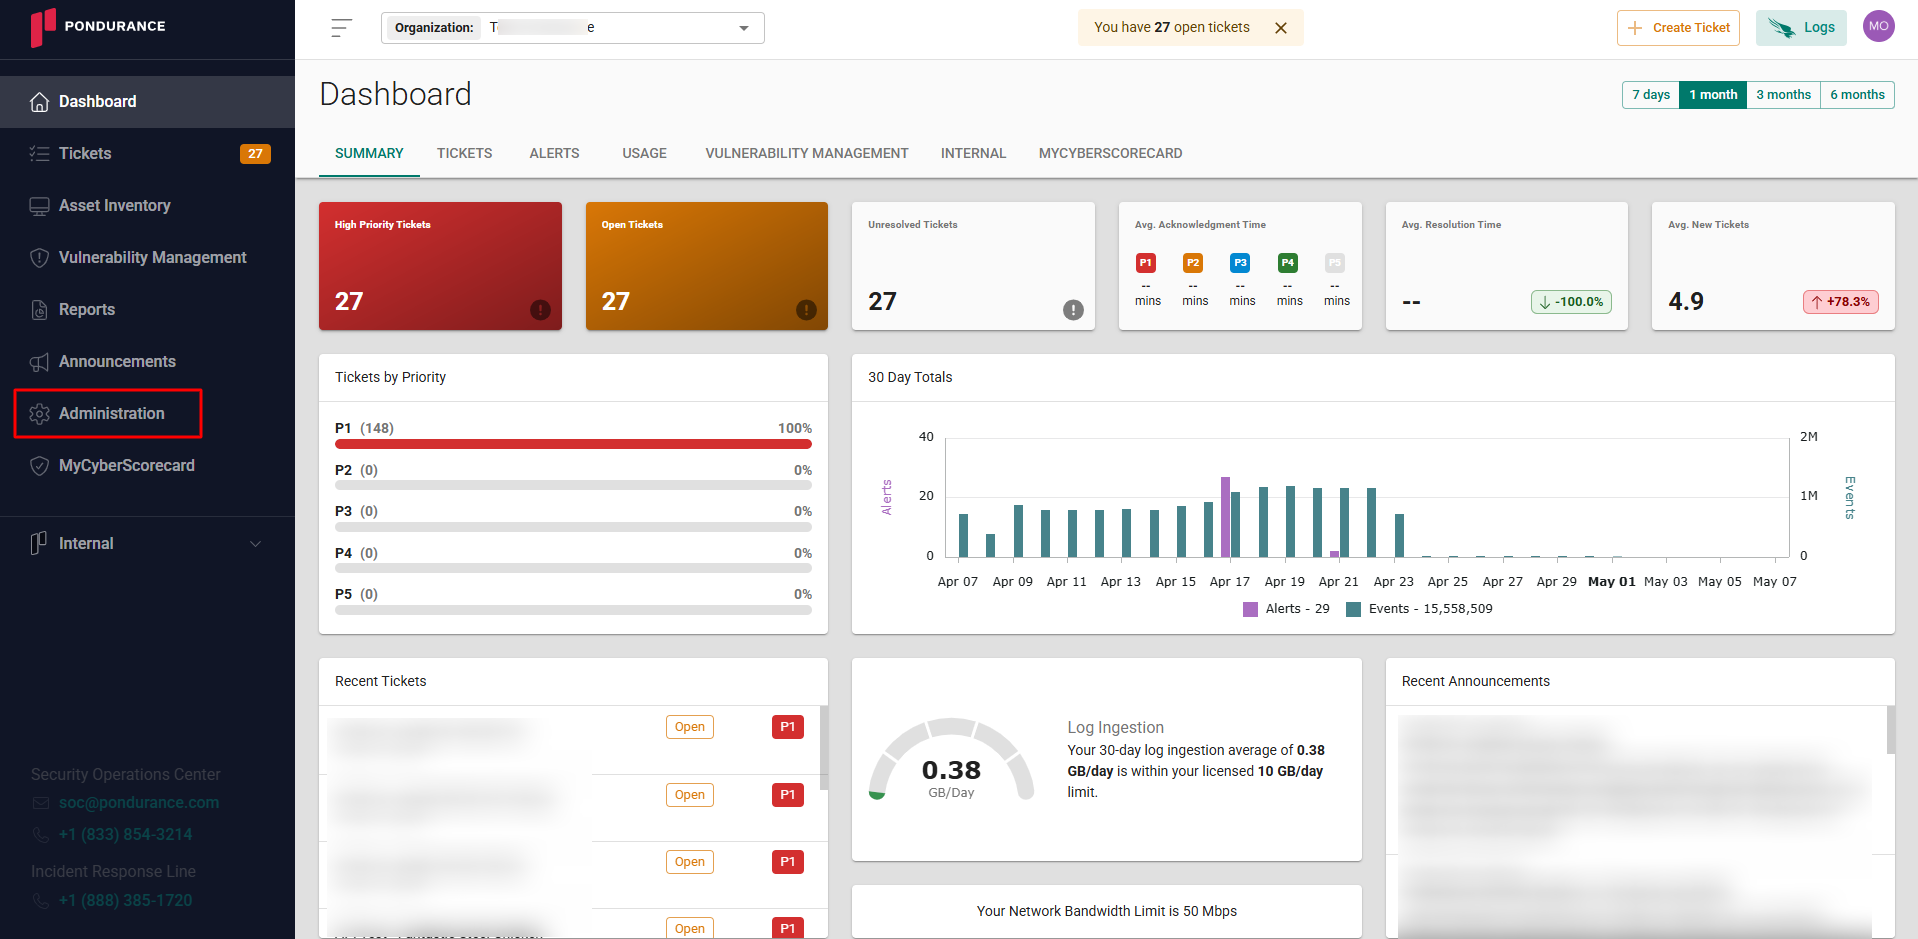
Navigate to the side menu -> Administration
-
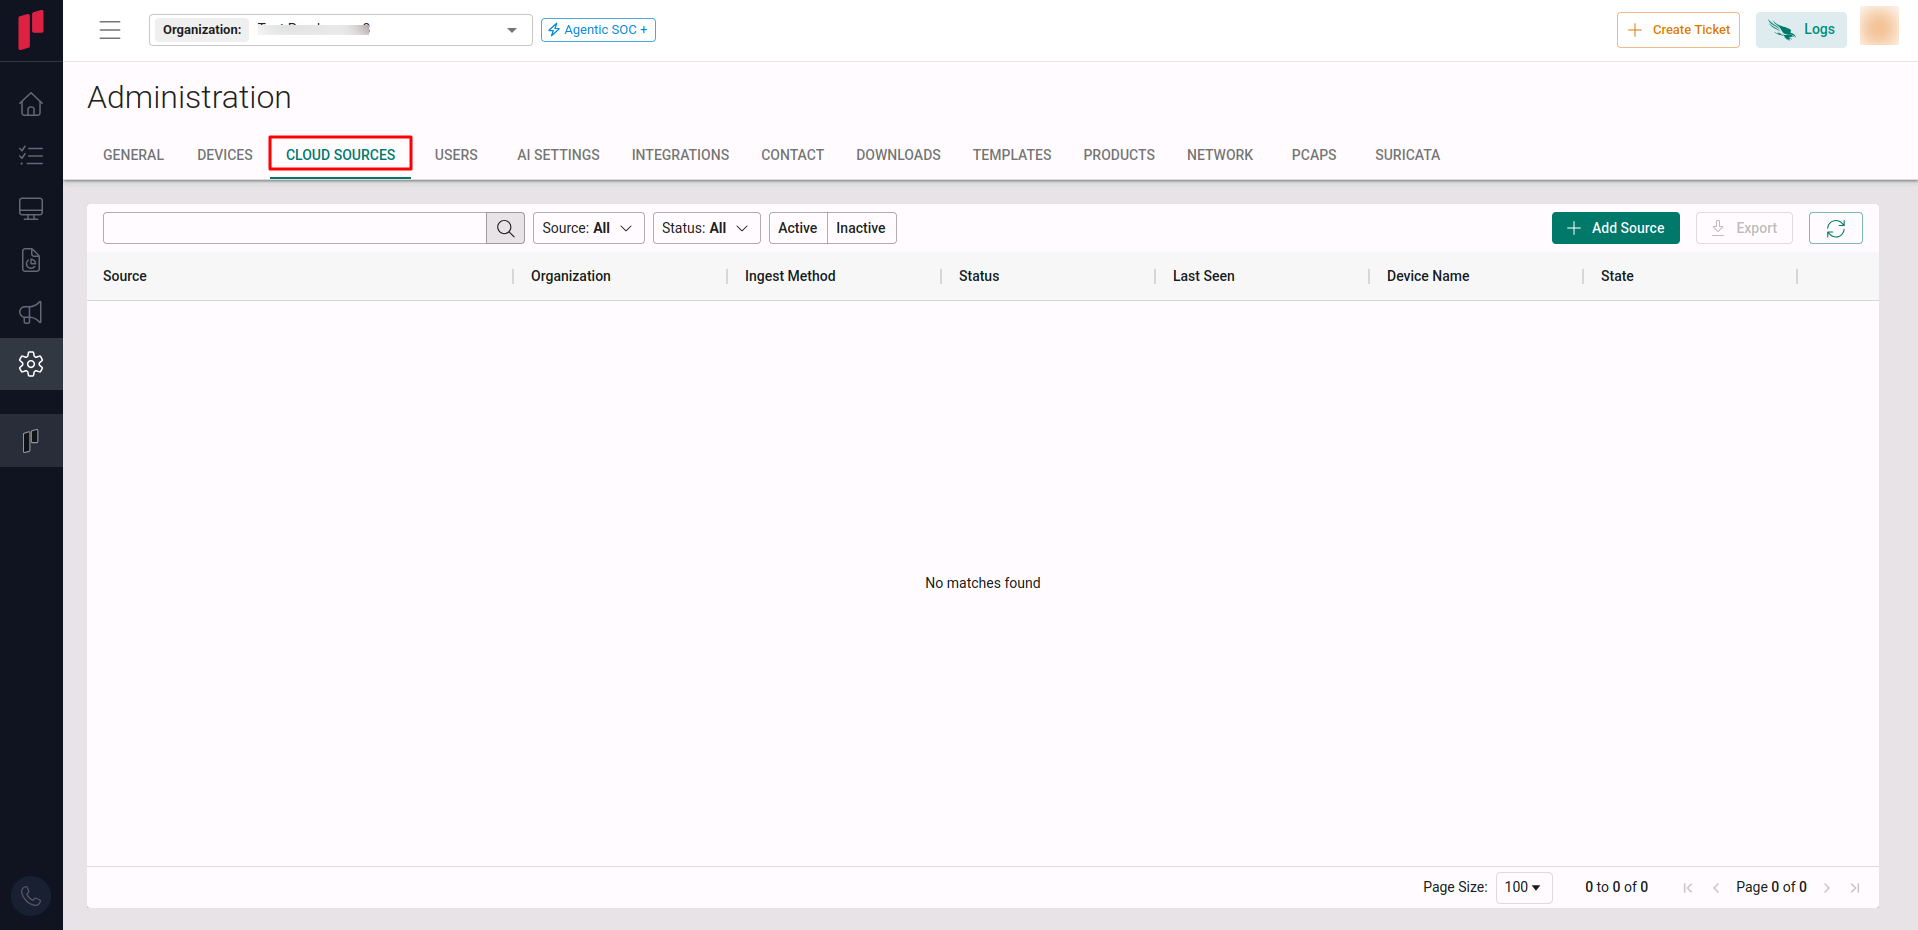
Navigate to the Cloud sources tab
-
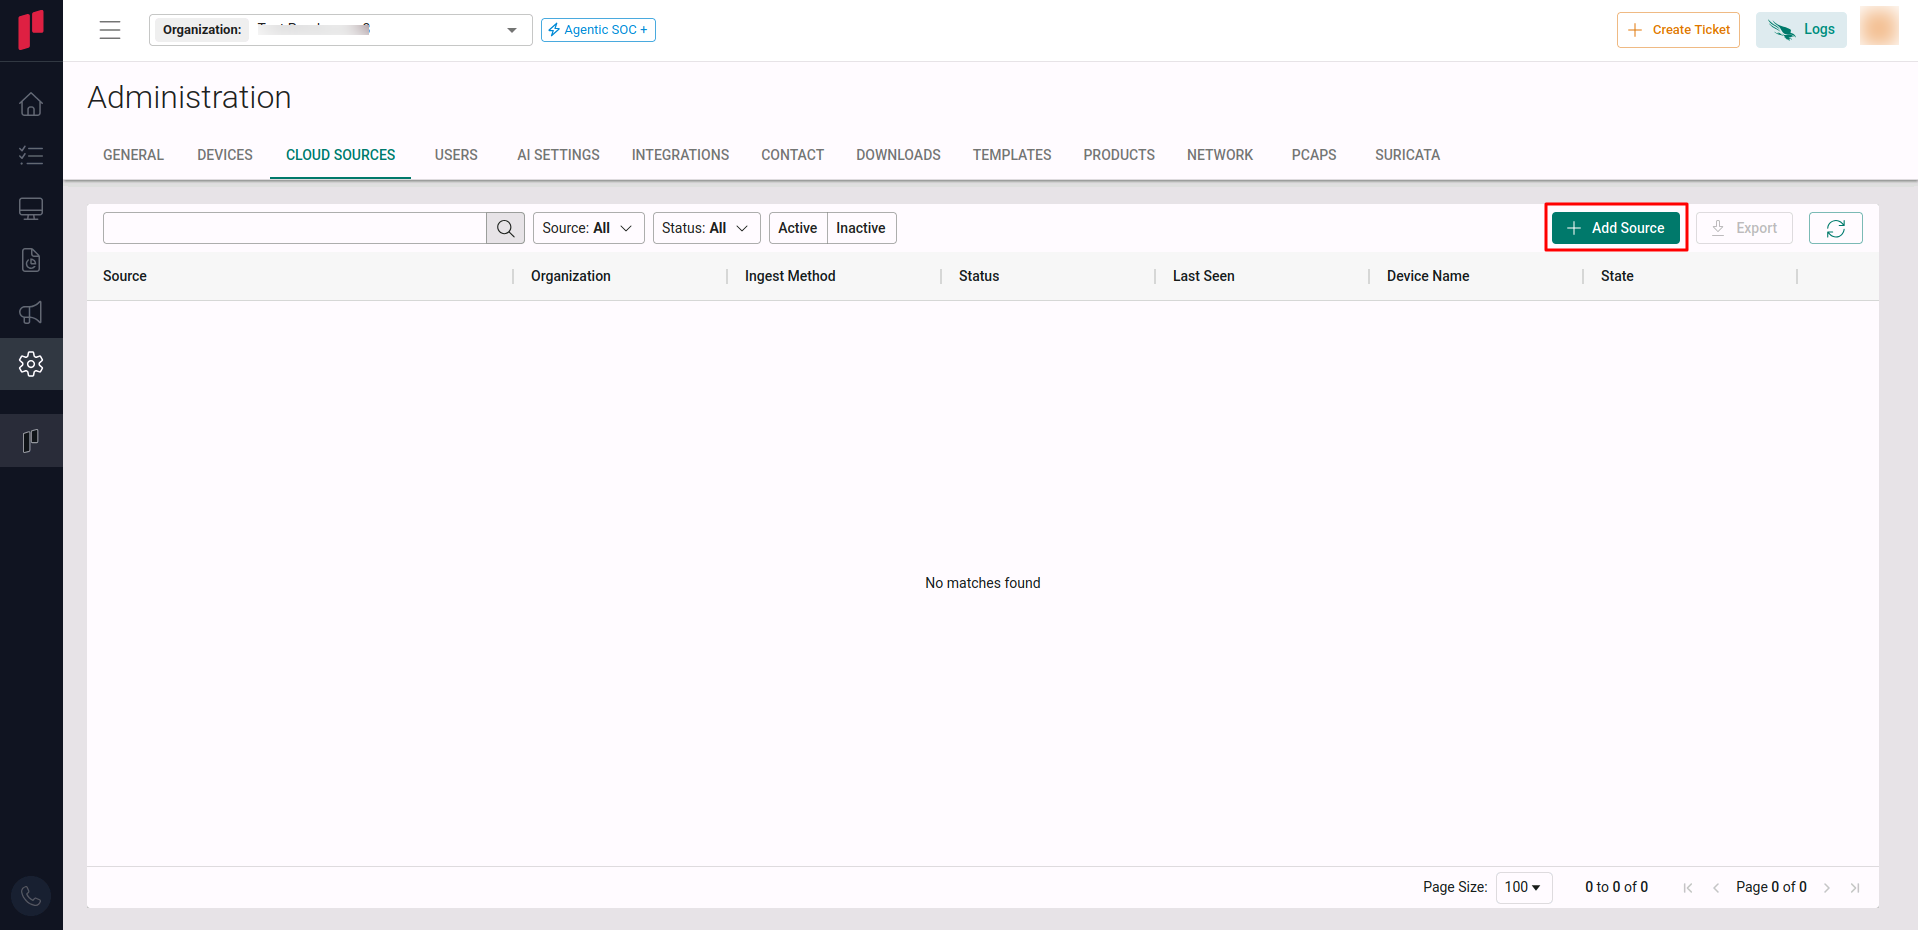
Click on the +Add Source button
-
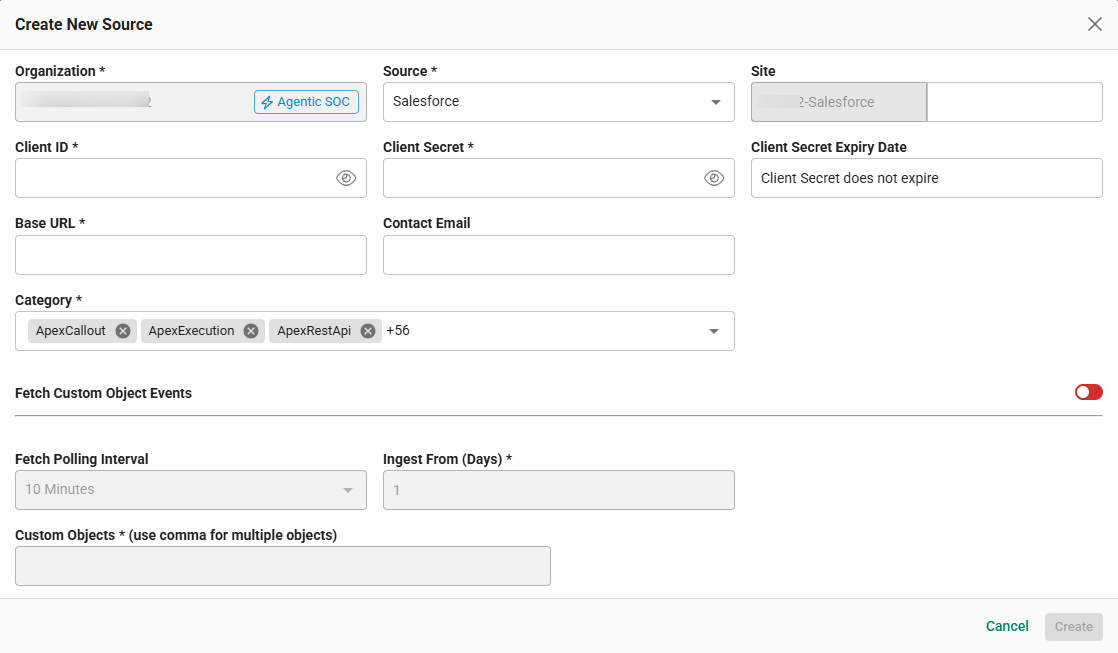
In the Add Source pop-up, provide the parameters below.
-
Source: Select the Salesforce source from the Source dropdown.
-
Site: The user defined name for the Salesforce cloud source.
-
Client ID: The Consumer Key generated in Step 4.
-
Client Secret: The Consumer Secret generated in Step 4.
-
Base URL: The standard URL to access the Salesforce API, in the format
https://MyDomainName.my.salesforce.com. For example, if the customer’s domain isabc, the Base URL ishttps://abc.my.salesforce.com. -
Contact Email: The email address of the person who registers the Salesforce cloud source in Scope.
-
Category: Select the log types from the dropdown. By default, all supported log types are selected. Based on the selection, the APIs will request the Salesforce API cloud source and the respective types of logs will be ingested.
-
Fetch Custom Object Events (Optional): Enable this toggle to fetch events from Custom Objects created in the Salesforce portal. For setup steps, see Custom Object Creation in Salesforce. Once the toggle is enabled, provide:
- Fetch Time Interval: The time interval to fetch Custom Object events.
- Custom Objects: Provide the required custom object names (delimited by commas for multiple objects).
-
Once the valid connection parameters are entered, the Salesforce cloud source registration is complete in Scope and is ready for ingestion of Salesforce logs.
Custom Object Creation in Salesforce
Note: You must have the Customize Application permission and an appropriate Salesforce role (for example, System Administrator) to create a custom object in Salesforce.
To create a custom object in Salesforce:
-
Log in to Salesforce.
-
Click the Setup icon (gear icon) in the top-right corner.
-
Select Setup.
-
In the left-side Quick Find search box, search for
Object Manager. -
Open Object Manager.
-
Click Create and select Custom Object.
-
Enter the required object details:
- Label: Name of the object (Example: Project)
- Plural Label: Plural form of the object name (Example: Projects)
- Object Name: Auto-generated API name
- Record Name: Primary field name for records
- Data Type: Text or Auto Number
-
Configure optional settings as required:
- Allow Reports
- Allow Activities
- Track Field History
- Enable Search
- Launch New Custom Tab Wizard after saving
-
Click Save.
Create a Custom Tab (Optional)
- After saving, the New Custom Tab Wizard opens automatically.
- Select a tab style/icon.
- Click Next, Next, Save.
Add Custom Fields
- Open the newly created custom object from Object Manager.
- Navigate to Fields & Relationships.
- Click New.
- Select the field type:
- Text
- Number
- Date
- Picklist
- Lookup Relationship
- Checkbox
- Configure field details.
- Click Next, Save.