ThreatLocker
Overview
Configuring a cloud source in Scope is a two-step process.
-
Generating ThreatLocker API credentials in the ThreatLocker Portal. Please refer to Section 1 – ThreatLocker Setup
-
Setting up the ThreatLocker cloud source in the Scope application. Please refer to Section 2 – Scope Setup
ThreatLocker Setup
To get started, you’ll need to generate the following credentials in the ThreatLocker Portal –
- API Token
- API Token Expiry Date
- API URL
Step 1: Create an API User in ThreatLocker
-
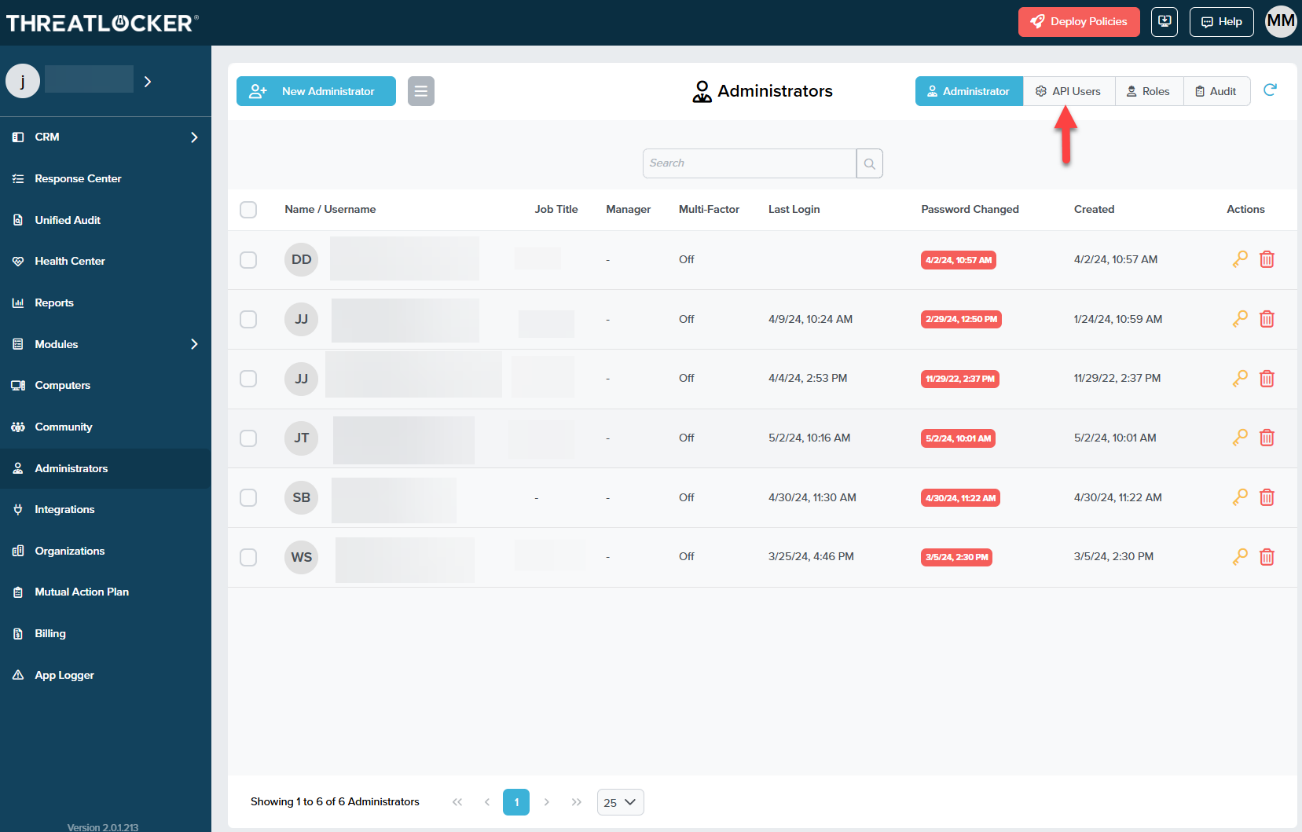
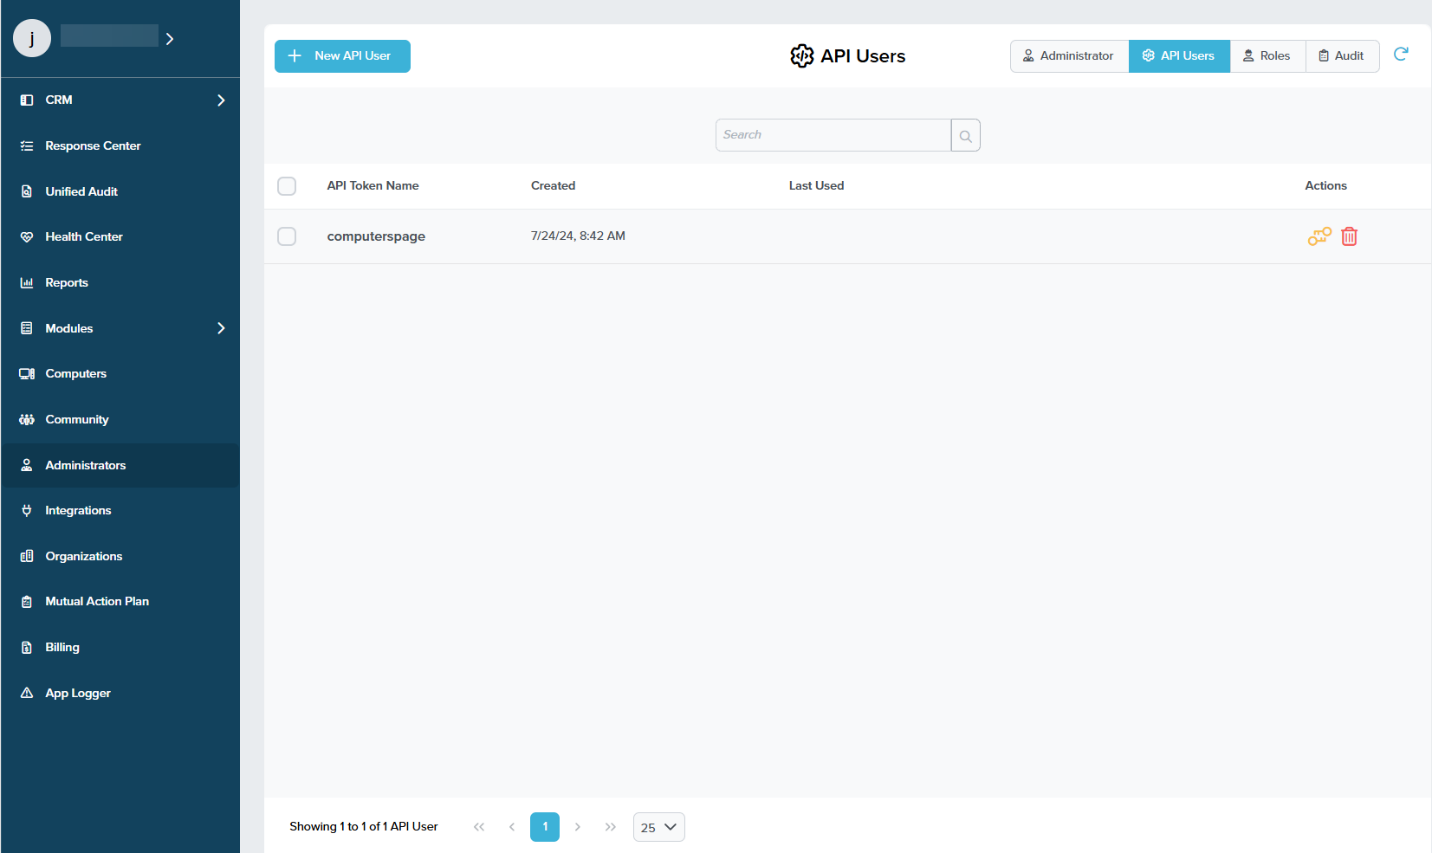
Sign in to the ThreatLocker Portal and navigate to Administrators -> API Users. Select the API Users tab
-
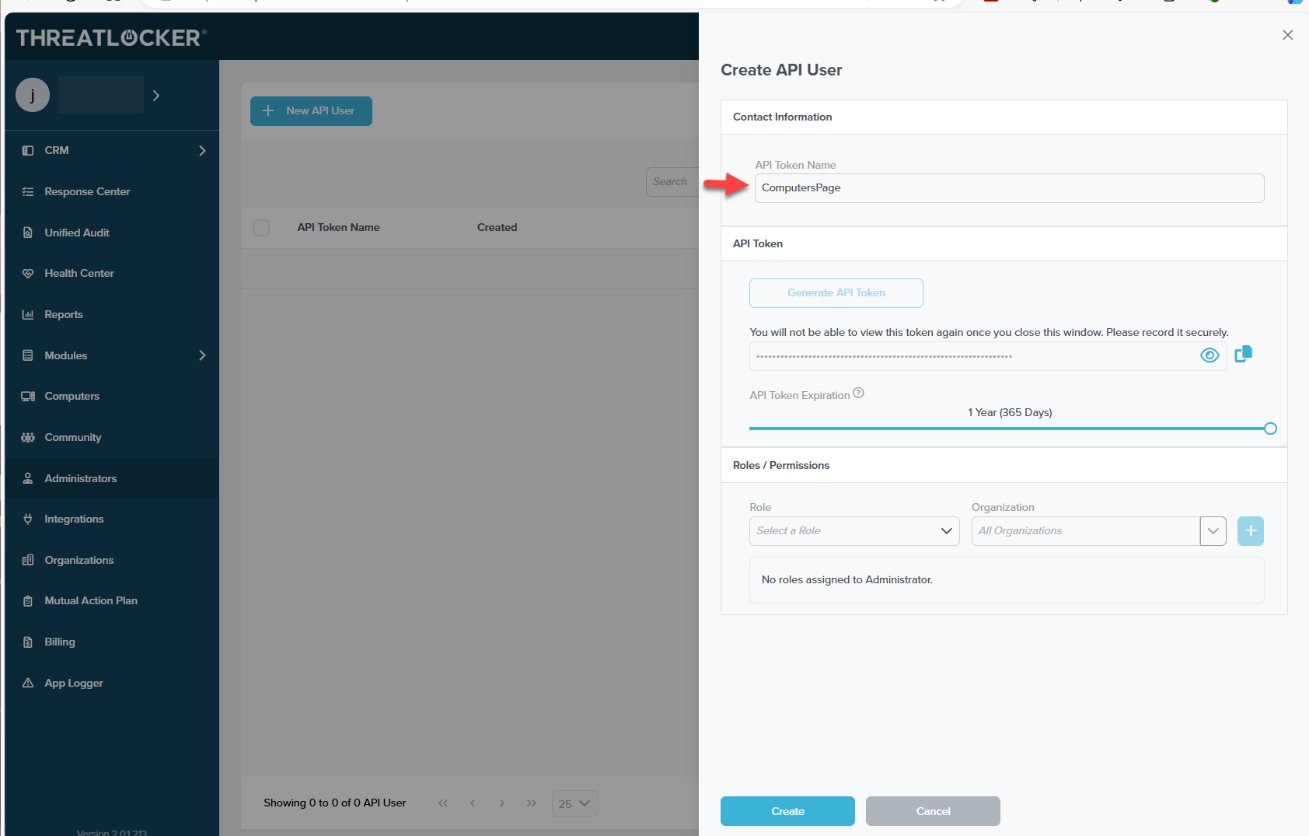
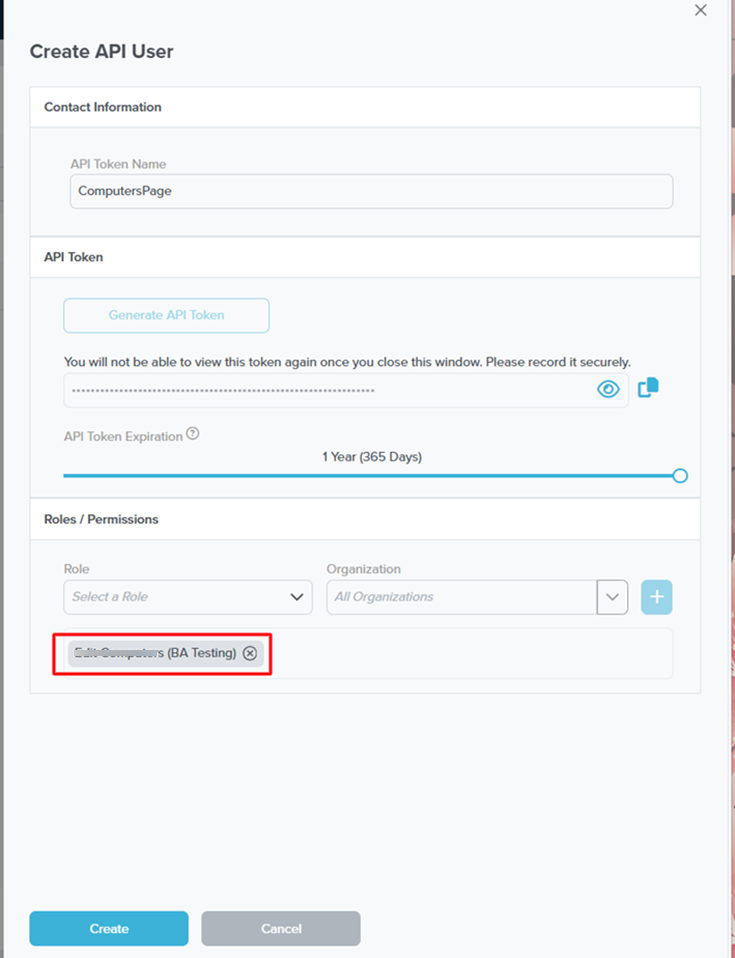
Click New API User. The Create API User sidebar will slide out from the right.

-
In the API Token Name field, enter a name for the token.
-
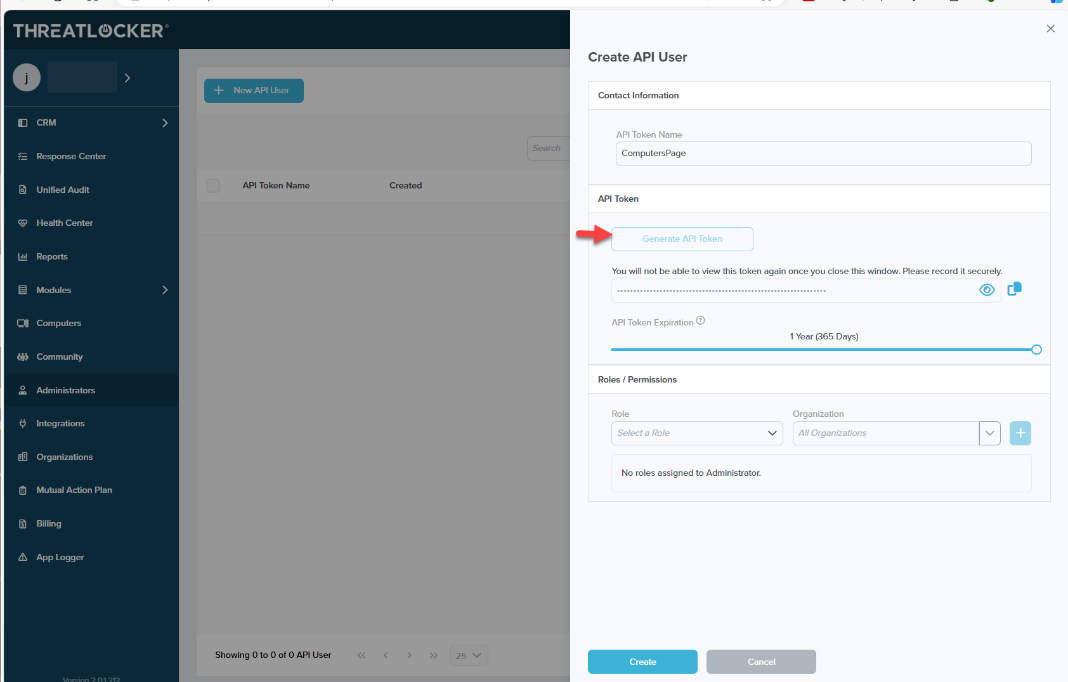
Click Generate API Token to generate the token.
Note: The generated token is displayed only until the sidebar is closed. Ensure that the token is copied and securely stored before closing the sidebar.
-
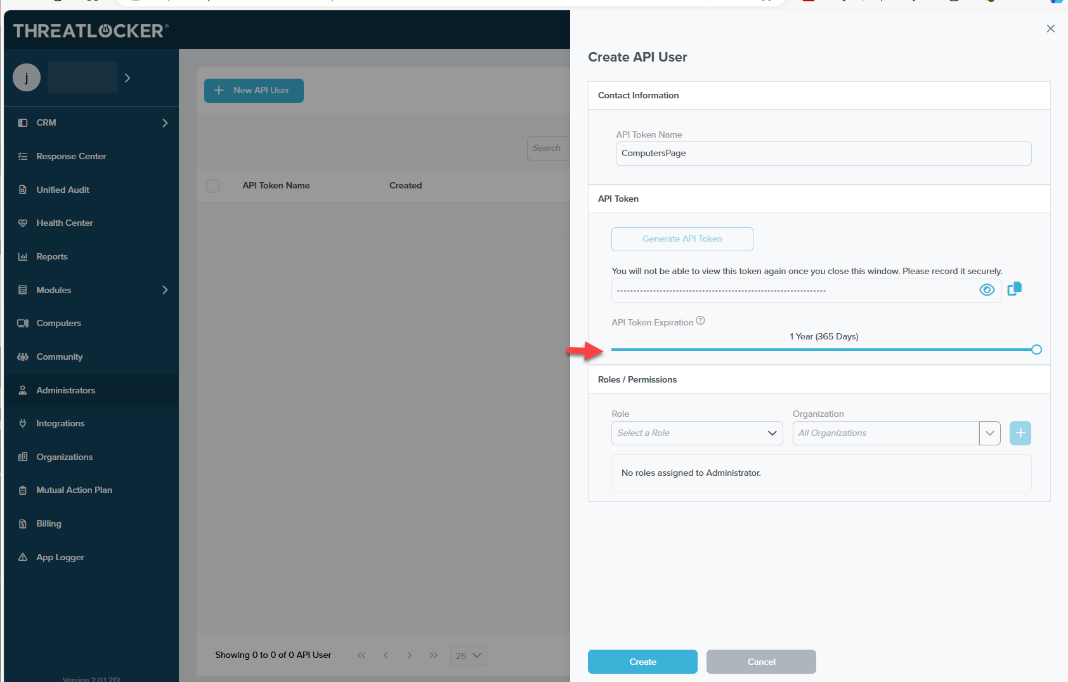
Select the required API Token Expiration.
Note: The token expiration resets each time the token is used. For example, if 365 days is selected, the token expires only after 365 days of inactivity.
-
Under Roles/Permissions:
-
Select the required Role from the Role dropdown.
-
Select the required Organization from the Organization dropdown.
-
Click the + button to add the selected Role and Organization combination.
If a new API User Role is required, ensure that the following permissions are assigned:
- View organization
- View computers
- View reports
- View system audit
- View ThreatLocker threats
- View ThreatLocker policies
- View ThreatLocker remediations
- View unified audit
-
-
The newly created API User will now be listed in the main grid.
Step 2: Identify and Share the ThreatLocker API URL
-
The ThreatLocker API URL is in the following format:
https://portalapi.<INSTANCE>.threatlocker.com -
Replace
<INSTANCE>with the actual instance value of the organization. -
To identify the instance value:
-
In the ThreatLocker Portal, click the Help button located in the upper-right corner.
-
Locate the instance value displayed in parentheses next to the ThreatLocker Access header.
-
-
Example:
If the instance value is
E, then the API URL will be:https://portalapi.e.threatlocker.com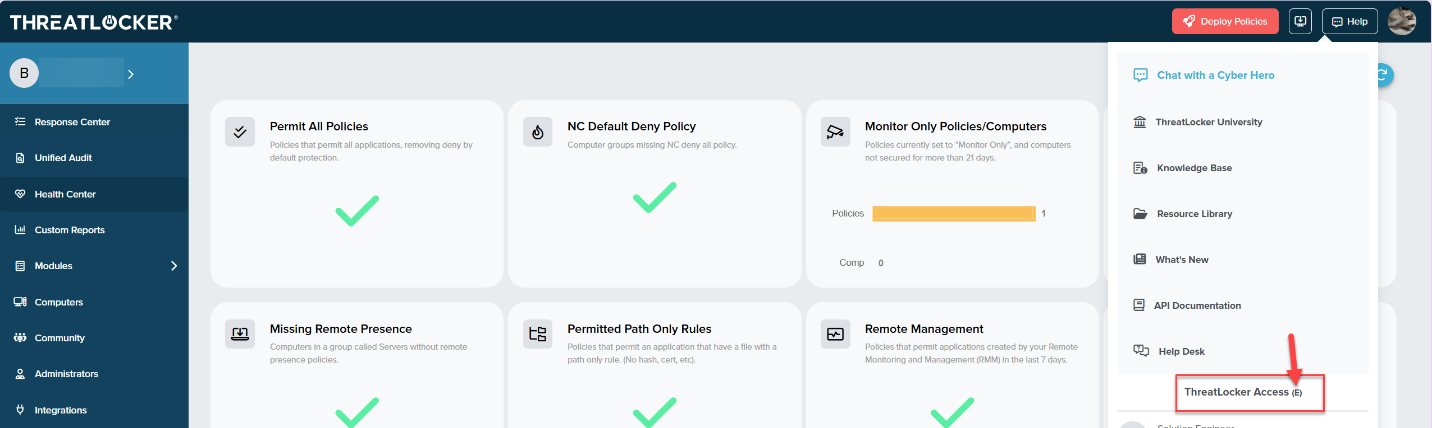
The generated API Key, API Key Expiry Date & Base URL are to be configured in Scope Setup: Step 1 for initiating the ThreatLocker log ingestion.
Scope Setup
Step 1: ThreatLocker Cloud Source Registration in the Scope Application
Once the API Key is generated, it must be configured in the Scope application to establish the connection and enable data ingestion from the ThreatLocker environment.
In the Scope application, to register a ThreatLocker cloud source, navigate to the cloud source registration page –
-
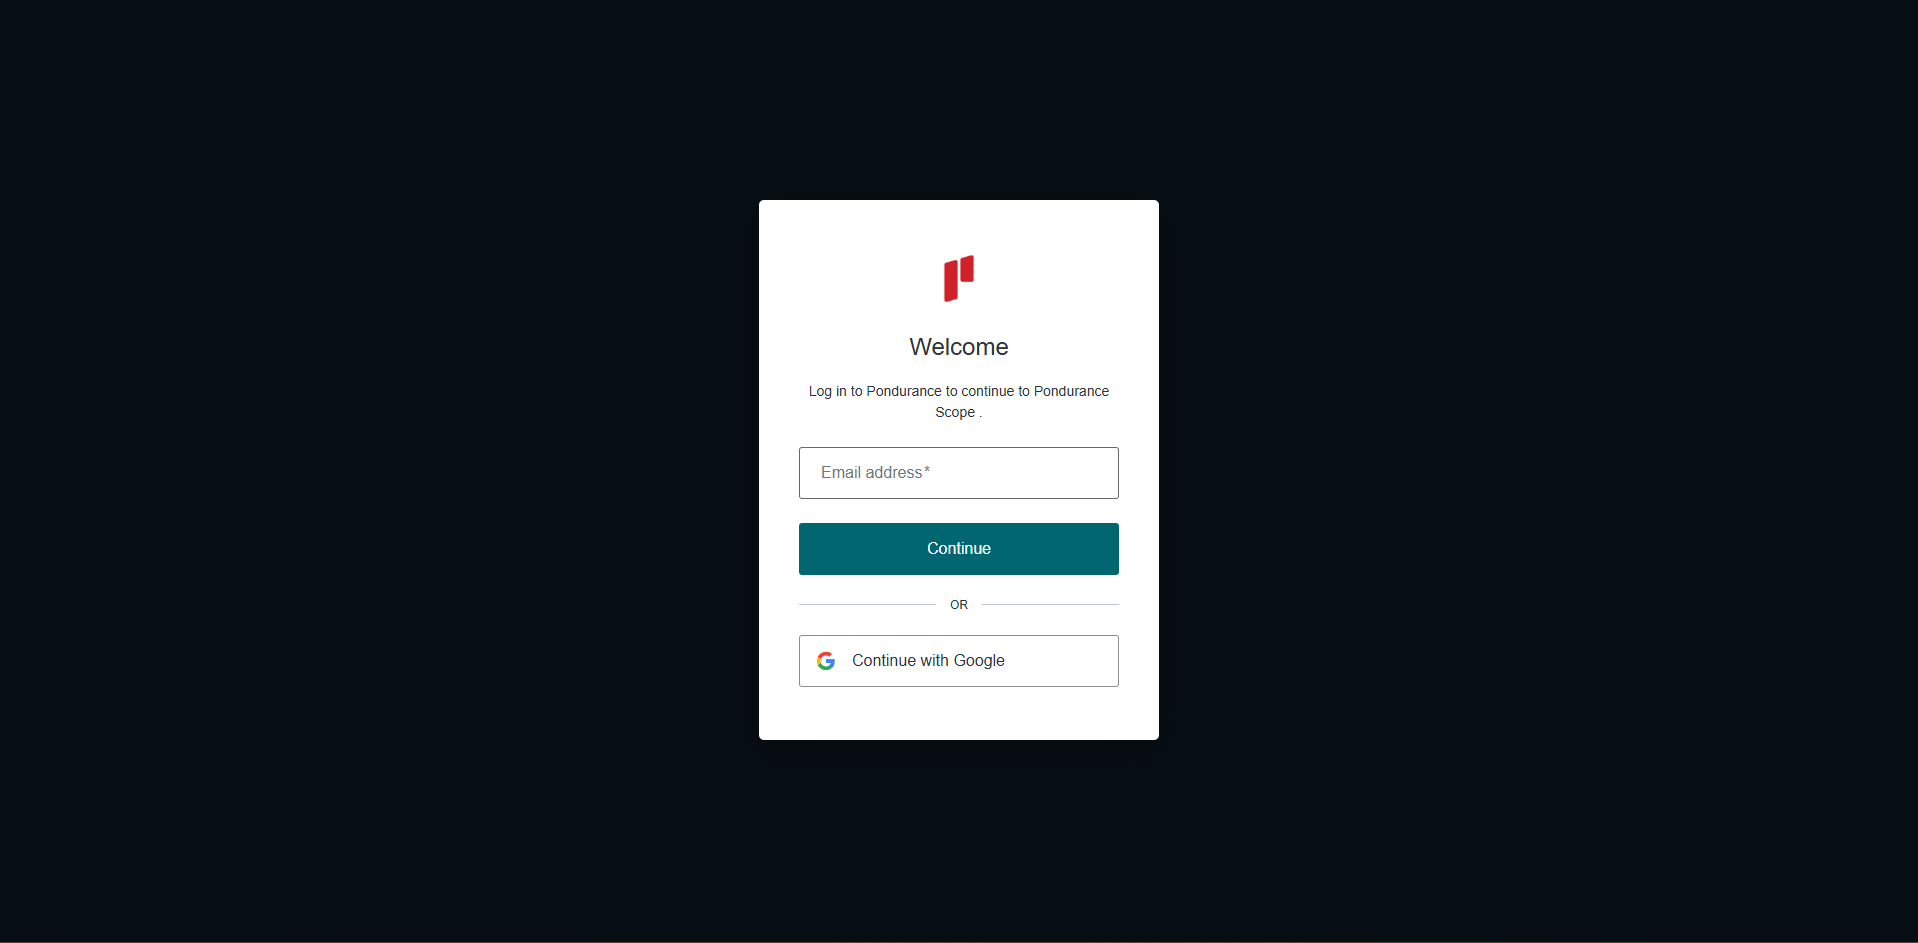
Log into the Scope application
-
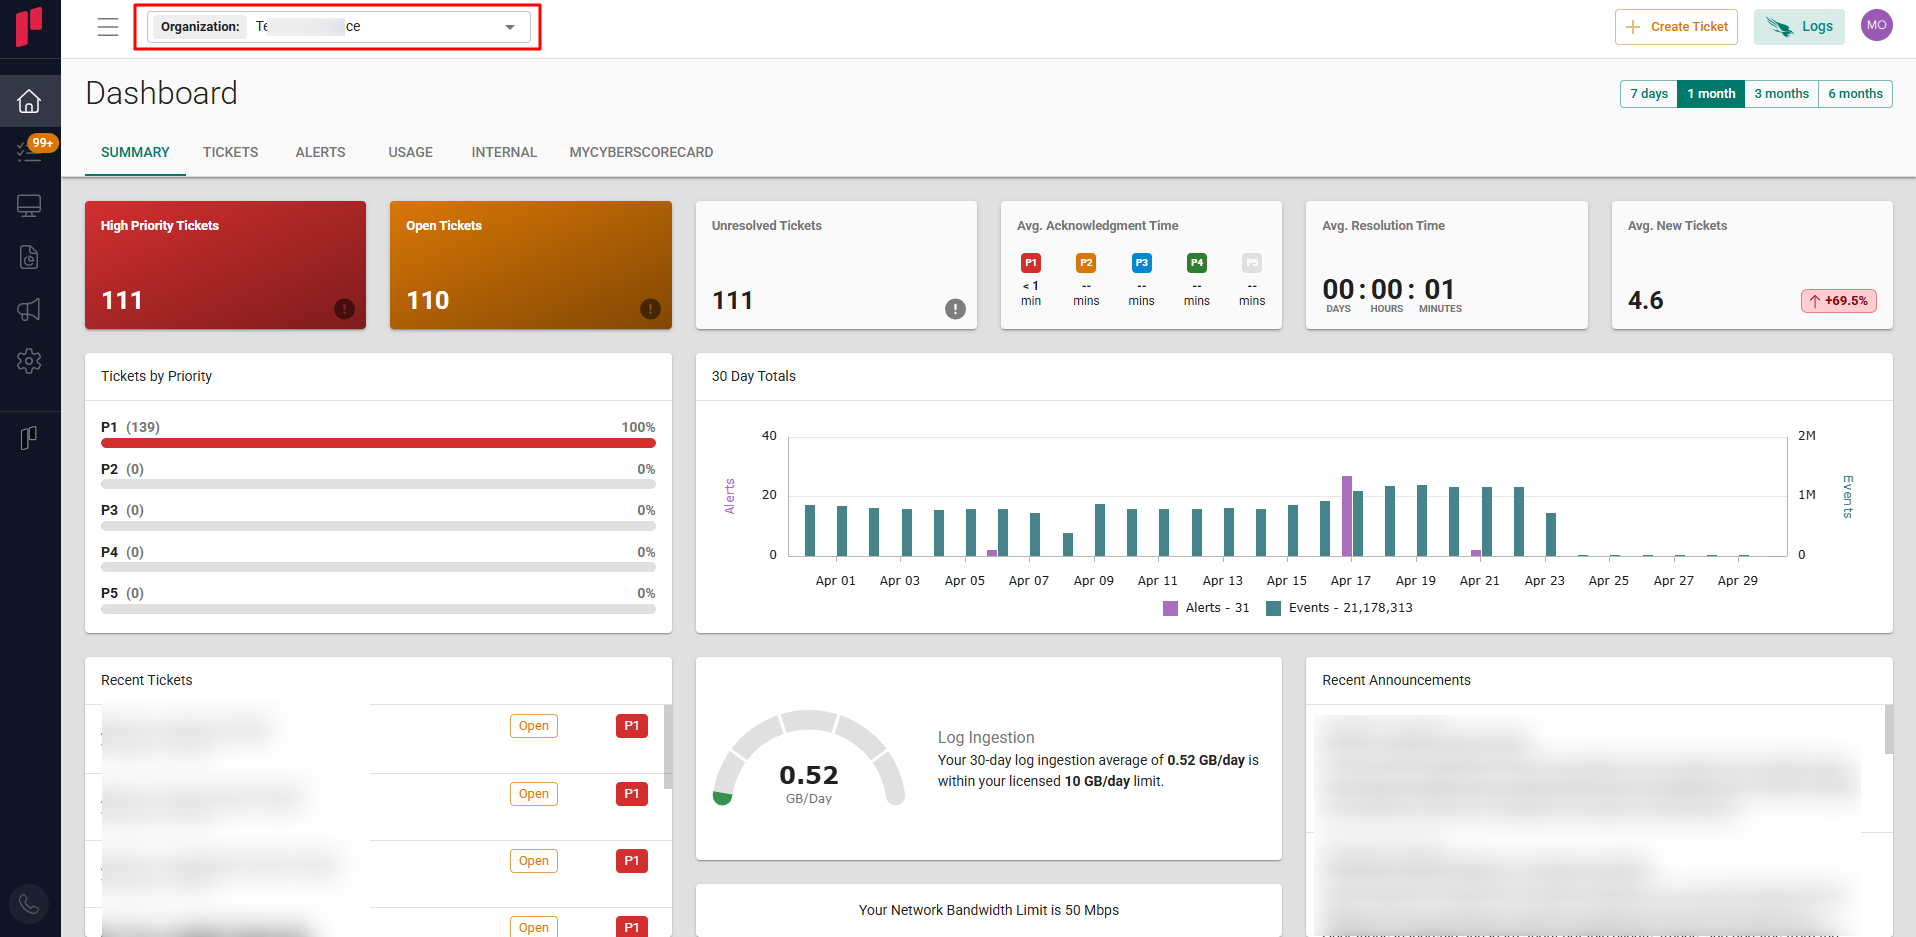
Select the required Organization from the Organization dropdown
-
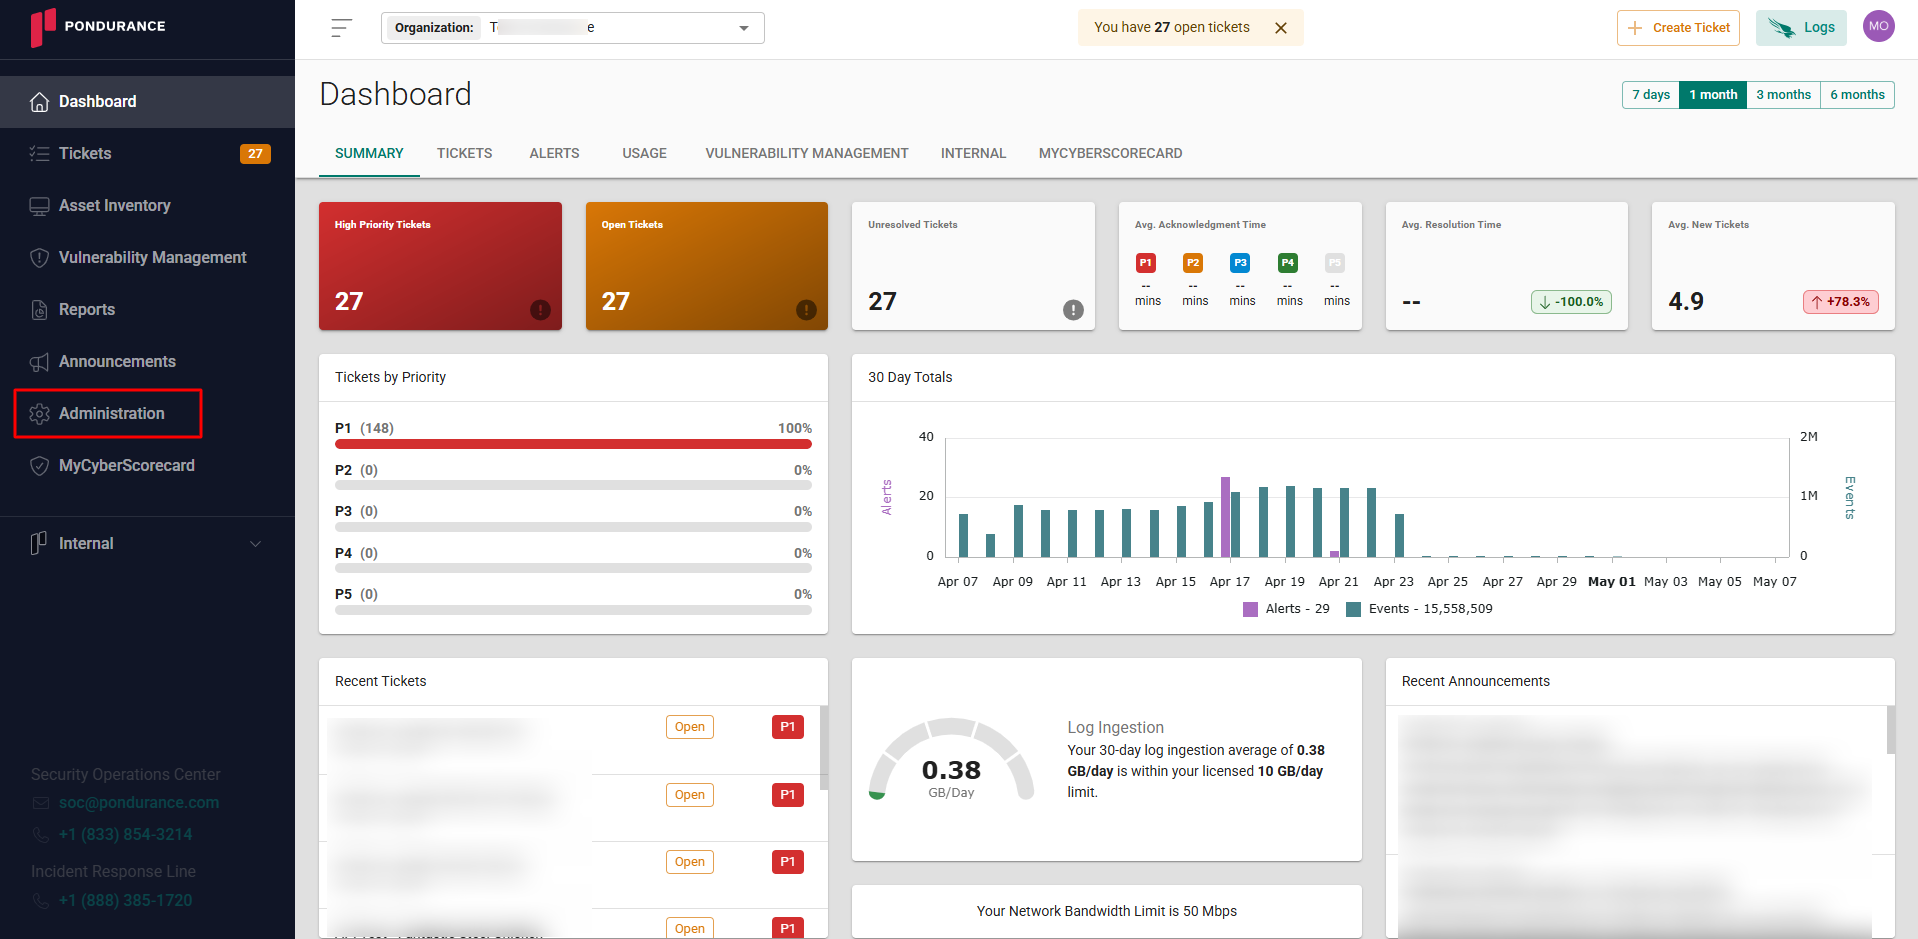
Navigate to the side menu -> Administration
-
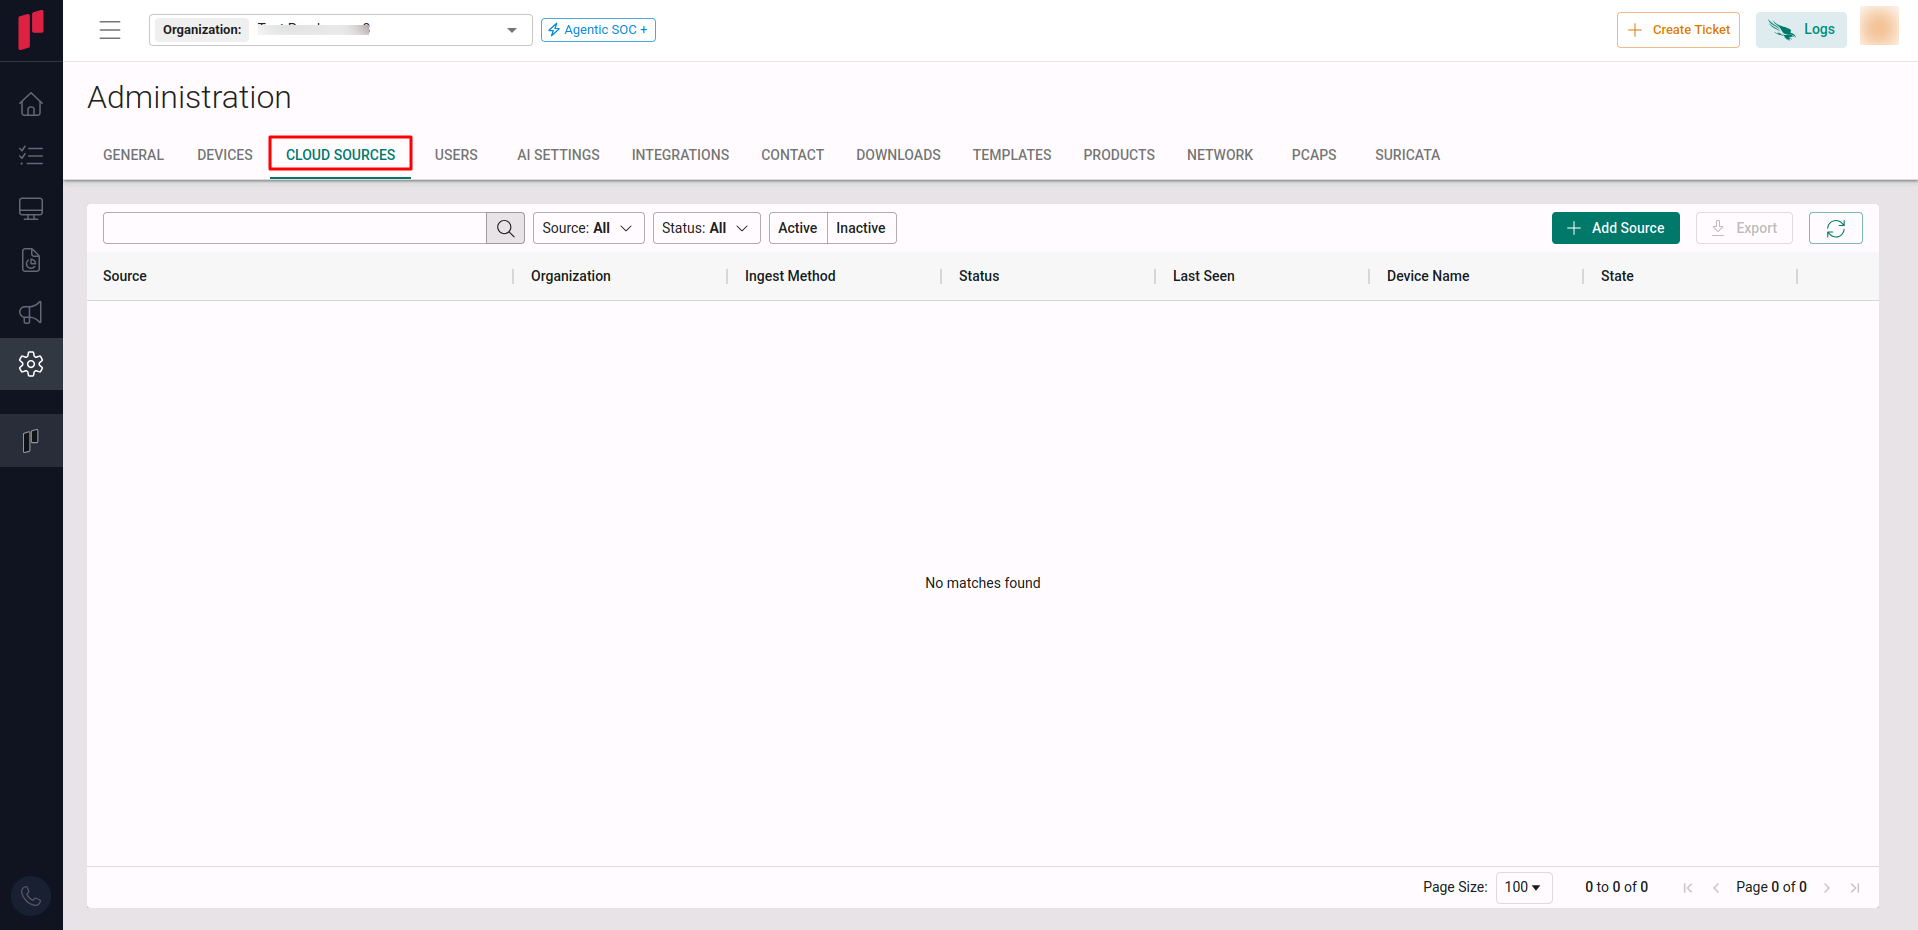
Navigate to the Cloud sources tab
-
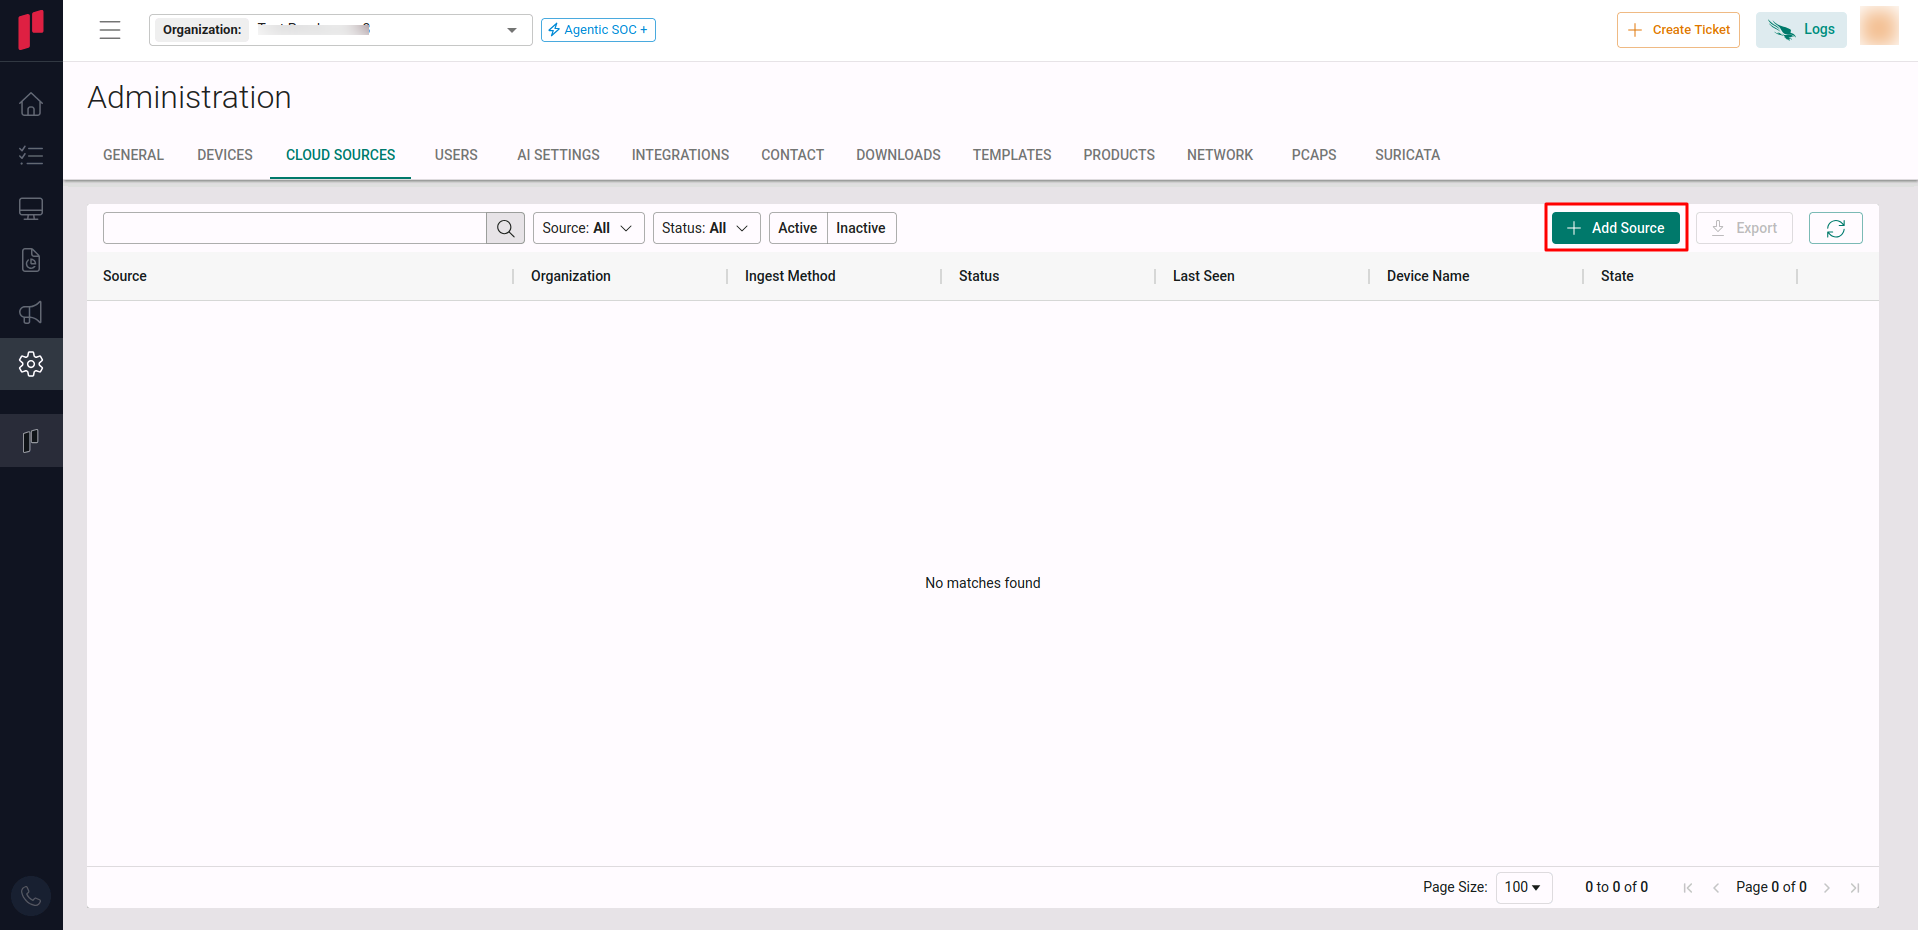
Click on the +Add Source button
-
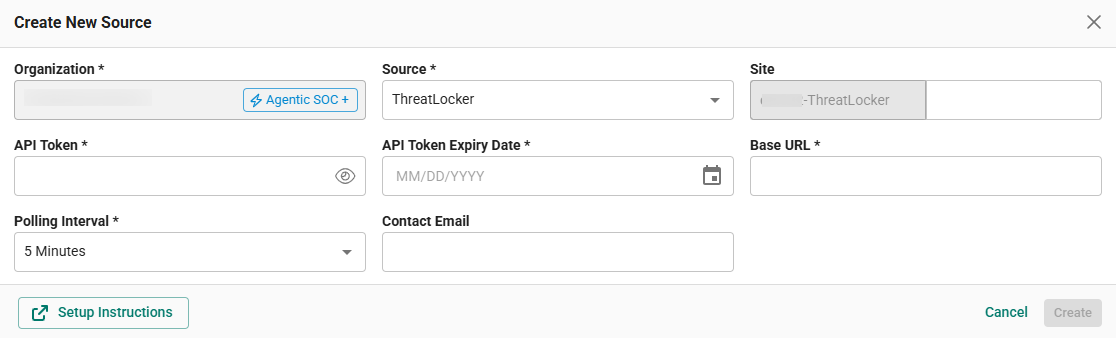
In the Add Source pop-up, provide the parameters below.
-
Source: Select the ThreatLocker source from the Source dropdown.
-
Site: The user defined name for the ThreatLocker cloud source.
-
API Key: The API Key generated in Step 1.
-
API Key Expiry Date: Expiry date of the generated API Key.
-
Base URL: Base URL identified in Step 2.
-
Polling Interval: The polling interval for making periodic API calls to the ThreatLocker API. The user can select the time interval from the dropdown.
-
Contact Email: The email address of the person who registers the ThreatLocker cloud source in Scope.
-
Once the required connection parameters are entered, the ThreatLocker cloud source registration is complete in Scope and is ready for ingestion of ThreatLocker logs.