NetSuite
Overview
Configuring a cloud source in Scope is a two-step process.
-
Generating NetSuite Token-Based Authentication (TBA) credentials in the NetSuite account. Please refer to Section 1 – NetSuite Setup
-
Setting up the NetSuite cloud source in the Scope application. Please refer to Section 2 – Scope Setup
NetSuite Setup
To get started, you’ll need to generate the following credentials in the NetSuite account –
- Consumer key
- Consumer secret
- Token
- Token secret
- URL
- Realm
Step 1: Create a New Integration in NetSuite
-
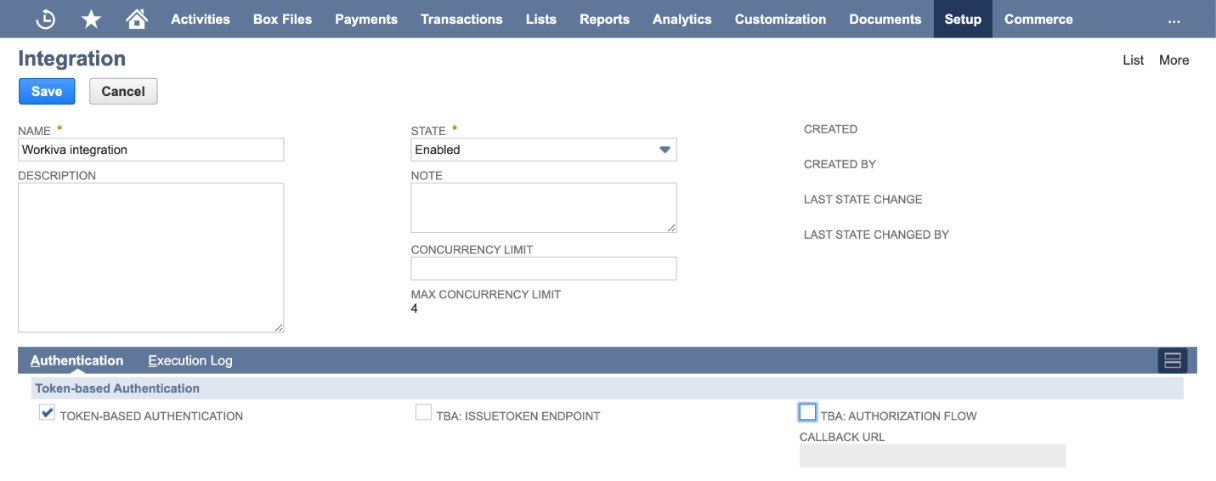
In NetSuite, navigate to Setup -> Integrations -> Manage Integrations -> New.
-
Enter a unique Name and Description to help identify the integration.
-
Under Authentication:
- Select Token-based Authentication
- Clear TBA: Authorization Flow
-
Click Save and record the generated Consumer Key and Consumer Secret from the confirmation page.
Note: The Consumer Key and Consumer Secret are displayed only once on the integration confirmation page. Ensure that these values are securely recorded before navigating away from the page.
Step 2: Create an Integration Role
-
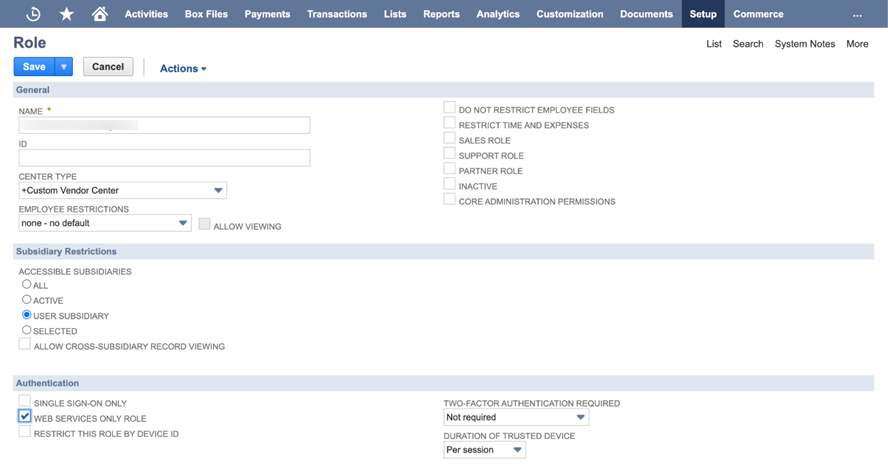
In NetSuite, navigate to Setup -> Users/Roles -> Manage Roles -> New.
-
Under General, enter a unique name to help identify the role.
-
Under Authentication, select Web Services Only Role to allow the role to connect only to the NetSuite API and prevent direct login to NetSuite.
-
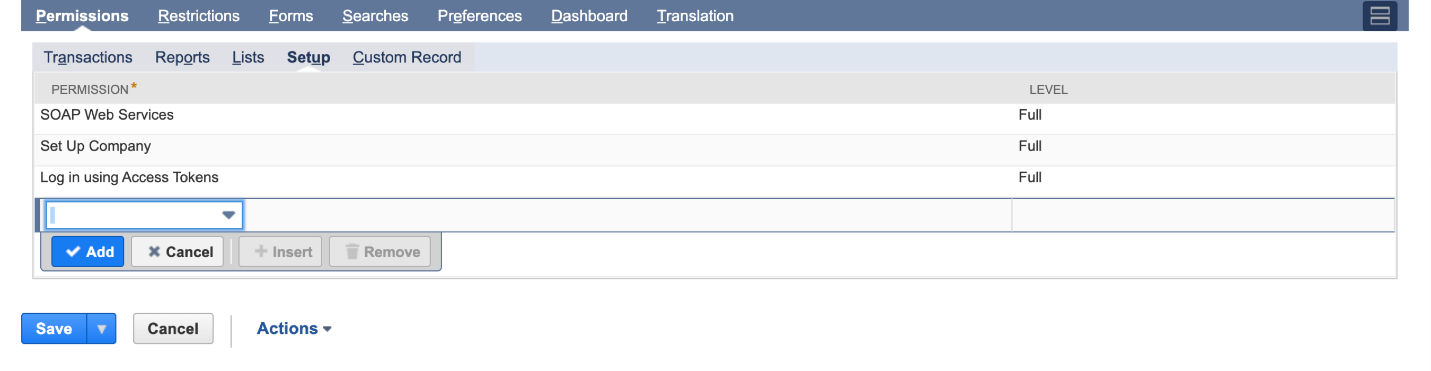
Under Permissions, add the required permissions to enable the integration to fetch the relevant information from NetSuite.
Please refer here for more details on NetSuite permissions.
-
Click Save.
Step 3: Assign the Role to the Integration User
-
Navigate to Setup -> Users/Roles -> Manage Users.
-
Select an existing integration user or create a new integration user.
Note: It is recommended to use a separate user for each integration.
-
Under Roles, assign the integration role to the user.
Step 4: Create the Integration User’s Access Token
-
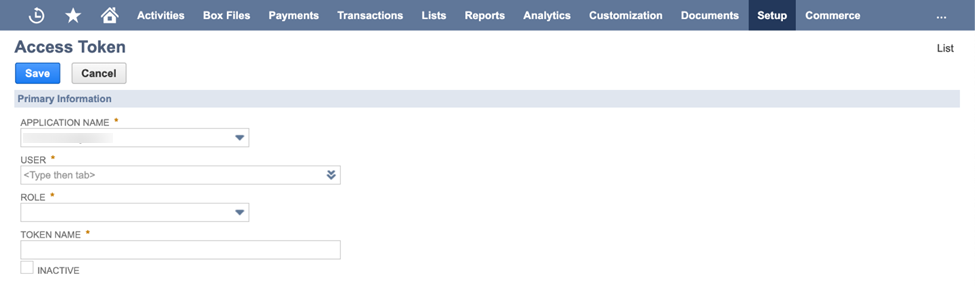
In NetSuite, navigate to Setup -> Users/Roles -> Access Tokens -> New.
-
Click New Access Token.
-
In Application Name, select the integration record.
-
In User, select the required integration user.
-
In Role, select the integration role.
-
Click Save.
-
Record the generated Token ID and Token Secret.
Note: For security purposes, the Token ID and Token Secret are displayed only once during token creation. Store them securely, as you would a password. If the Token ID or Token Secret is lost, a new token must be generated.
Step 5: Generate the Restlet URL and Fetch the Realm
-
In NetSuite, navigate to Customization -> Scripting -> Scripts -> New.
-
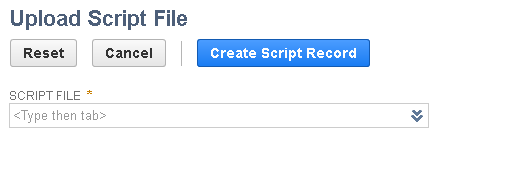
Upload the required Restlet Script file to the Scripts page.
Note: The sample Restlet script used to fetch audit events is not publicly available. It is assumed that the NetSuite administrator will upload the appropriate Restlet script.
-
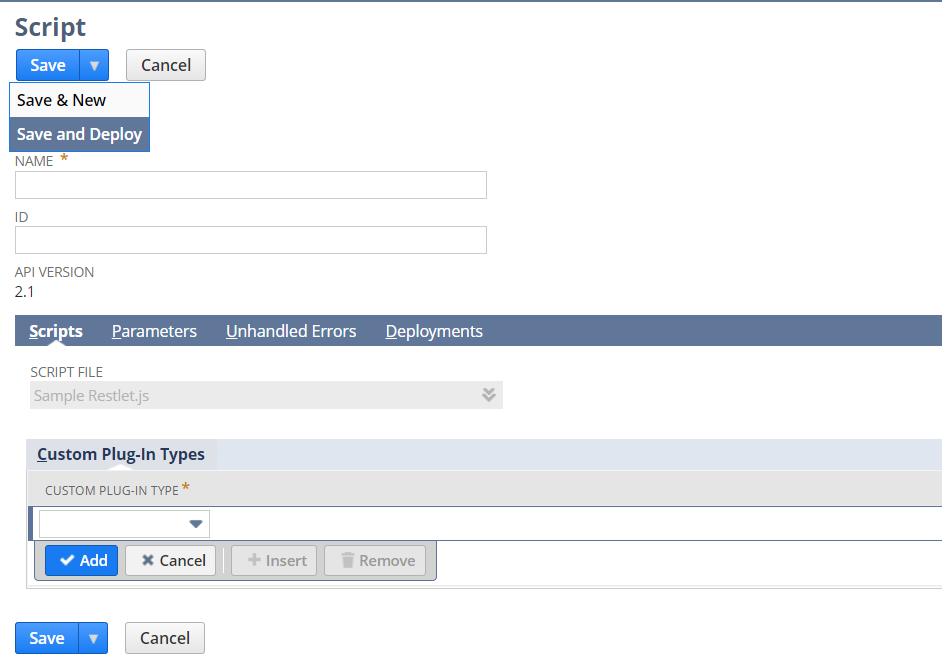
Click Create Script Record, enter the required details, and then click Save and Deploy.
-
After saving the deployment record, an external URL will be generated.
-
The generated external URL will be of the following structure:
https://<realm>.restlets.api.netsuite.com/app/site/hosting/restlet.nl?script=<script_id>&deploy=<deployment_id>Use the generated External URL and the Realm value.
Example:
URL:
https://5156018.restlets.api.netsuite.com/app/site/hosting/restlet.nl?script=2643&deploy=1

Realm:
5156018
The generated Consumer Key, Consumer Secret, Token, Token Secret, URL & Realm are to be configured in Scope Setup: Step 1 for initiating the NetSuite log ingestion.
Scope Setup
Step 1: NetSuite Cloud Source Registration in the Scope Application
Once the credentials are generated, they must be configured in the Scope application to establish the connection and enable data ingestion from the NetSuite environment.
In the Scope application, to register a NetSuite cloud source, navigate to the cloud source registration page –
-
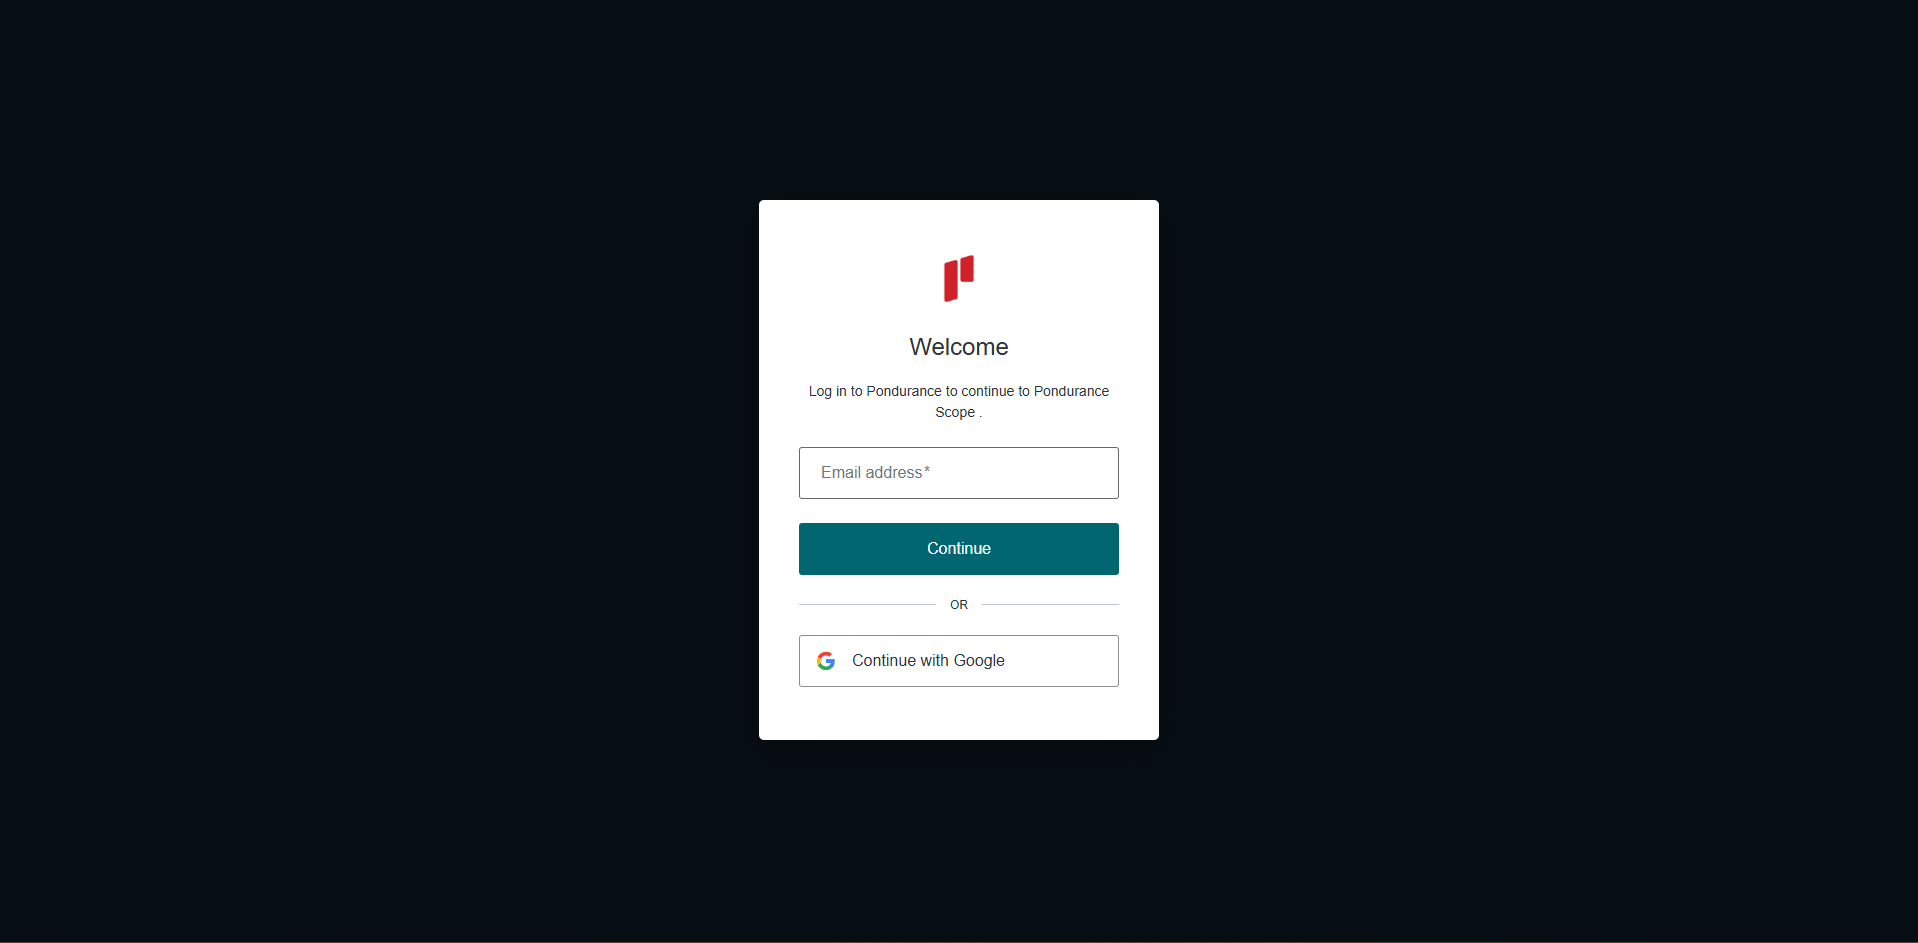
Log into the Scope application
-
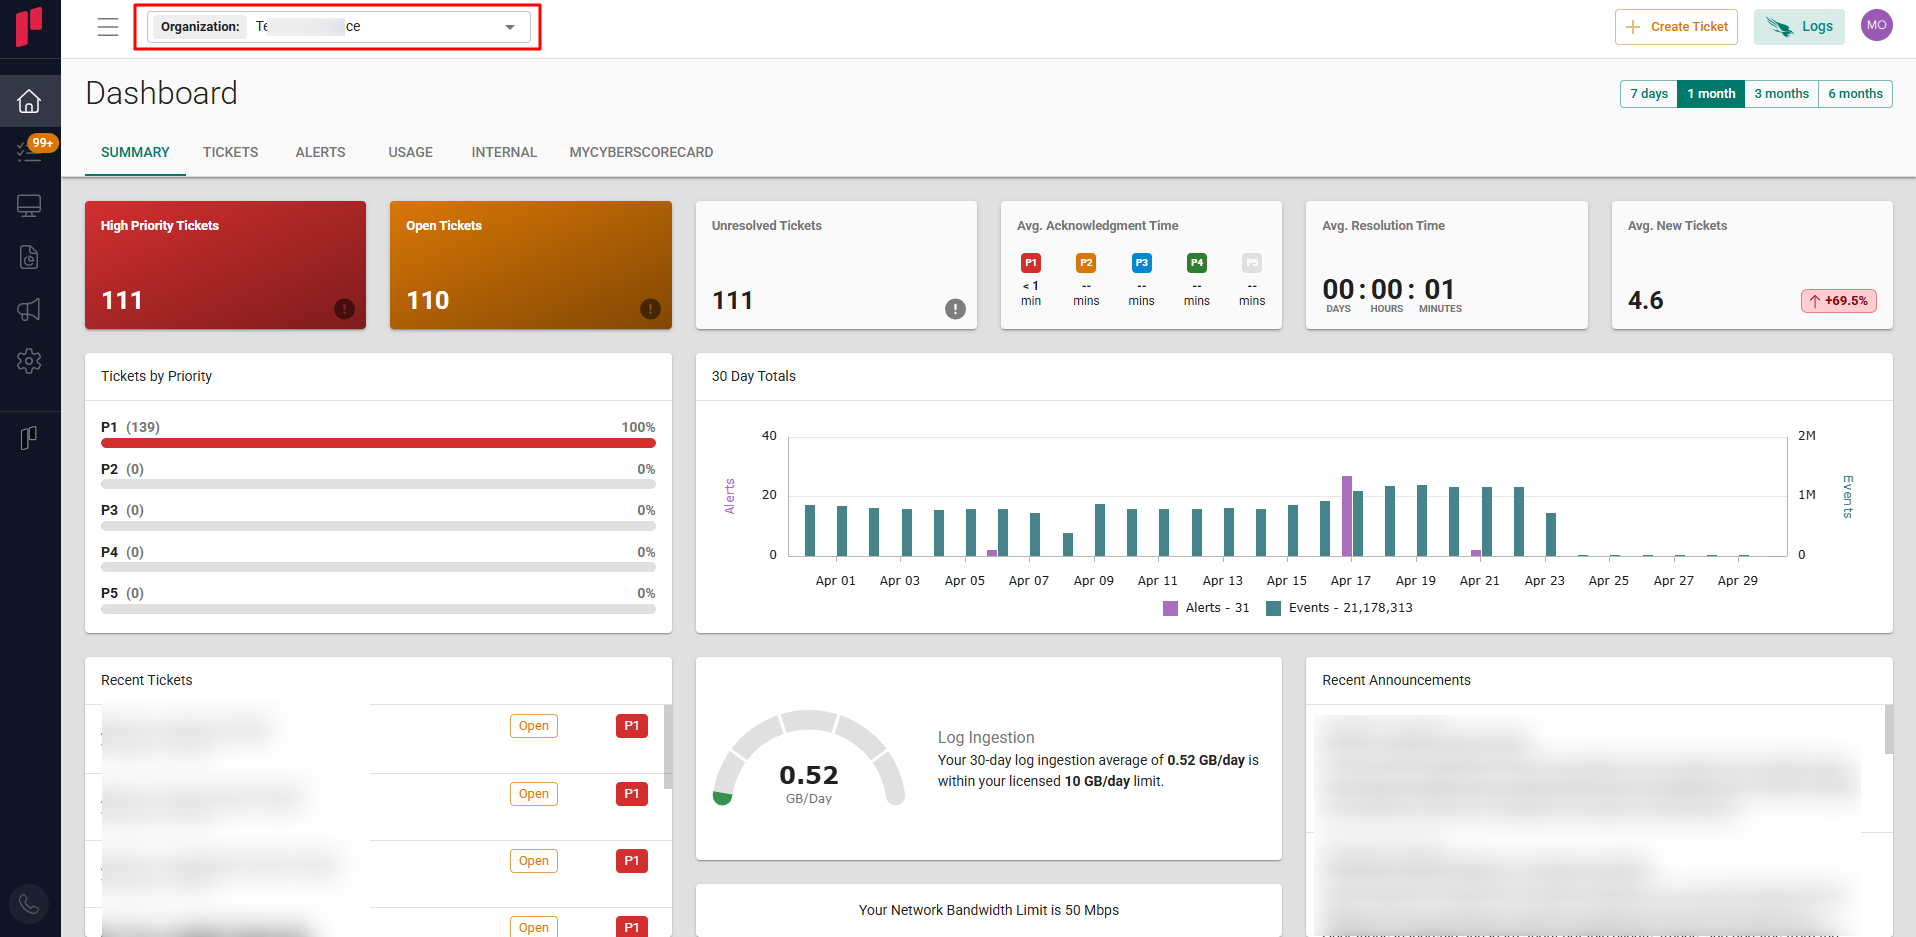
Select the required Organization from the Organization dropdown
-
Navigate to the side menu -> Administration
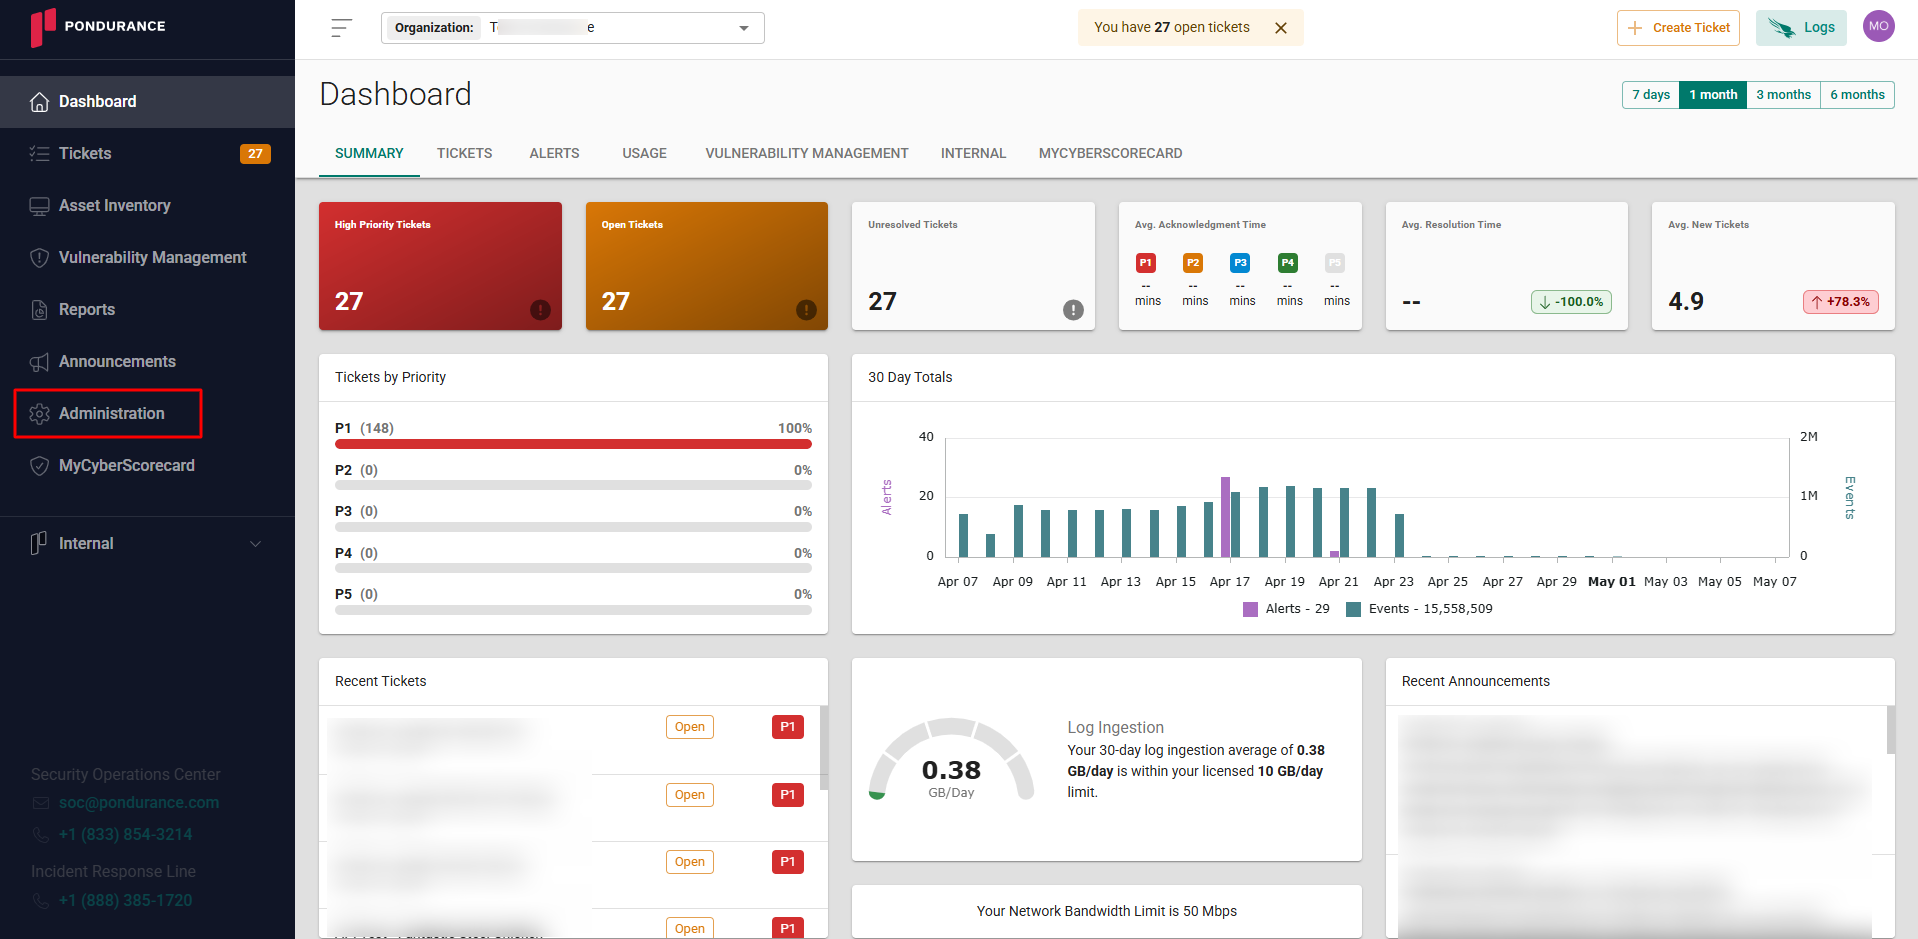
-
Navigate to the Cloud sources tab
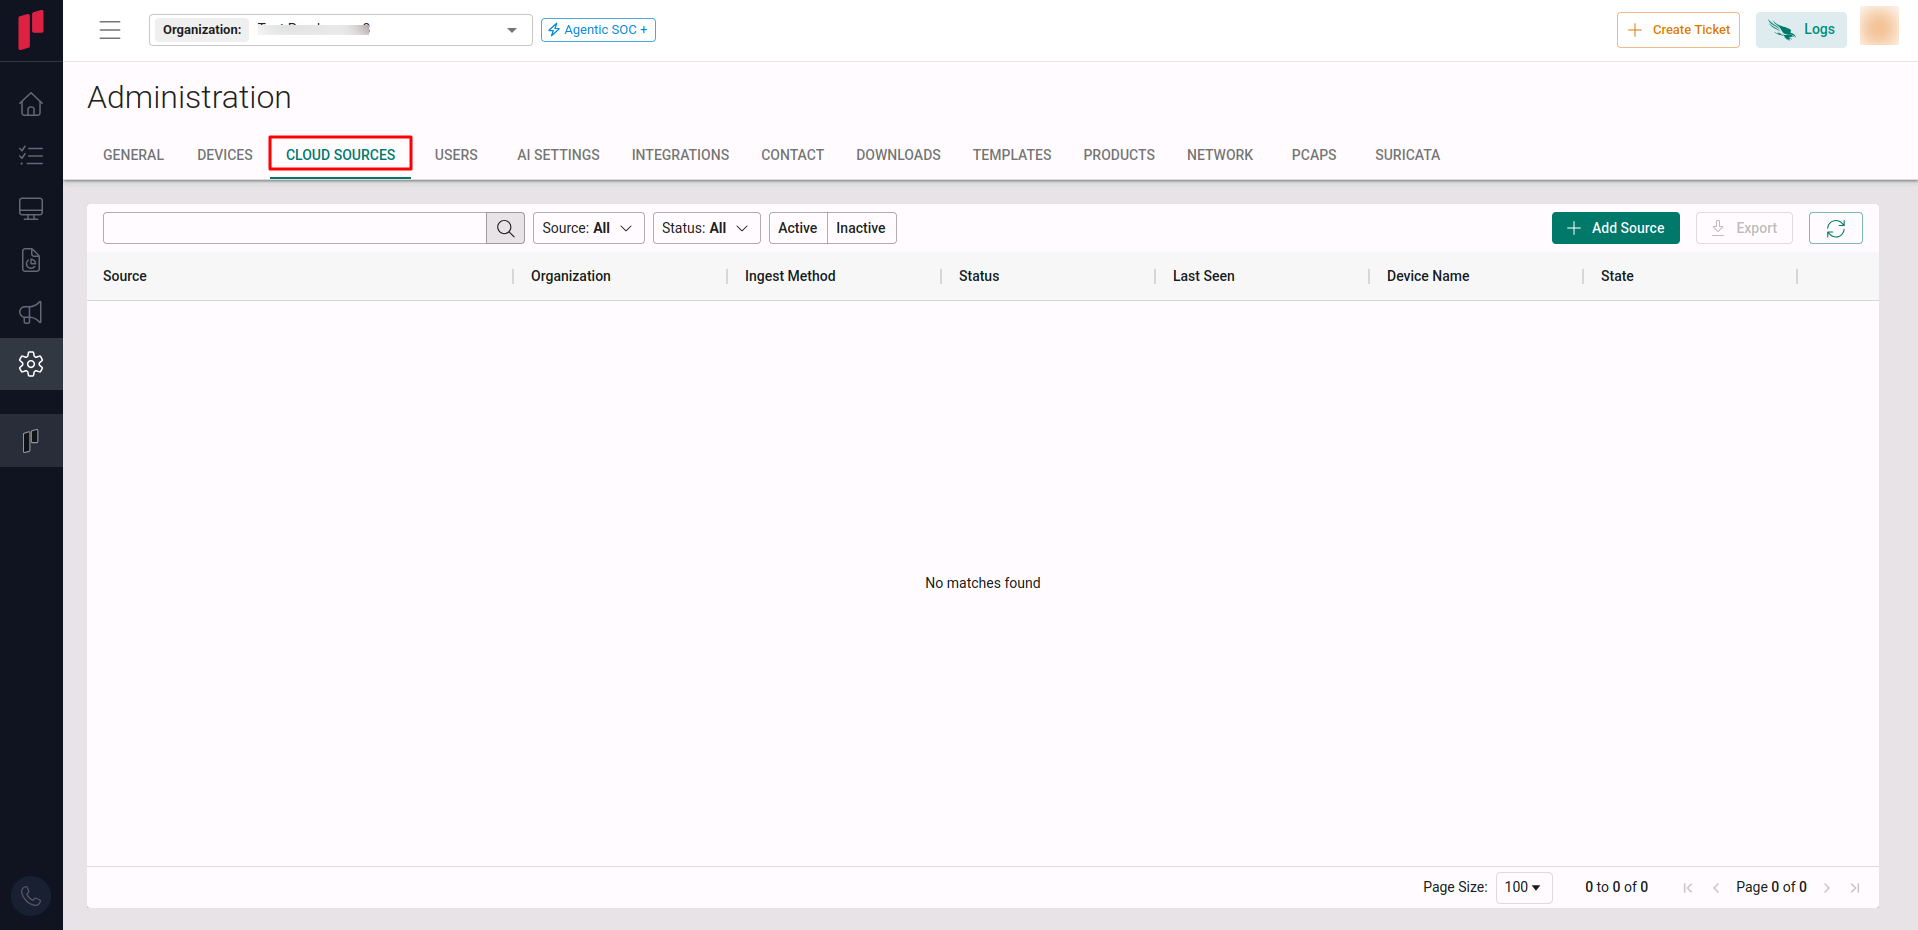
-
Click on the +Add Source button
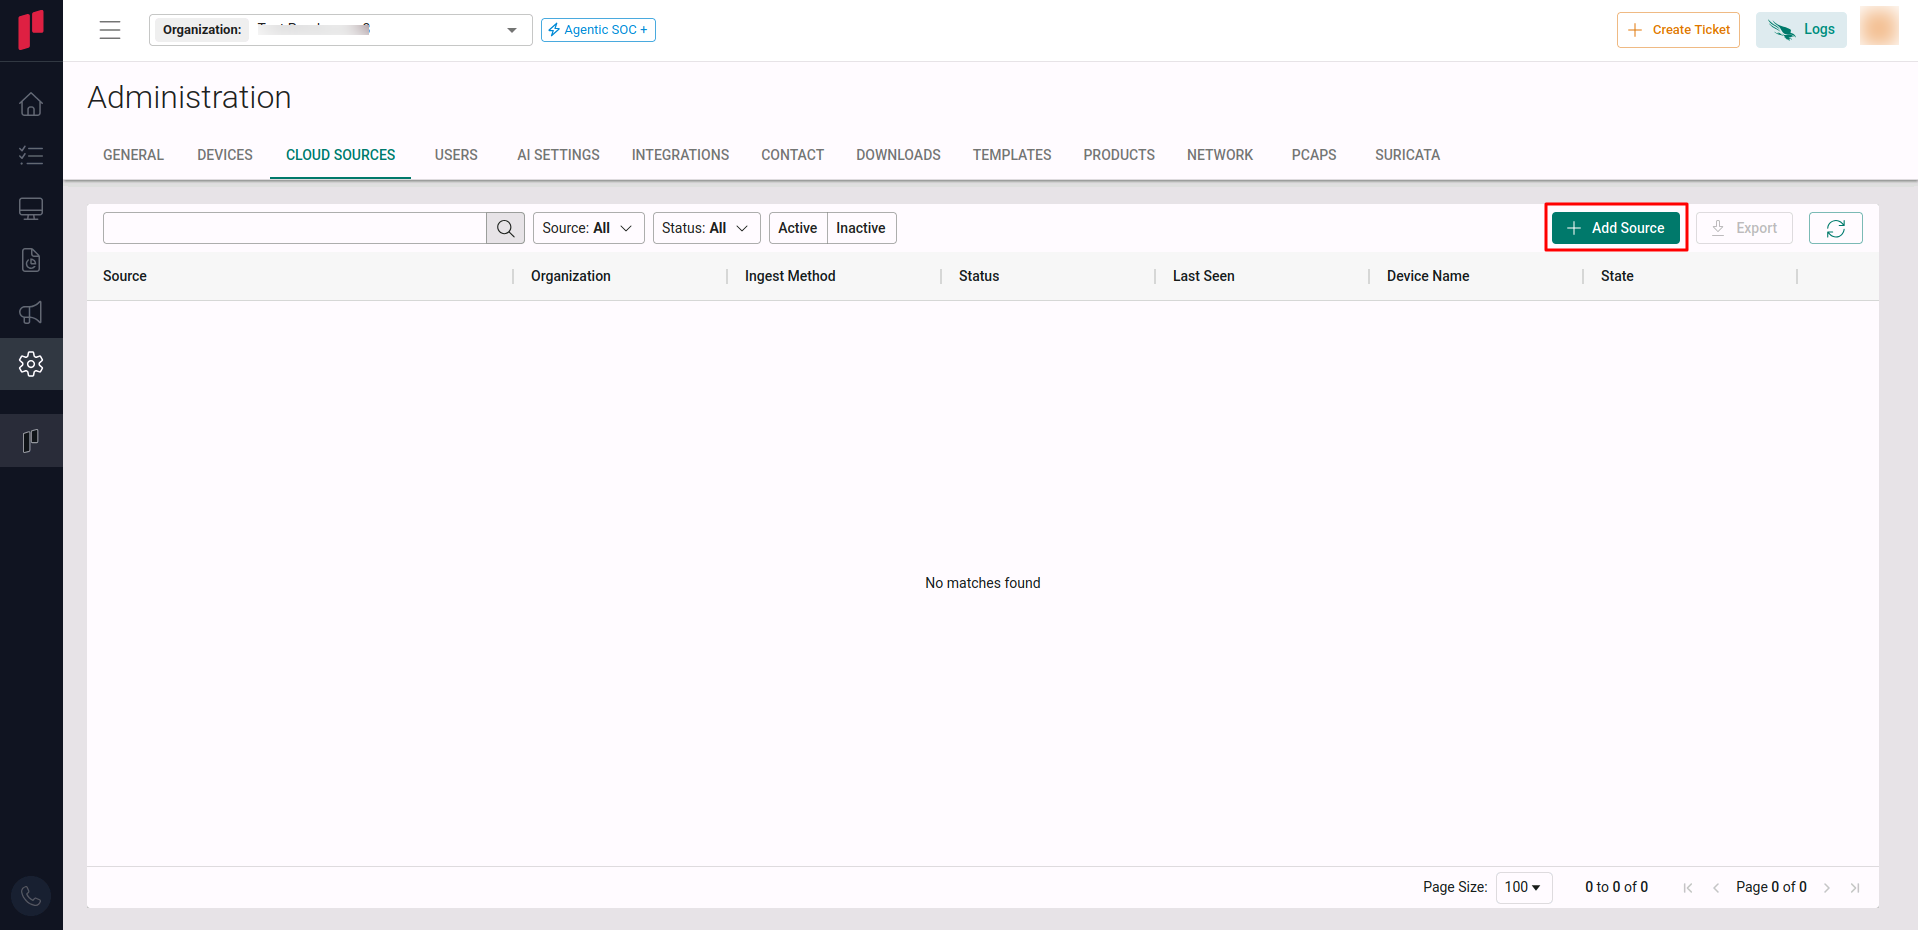
-
In the Add Source pop-up, provide the parameters below.
-
Source: Select the NetSuite source from the Source dropdown.
-
Site: The user defined name for the NetSuite cloud source.
-
Consumer Key: The Consumer Key generated in Step 1.
-
Consumer Secret: The Consumer Secret generated in Step 1.
-
Token: The Token ID generated in Step 4.
-
Token Secret: The Token Secret generated in Step 4.
-
URL: The URL generated in Step 4.
-
Realm: The Realm generated in Step 4.
-
Polling Interval: The polling interval for making periodic API calls to the NetSuite API. The user can select the time interval from the dropdown.
-
Contact Email: The email address of the person who registers the NetSuite cloud source in Scope.
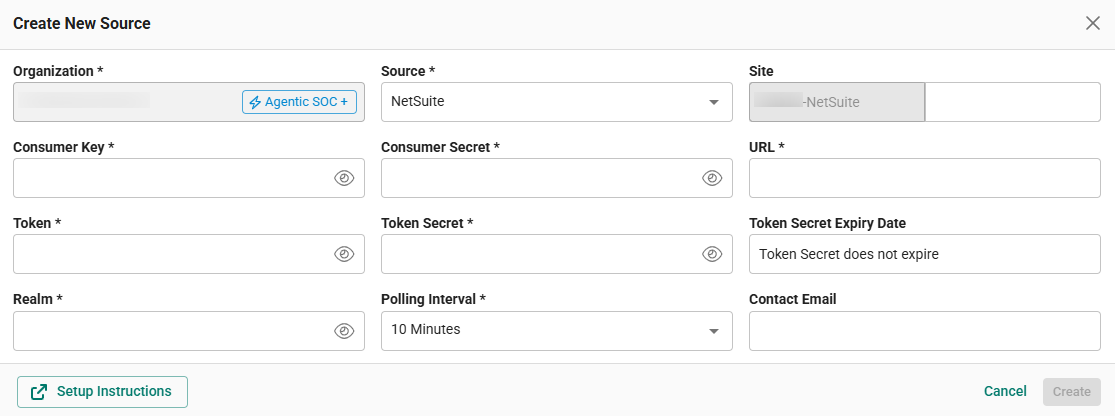
-
Once the required connection parameters are entered, the NetSuite cloud source registration is complete in Scope and is ready for ingestion of NetSuite logs.